


Setting up automation for beginners#
This guide shows you how to create an automation that sends an email to a customer when their WooCommerce order changes to the refunded status.
You will choose an event, configure an email action, and publish the automation. Once it is active, ShopMagic will run it whenever the selected event occurs and the automation’s conditions are met.
How to set up a ShopMagic automation in 8 steps#
-
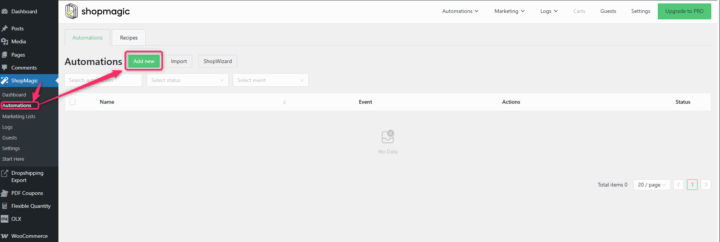
Go to ShopMagic → Automations in your WordPress dashboard and click Add New.
-
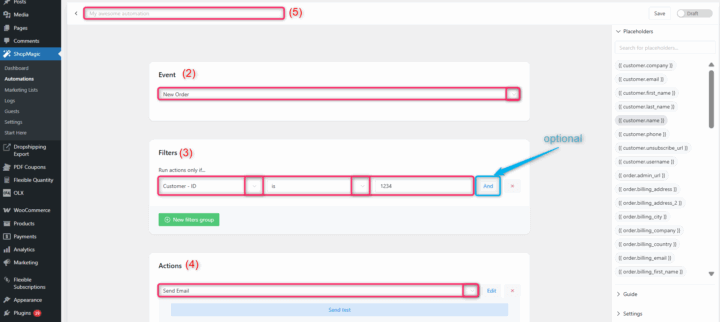
Enter a name for your automation, such as Order refund notification. The editor contains sections for the Event, optional Filter, and Action.
-
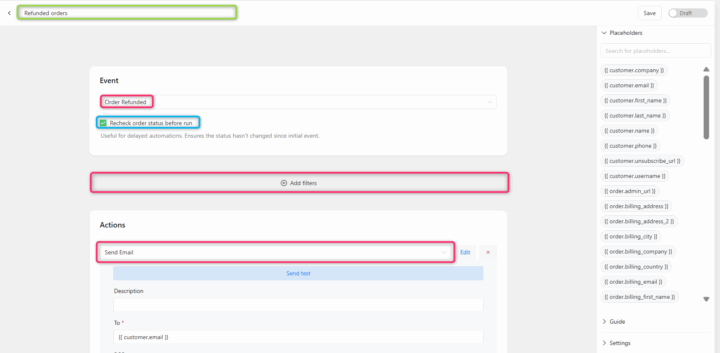
In the Event dropdown, select Order refunded. This event responds to an order changing to the refunded status.
Enable Rechecking order status before run if you want ShopMagic to check that the order still has the required status before executing the action.
-
Leave the Filter section empty for this example. The automation will apply to all orders that trigger the selected event, without restrictions to specific products or customers.
-
In the Action section, select Send email.
-
Configure the email recipient, subject, and message. To send the notification to the customer associated with the order, enter
{{ customer.email }}in the To field.For details about the available fields, see how to use automation settings.
-
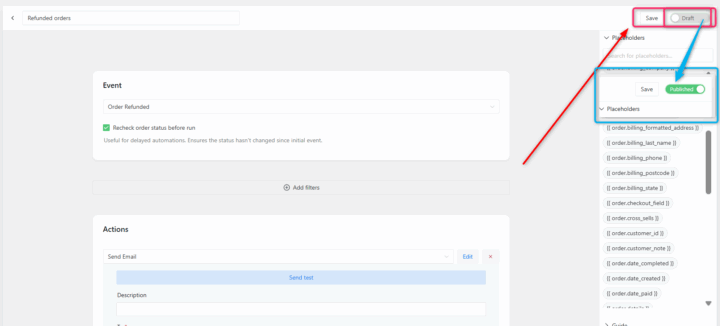
Click Publish in the top-right corner of the automation editor to activate the automation.
-
Your automation is now active. It will respond to future changes to the refunded order status. To check it, use a test order and change its status to Refunded after publishing the automation.
The action may be processed through the queue, so the email may not be sent immediately.


Check and manage your automation#
Return to ShopMagic → Automations to check the automation’s status and activity. From ShopMagic 4.9.0, the list includes the following controls and counters:
- Active — publish the automation or switch it back to a draft without opening the editor.
- Runs — check the number of completed action executions, including successes and failures. Click the number to open Outcomes filtered by this automation.
- Queued — check the number of pending tasks, including tasks scheduled for the future. Click the number to open Queue filtered by this automation.
Runs does not confirm email delivery. Open Outcomes to check whether the email action succeeded or failed. The small chart beside the counter shows completed executions over the last 14 days; the counter itself covers all retained completed Outcomes records.
Important: Switching off Active does not cancel tasks already in the queue. To stop those tasks, open Queue and cancel the relevant entries.
For more details, see How to add first automation. If the email does not arrive, follow the Why are emails not sending? troubleshooting guide.