


Why are emails not sending?#
If an email from your automation does not arrive, first check whether the automation was triggered, whether its action is waiting in the queue, and whether the email action succeeded or failed.
This guide takes you through those checks, followed by email delivery and scheduling troubleshooting.
Before you start: update ShopMagic#
Update ShopMagic and its installed add-ons to their latest versions. If you need help from support, include the version numbers in your request.
The Active switch and the Runs and Queued counters described below are available from ShopMagic 4.9.0.
Step 1. Check whether the automation is active#
- Go to ShopMagic → Automations.
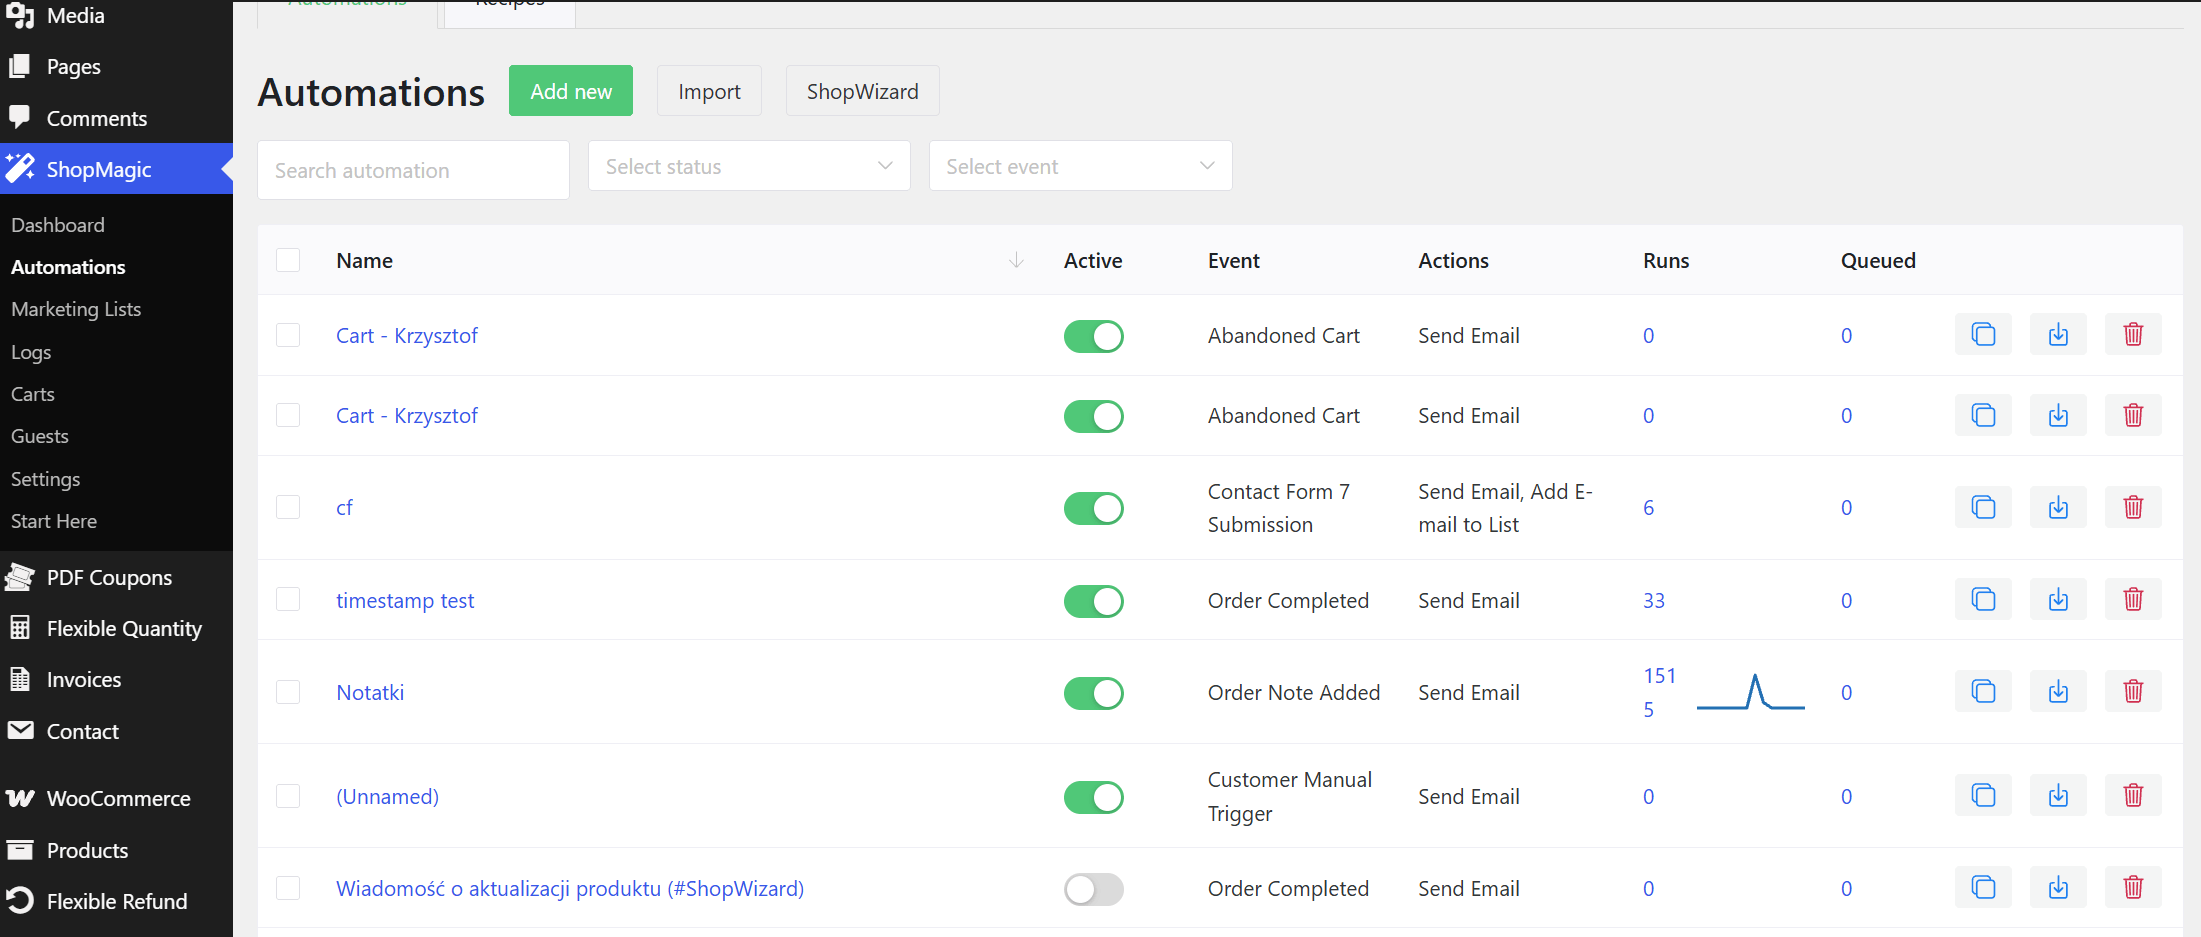
- Find the automation and check its Active switch.
- If the automation is a draft, open it, review its settings, and publish it when it is ready.
- Check that the selected event and filters match the situation you are testing.
Test the automation by triggering its event after publication. Publishing an automation does not automatically run it for all past events or existing orders.
For help with configuration, see Setting up automation for beginners.
Step 2. Check Runs and Outcomes#
The Runs counter shows completed action executions recorded for the automation, including both successful and failed executions. Click the number to open Outcomes filtered by that automation.
Runs is not a count of delivered emails. An automation can contain multiple actions, and some actions do not send emails. The counter covers all retained completed Outcomes records. The small chart beside it covers only the last 14 days, including today.
You can also open ShopMagic → Logs → Outcomes and select the relevant automation.

If the email action shows Failure#
Open the logs for the failed action and read the error message. Use it to identify which setting or service needs attention.

If the message does not explain how to resolve the issue, copy it or take a screenshot and include it in your support request.
If the email action shows Success#
Success does not guarantee that the email reached the recipient’s inbox. It means the email action completed without reporting an error. The receiving mail server may still reject the message, filter it, or place it in spam.
If the action succeeded but the message did not arrive, continue with the delivery checks in steps 4 and 5.
If there is no completed result for your test#
Check the queue in step 3. If there is no matching queued task either, review the automation’s event, filters, and recipient settings, then trigger a new test event.
A dash (—) in the Runs or Queued column means that statistics are currently unavailable. It does not mean that the count is zero. Open Outcomes or Queue directly to investigate.
Step 3. Check Queued and pending tasks#
On the automations list, click the Queued number to open the queue filtered by that automation. You can also go to ShopMagic → Logs → Queue.
Queued shows pending tasks, including tasks scheduled for a future date. A number greater than zero does not necessarily indicate a problem.
- Find the task associated with your test.
- Check its scheduled execution time.
- If the task is scheduled for the future, wait until that time.
- If the scheduled time has passed and the task remains pending, continue with the scheduling checks in step 6.
Cancel tasks you no longer want to run#
Use Cancel next to an individual task. To cancel several tasks, select the relevant rows, choose Delete from the bulk actions menu, and click Execute.
Important: Switching off Active does not cancel tasks that are already queued. If you need to stop an automation and its pending work, switch it off and cancel the relevant queued tasks separately.
Cancel only tasks you no longer want to execute. Canceling pending work does not resolve the underlying cause of a scheduling problem.
Step 4. Check email delivery#
Check the recipient and spam folder#
- Verify the recipient address configured in the email action.
- If you use a placeholder such as
{{ customer.email }}, check the customer email associated with your test. - Check the recipient’s spam, junk, and other filtered folders.
- Try a test recipient at another email provider to see whether the issue affects one mailbox or several.
Compare with WooCommerce notifications#
Check whether standard WooCommerce emails arrive. You can review which notifications are enabled under WooCommerce → Settings → Emails, then trigger an appropriate notification using a test order.
- If neither WooCommerce nor ShopMagic emails arrive, investigate the site’s email delivery configuration and contact your hosting or email provider.
- If WooCommerce emails arrive but ShopMagic emails do not, continue checking the ShopMagic action settings, Outcomes, queue, and email provider logs.
Check the sender and message#
Use a sender address that your email provider authorizes you to send from. Ask the provider to confirm the required domain authentication settings, including SPF, DKIM, and DMARC.
You can also send a test message to Mail Tester and review its findings. A test score can help identify issues, but it does not guarantee delivery to every recipient.
Step 5. Check SMTP or your email delivery service#
If an email action succeeds but messages do not arrive, check the service that sends mail from your WordPress site.
- Verify the connection settings and authentication in your SMTP or email delivery plugin.
- Check provider logs for rejected messages, sending limits, bounces, or blocked recipients.
- Confirm that the configured sender address is permitted by the provider.
- Send a test email and compare its result with an email triggered by the automation.
If your site does not have an authenticated email delivery service configured, ask your hosting or email provider how to set one up for WordPress.
SMTP configuration and task scheduling are separate checks. Changing the email delivery service will not resolve an automation that remains waiting in the queue.
Step 6. Check Action Scheduler and WP-Cron#
If tasks remain pending after their scheduled time, investigate background processing. Low traffic, failed scheduled actions, or a backlog of tasks can delay execution.
Check scheduled actions#
- Go to WooCommerce → Status → Scheduled Actions. If WooCommerce is not available, look under Tools → Scheduled Actions.
- Search for the ShopMagic execution hook:
shopmagic/core/queue/execute. - Review pending actions whose scheduled time has passed.
- Check failed actions separately and open their logs for error details.
A growing number of overdue tasks may indicate that scheduled processing is not running or cannot keep up. Share the action logs with your hosting provider or support team before attempting to rerun failed tasks.
Consider a server-level cron job#
By default, WP-Cron relies on requests to your website to trigger scheduled processing. On a low-traffic site, this can delay tasks.
Ask your hosting provider to configure a server-level cron job that runs WordPress scheduled tasks at an interval appropriate for your store. Configure and verify the replacement job before disabling the default page-load trigger.
Once the server job is working, the default trigger can be disabled by adding the following line to wp-config.php:
define( 'DISABLE_WP_CRON', true );Do not disable the default trigger without a working replacement. Doing so can leave WordPress scheduled tasks unprocessed.
For setup details, see the official WordPress guide to connecting WP-Cron to a system task scheduler.
What to include in a support request#
If the issue continues, contact support and include:
- Your ShopMagic, add-on, WordPress, and WooCommerce versions, where applicable.
- The automation name or ID, selected event, and relevant filters.
- The time of your test and the timezone configured in WordPress.
- The relevant Outcomes result and error message.
- Whether the task appears in Queue and its scheduled time.
- Whether a test email and standard WooCommerce notifications arrive.
- Any relevant errors from Scheduled Actions or your email provider.
A successful test email helps check email sending, but it does not confirm that the automation’s event, filters, or scheduled processing work correctly. Include the results of both the test email and a test of the actual automation.
More about email delivery#
For additional troubleshooting, see why WooCommerce emails are not sending.