


Enhance your WooCommerce follow up email after purchase with some extra social media links. In this article, we will create a WooCommerce social media email which – besides the standard communication – will have links to your social media pages. As a bonus, I’ll give you a template that you can copy and paste into your message field. Let’s get started!
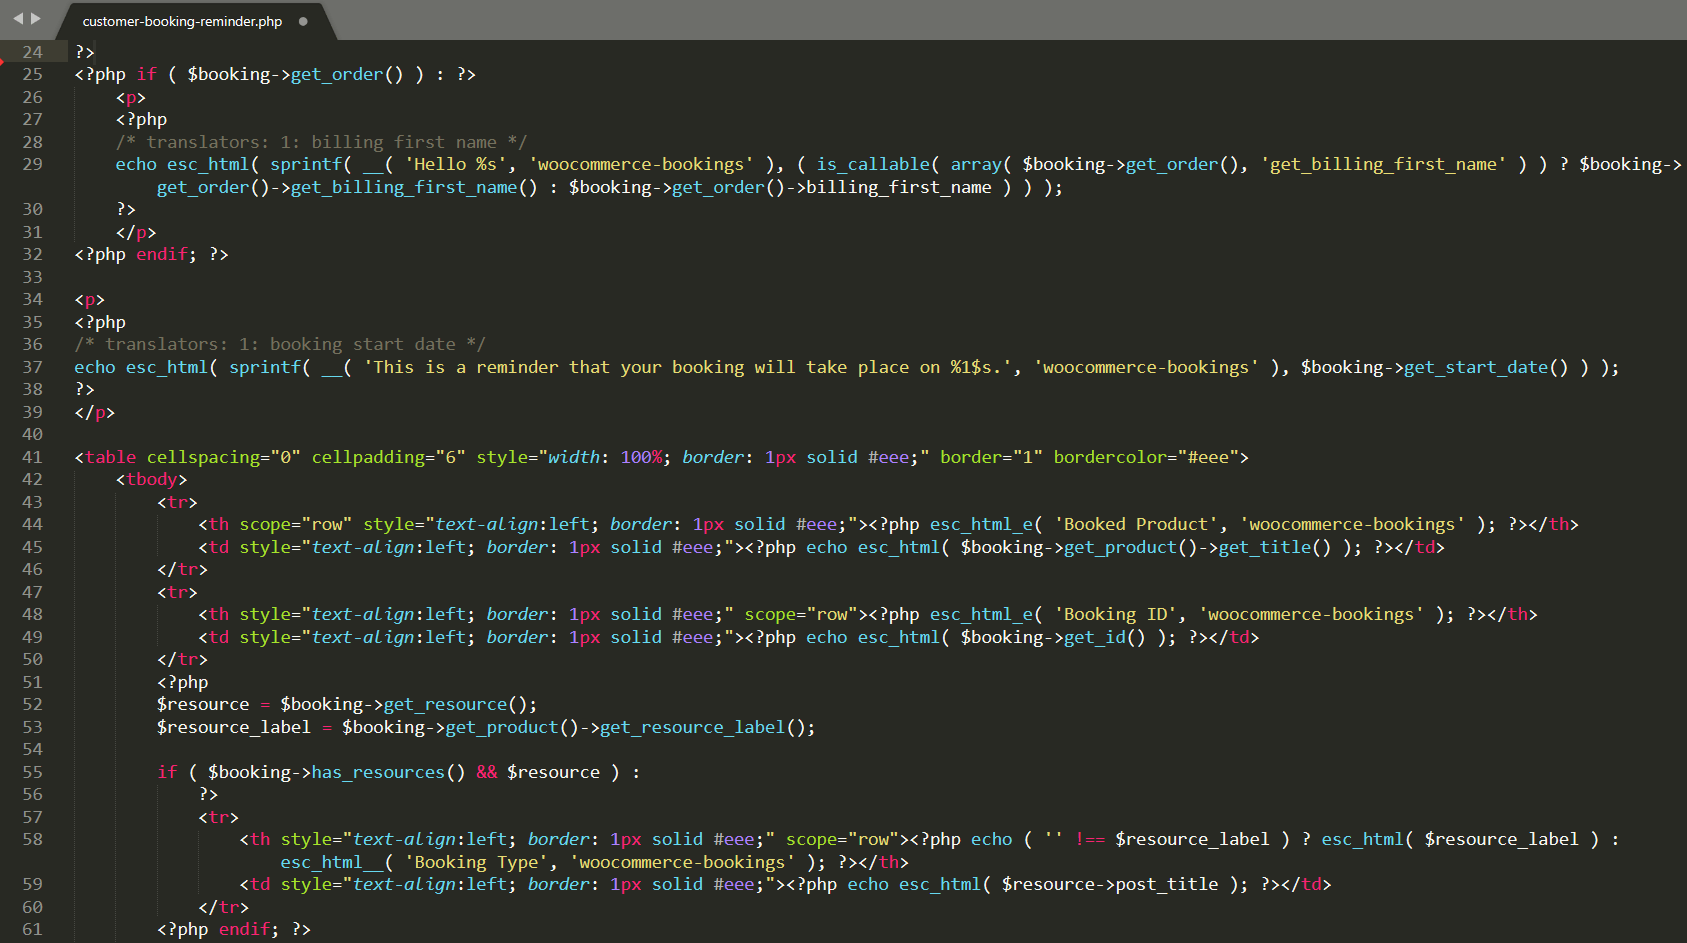
You may edit the default PHP template of a WooCommerce email but you’re bound to standard order statuses 😡.
Today, I will show you a free plugin to create new follow up emails in WooCommerce for any status with plenty of customization, filters, customer segmentation, and more!
Table of contents
- How to edit default WooCommerce emails?
- What is ShopMagic and how can it help you with WooCommerce social media emails?
- Create a custom WooCommerce email with social links in 5 steps!
- Customize emails for all order statuses
- Summary & more about ShopMagic
How to edit default WooCommerce emails?
➡️ You may use the standard WooCommerce email editor by going to WooCommerce → Settings → Emails.
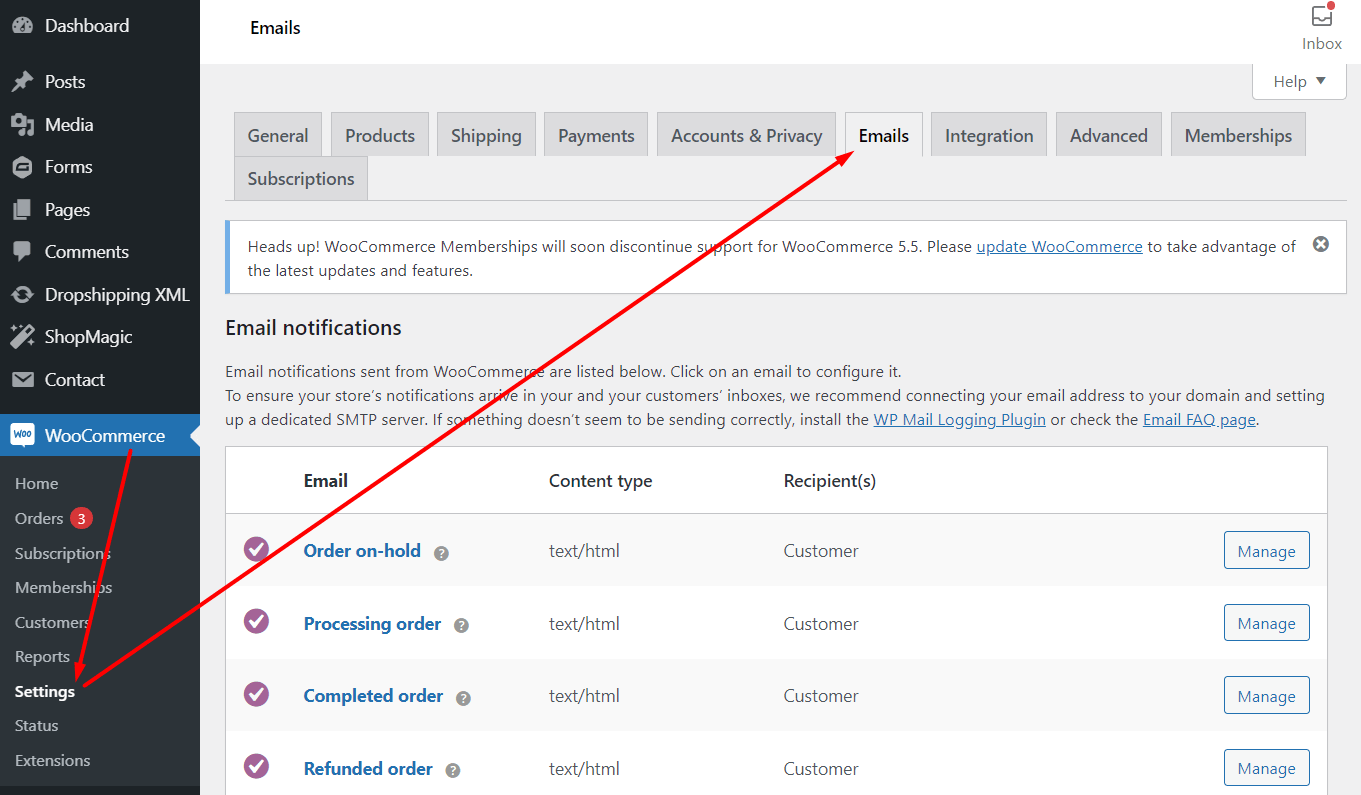
Here you can edit default WooCommerce email templates for order statuses and emails added by plugins. After choosing one email, you may copy the template to further customize it using PHP, HTML, and CSS.
⚠️ You need to remember to copy/ paste your custom email templates when you update or change the WordPress theme.
It looks a bit complicated, doesn’t it?😵💫 😵 🥴
What is ShopMagic and how can it help you with WooCommerce social media emails?
ShopMagic🪄 is a marketing automation plugin, which not only automates some of the repetitive (but yet important!) tasks but also improves communication between your store and customer.
ShopMagic
ShopMagic will let you send WooCommerce follow up purchase order email and many more. We've got a lot of them ready to be customized and sent!
Download for free or Go to WordPress.org✅ Thanks to ShopMagic, you have full control over how you communicate with customers. You will decide, what emails will you send and how these emails will look. So you can easily create a new WooCommerce follow up email after purchase with some extra social media links without tweaking and editing the PHP files!
Let’s see one opinion about the plugin.

Are there more customization options?
Yes🙂.
➡️ If you want, you can delay an email or manually trigger an email with a special offer.
➡️ What’s even better, with the Advanced Filters add-on, you will decide to which customers ShopMagic should send emails. Choose from filters like date created, item categories, shipping method, order status, and many more.
➡️ You can try the Advanced Filters add-on and all other PRO add-ons in our demo account, which is available for 7 days. Do not forget to let us know what you think about it!
How to create a custom WooCommerce sociam media email?
I bet that besides the WooCommerce store, you have at least Facebook or Instagram account 😉. If you have any social media, why not show them off ? In ShopMagic it is not only doable but also very easy. In this guide, we will create a template for such a WooCommerce social media email.
Step 1: Install and activate ShopMagic
If you are a regular guest on our blog – which is highly appreciated 💗 – most likely you know how to install and activate ShopMagic. Similarly, you will know how to create an action. If that’s your case, there’s a chance that you are here only for a copy-and-paste template.
👉🏽👉🏽👉🏽Simply click this link to move to the WooCommerce social media email template.
Step 2: Create a follow up WooCommerce email after the purchase
The above heading is not 100% right. In a more precise version, it should be “How to write a free WooCommerce social media email”. It is because all the magic done in this guide is available in ShopMagic for free 🙂.
Step 3: Add new WooCommerce social media email automation
Find ShopMagic in your Dashboard. Clicking on Add new will open a new window in which we will be creating our new automation.
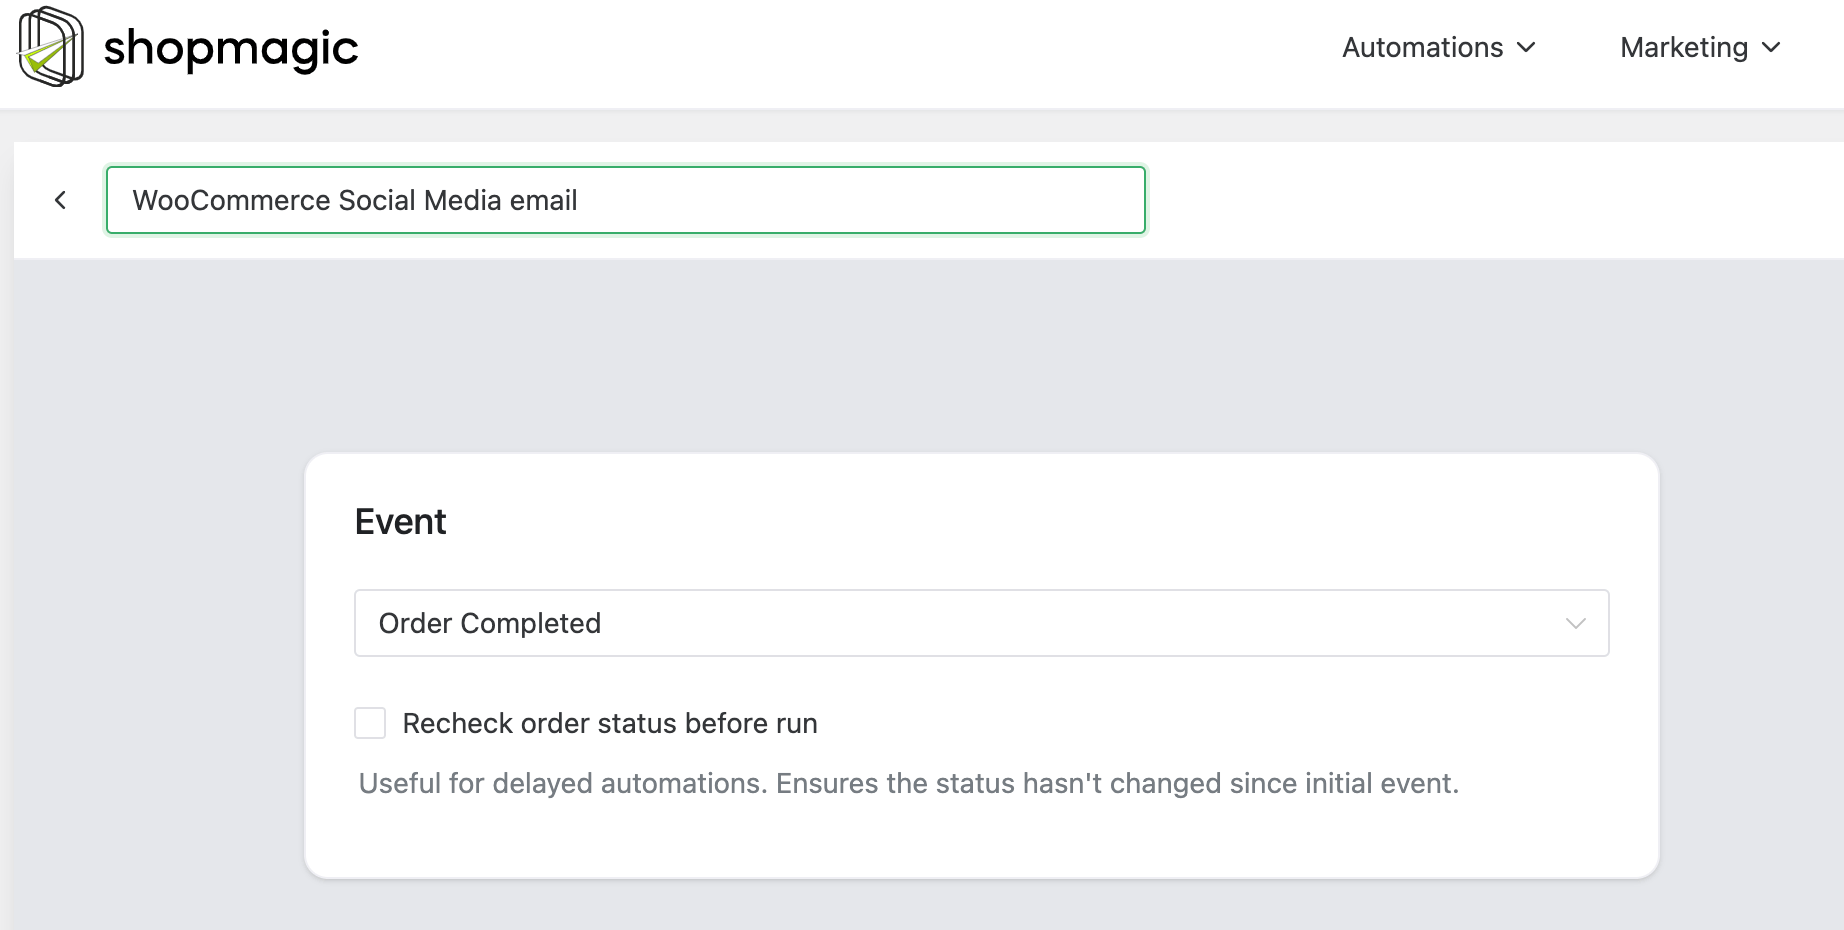
Here you can add a title and select an Event type. For an event choose Order Completed. The title is entirely your choice. I like to keep it simple – “WooCommerce social media email”.
Step 4: Assign a Filter
Assigning a filter is an optional step but I want to show you how it works. In our example, we will use the Order – Items filter and select a product (or products) for which the automation should trigger.
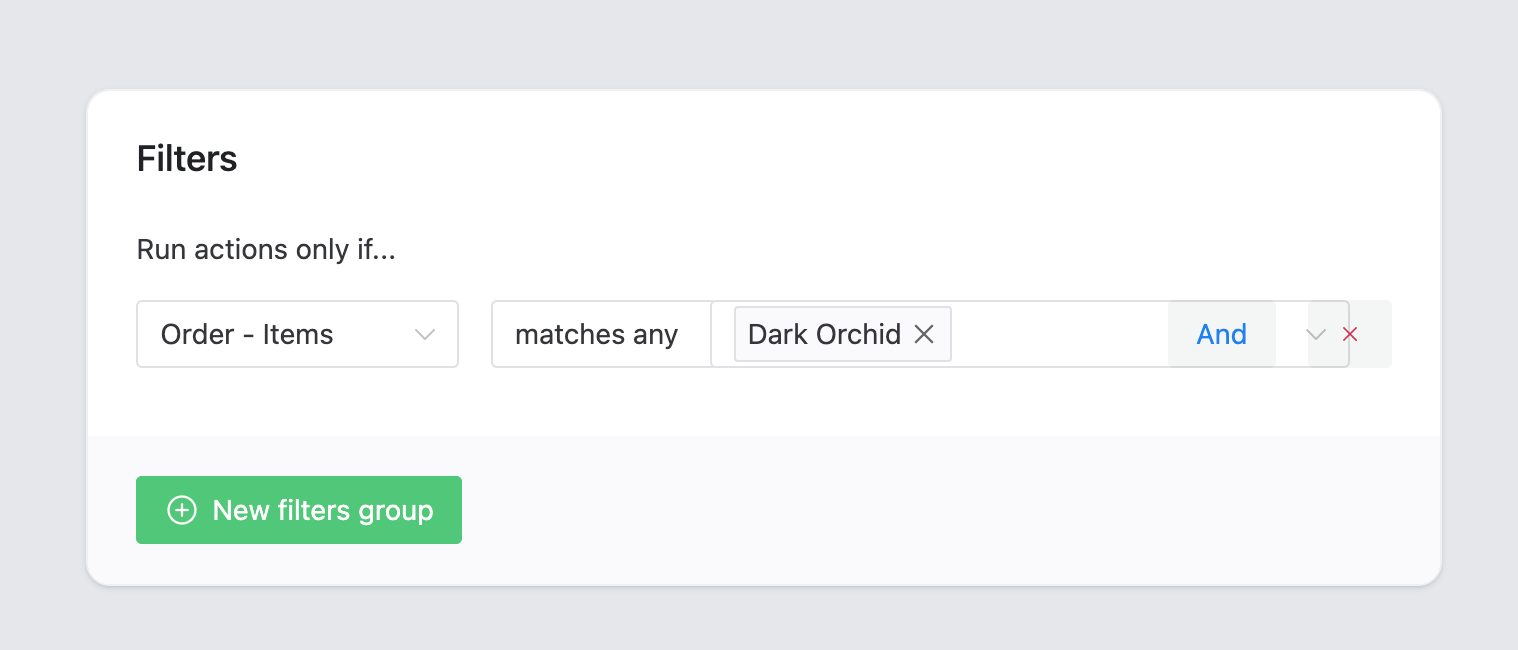
Why assign a filter🤔? Sometimes you want to send different messages to customers who bought different products. This is one of the few advantages which ShopMagic has over standard WooCommerce emails.
Step 5: Create an action for WooCommerce social media email
Most likely you had a chance to get acquainted with the process of action creation if you are frequently visiting our blog. Yet, there’s a possibility that you are here for the first time. If that’s your case – no worries. We’ve got you covered 🙂.
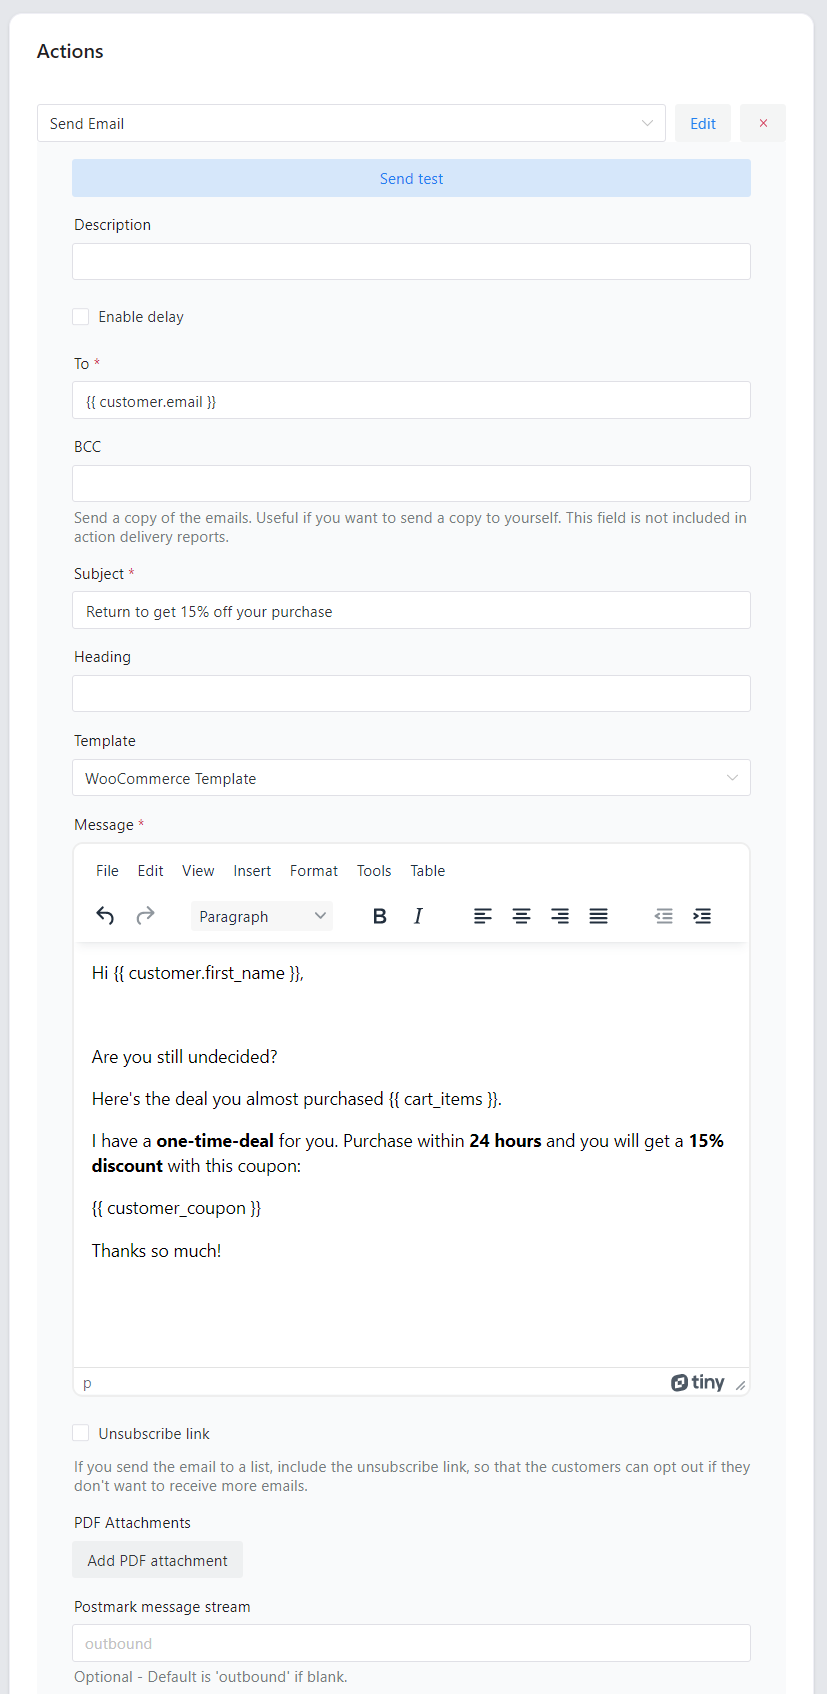
➡️ First, take a look at the screenshot with a ready-to-send action:
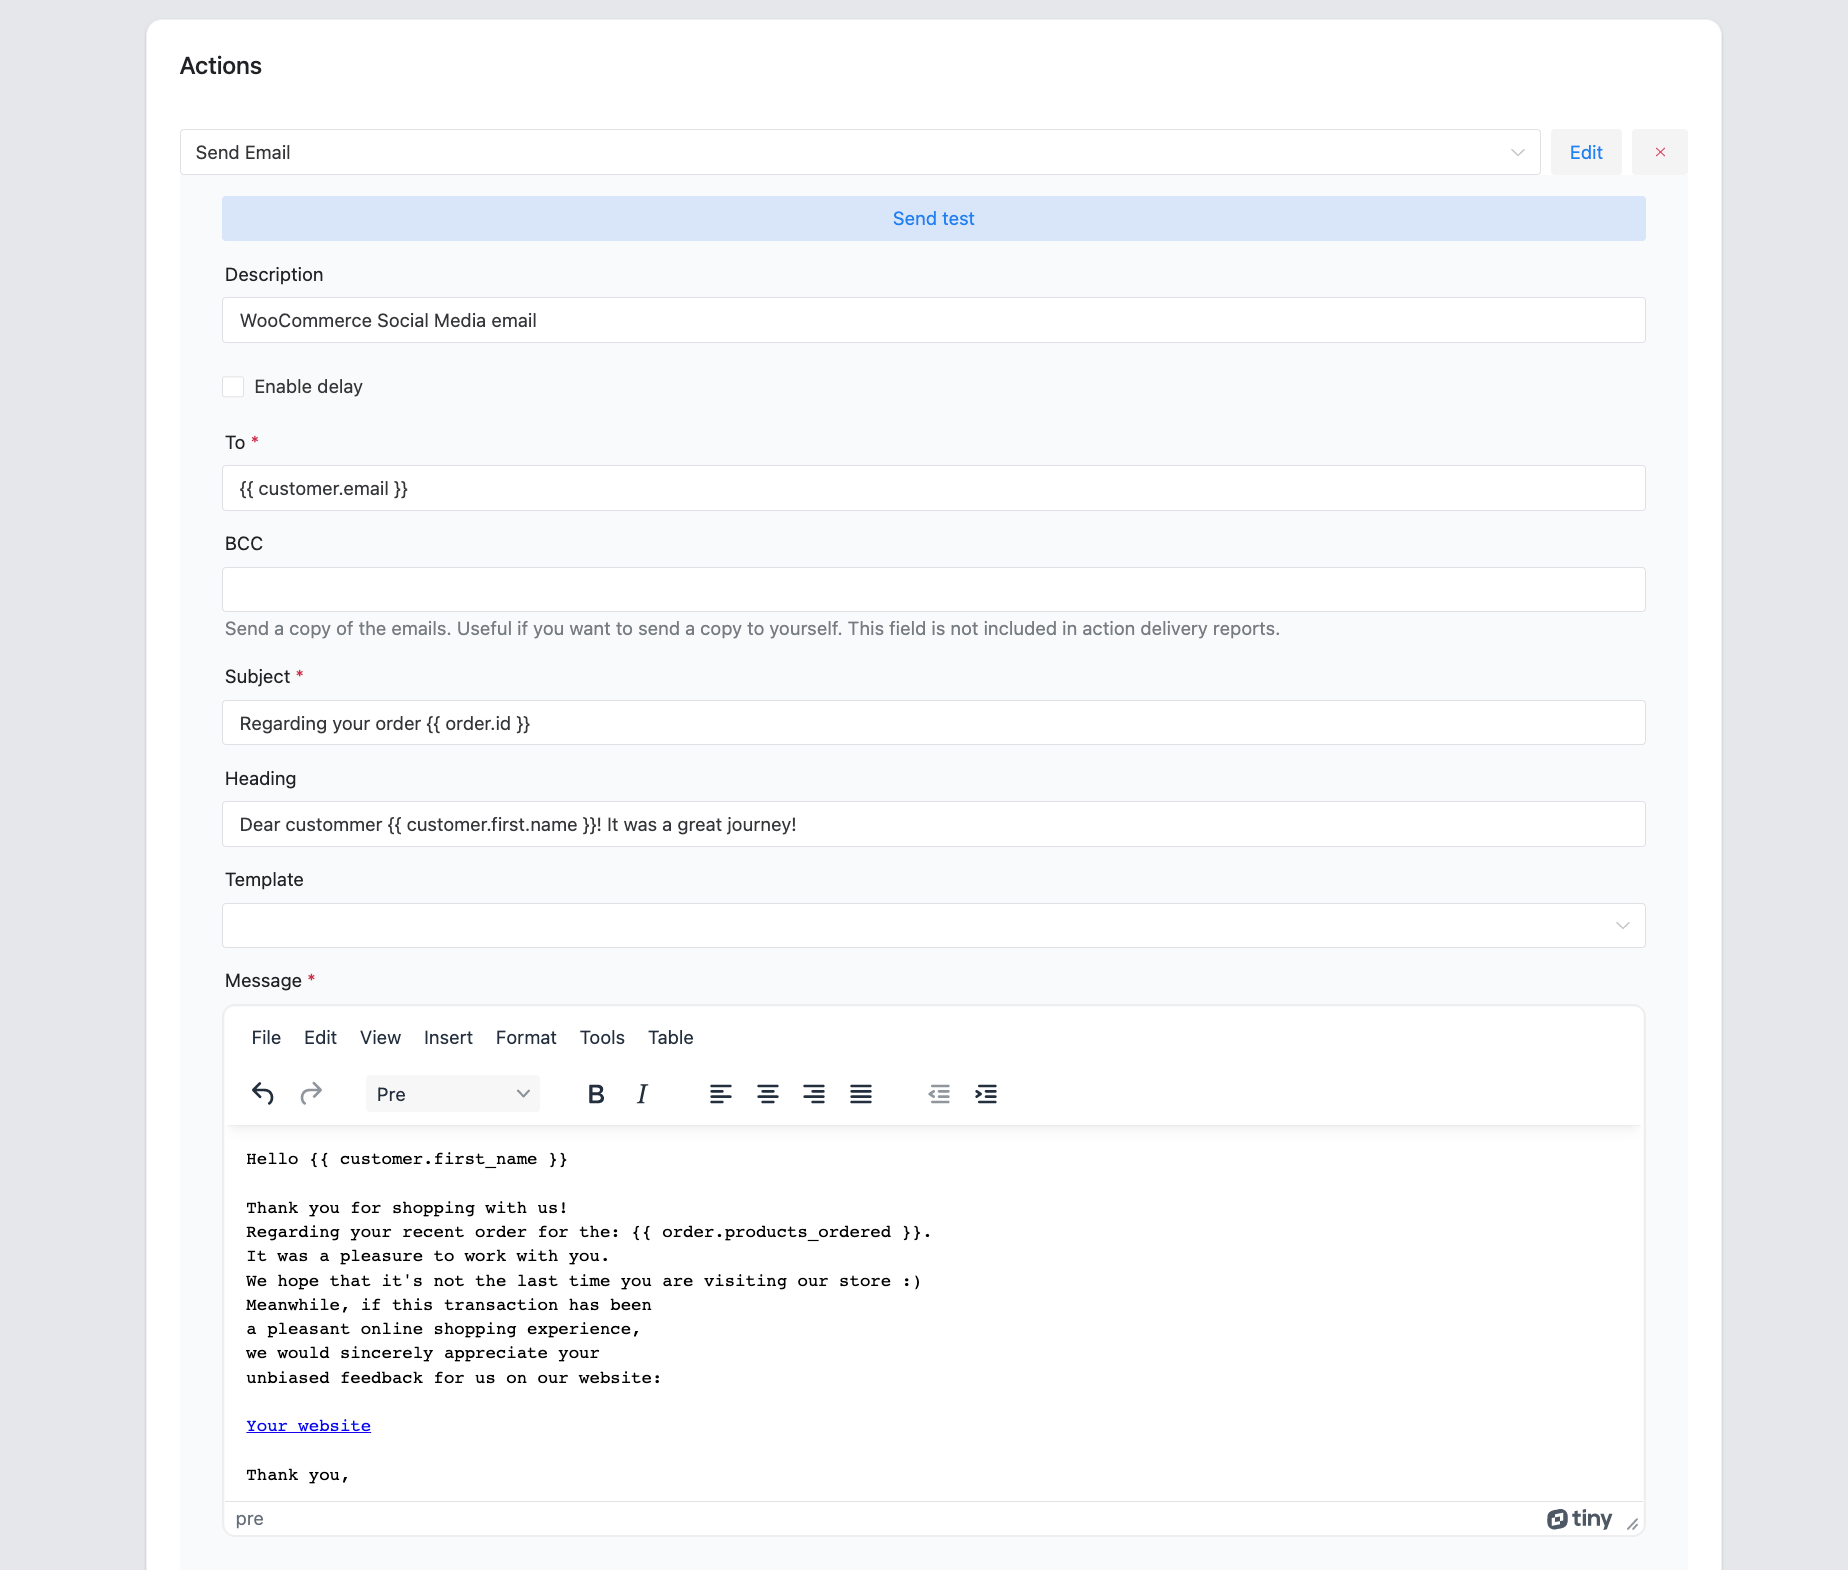
- Starting from the top, you are selecting a type of action. I decided to choose the Send email option. Then there’s a description. Not mandatory but generally it’s a good idea to write one. In my case, it’s “WooCommerce social media email”.
- We are omitting the Delay feature because its guide is directed to free users and this feature is not available for free.
- The next one is the To field, which is prefilled with a placeholder. We are leaving it as it is.
- Subject and Heading are the next two fields. They are self-explanatory. Remember that you can use placeholders in both these fields.
- The penultimate field of our WooCommerce social media email is for a message. The message field supports placeholders and more importantly, here you can paste links to your social media.
- In every automation, you can also use a small checkbox for the unsubscribing link. You can leave it unmarked.
Ready, set, go!
Our automation is ready to be triggered🎉. You can place a test order or even better – test the whole automation internally. Simply click on Send test feature available in the top right corner of every action.
If I remember correctly I promised you a copy/paste message template. Here it is:
Hello {{ customer.first_name }}

Thank you for shopping with us!
Regarding your recent order for the: {{ order.products_ordered }}.
It was a pleasure to work with you.
We hope that it's not the last time you are visiting our store :)
Meanwhile, if this transaction has been
a pleasant online shopping experience,
we would sincerely appreciate your
unbiased feedback for us on our website:

Your website

Thank you,

Your favorite store

Facebook | Instagram
Customize emails for all order statuses
Yes, we have a lot of them! Covering all the WooCommerce order statuses. What’s amazing about ShopMagic, is that you can use any of the given guides and mix it with the WooCommerce social media email guide.
Here’s the complete list:
Summary & more about ShopMagic
Today, you’ve learned how to create the WooCommerce follow up email after purchase with social links. Also, how to use a free plugin to customize emails in WordPress and WooCommerce. Download the free plugin & start today!
ShopMagic
ShopMagic will let you send WooCommerce follow up purchase order email and many more. We've got a lot of them ready to be customized and sent!
Download for free or Go to WordPress.orgAre you ready to send WooCommerce social media email?
I hope that with this guide, writing such an email will be just a piece of cake. If you encounter any issues while creating your automation – write to us. Leave a message on a WordPress forum or send us a direct email.
Related to WooCommerce social media email plugin
-
WooCommerce follow up emails

Free alternative to WooCommerce follow up emails. ShopMagic is your free alternative to send WooCommerce follow up emails. Read more about it. -
WooCommerce automated emails

How to use WooCommerce automated emails. In this article we give you tips on how to use ShopMagic to send WooCommerce automated emails.