


One of the most annoying things about WooCommerce is that you cannot easily customize the WooCommerce completed order email template. By default, it is only possible by modifying the PHP template, which is not at all easy for non-technical folks. In this tutorial, I will show you how to customize the contents of the WooCommerce completed order email.
Is your WooCommerce order complete email not sending? Or would you like to customize the WooCommerce email template without editing the PHP files?
Today, you’ll learn how to customize the WooCommerce completed order email with 4 steps. What’s more, I will show you the free plugin to create new emails in WooCommerce EASILY! Let’s begin!
ShopMagic
ShopMagic lets you customize WooCommerce completed order email. But that's not all! Give it a try. It's free!
Download for free or Go to WordPress.orgTable of contents
- Editing email templates in WooCommerce
- Customize WooCommerce completed order email with ShopMagic
- Customize WooCommerce completed order email in 4 steps
- Summary & more about ShopMagic
Editing email templates in WooCommerce
By default, if you want to customize WooCommerce emails you need to copy the PHP email template for a specific action or order status. To do that, go to WooCommerce → Settings → Emails.
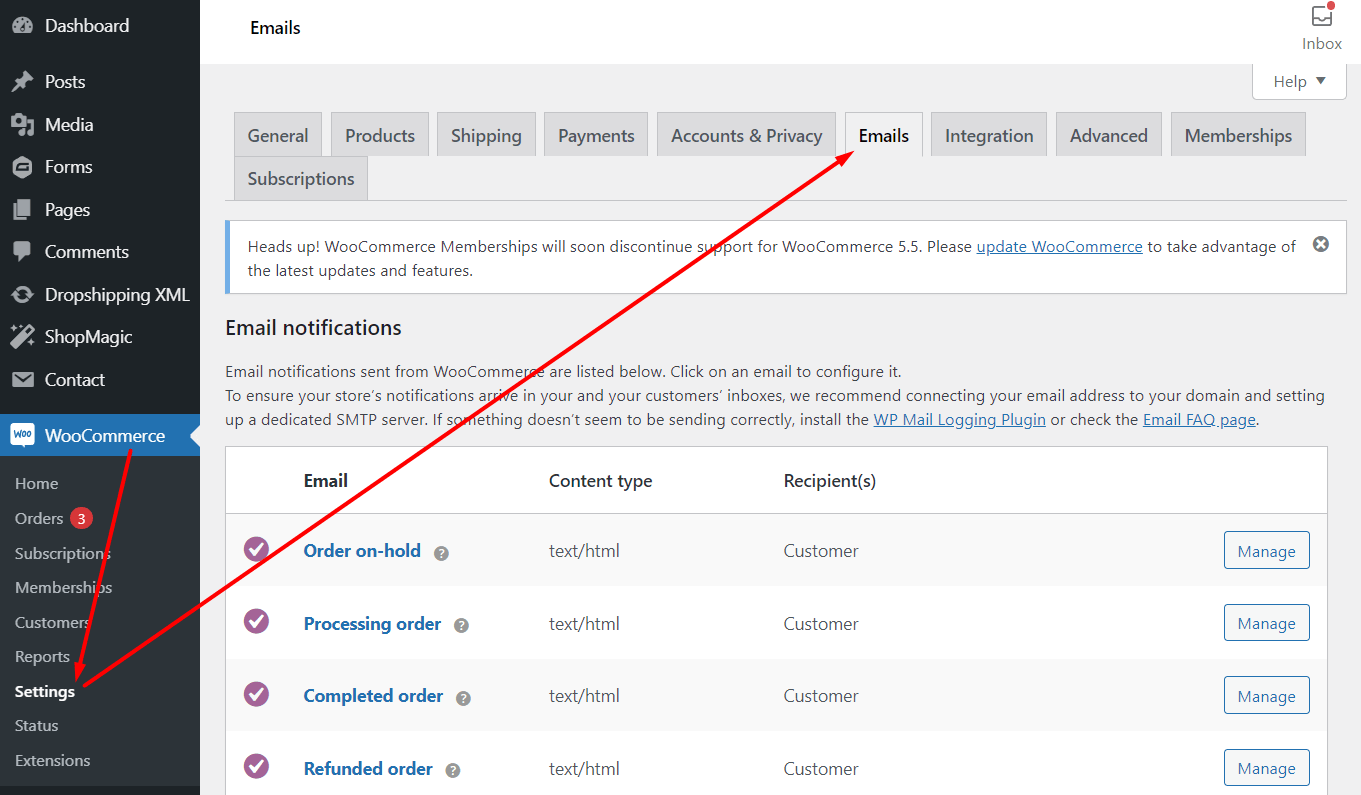
Then, open the email template you need to change, and copy the email template to your theme’s folder.
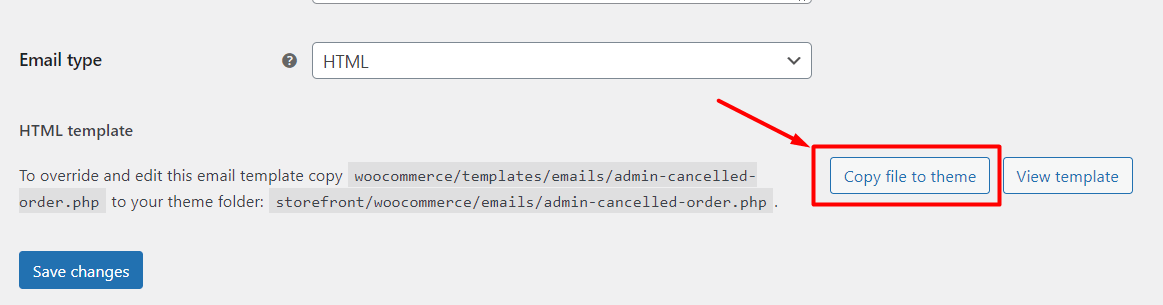
You can use the on-screen editor.
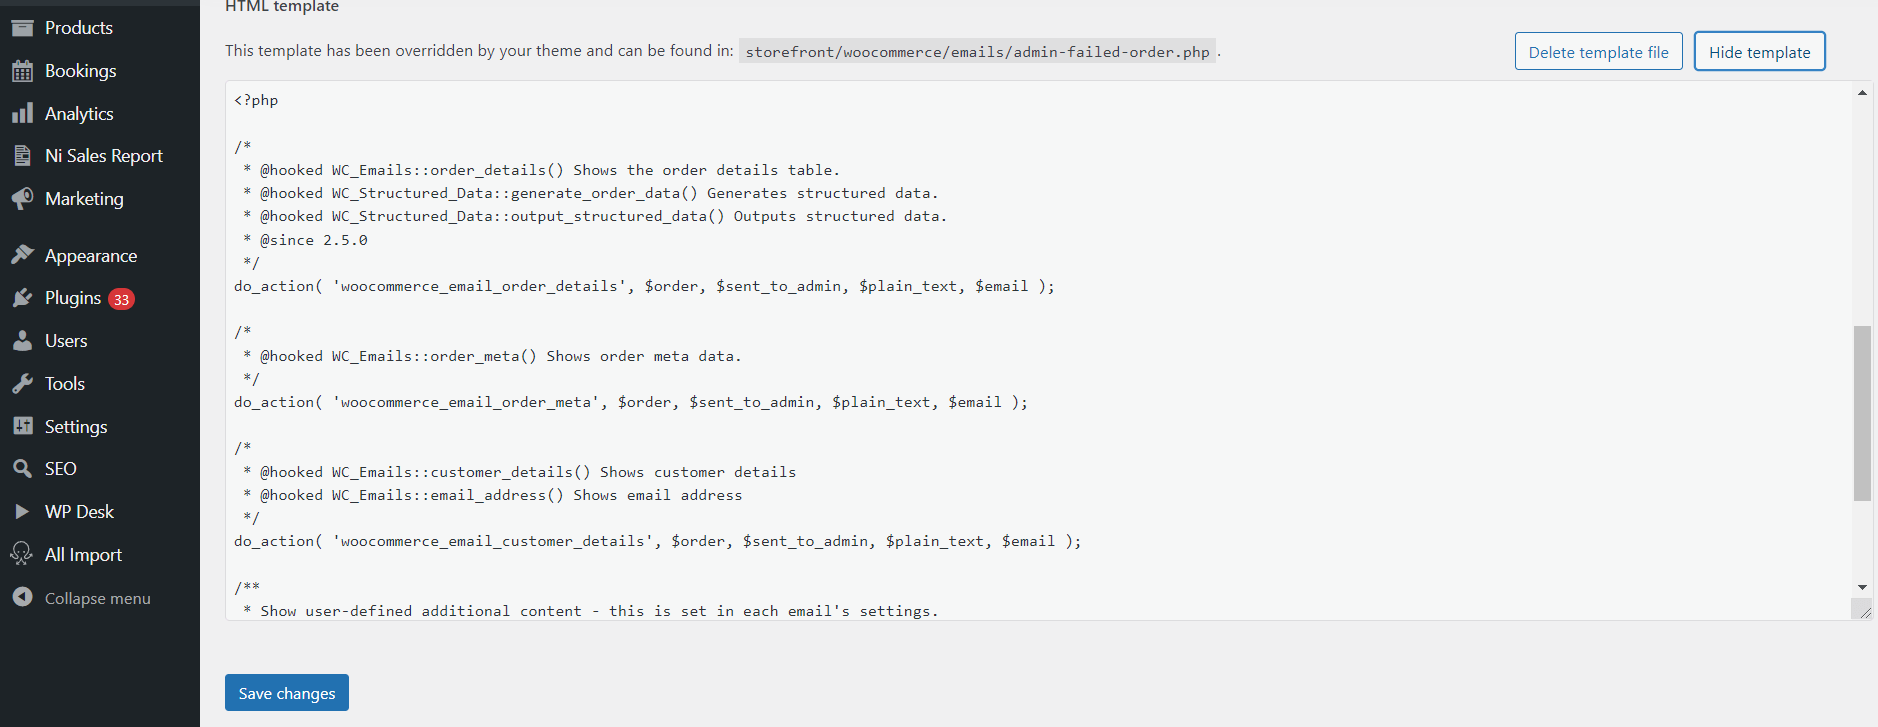
Also, you may use an external program to edit the PHP file.
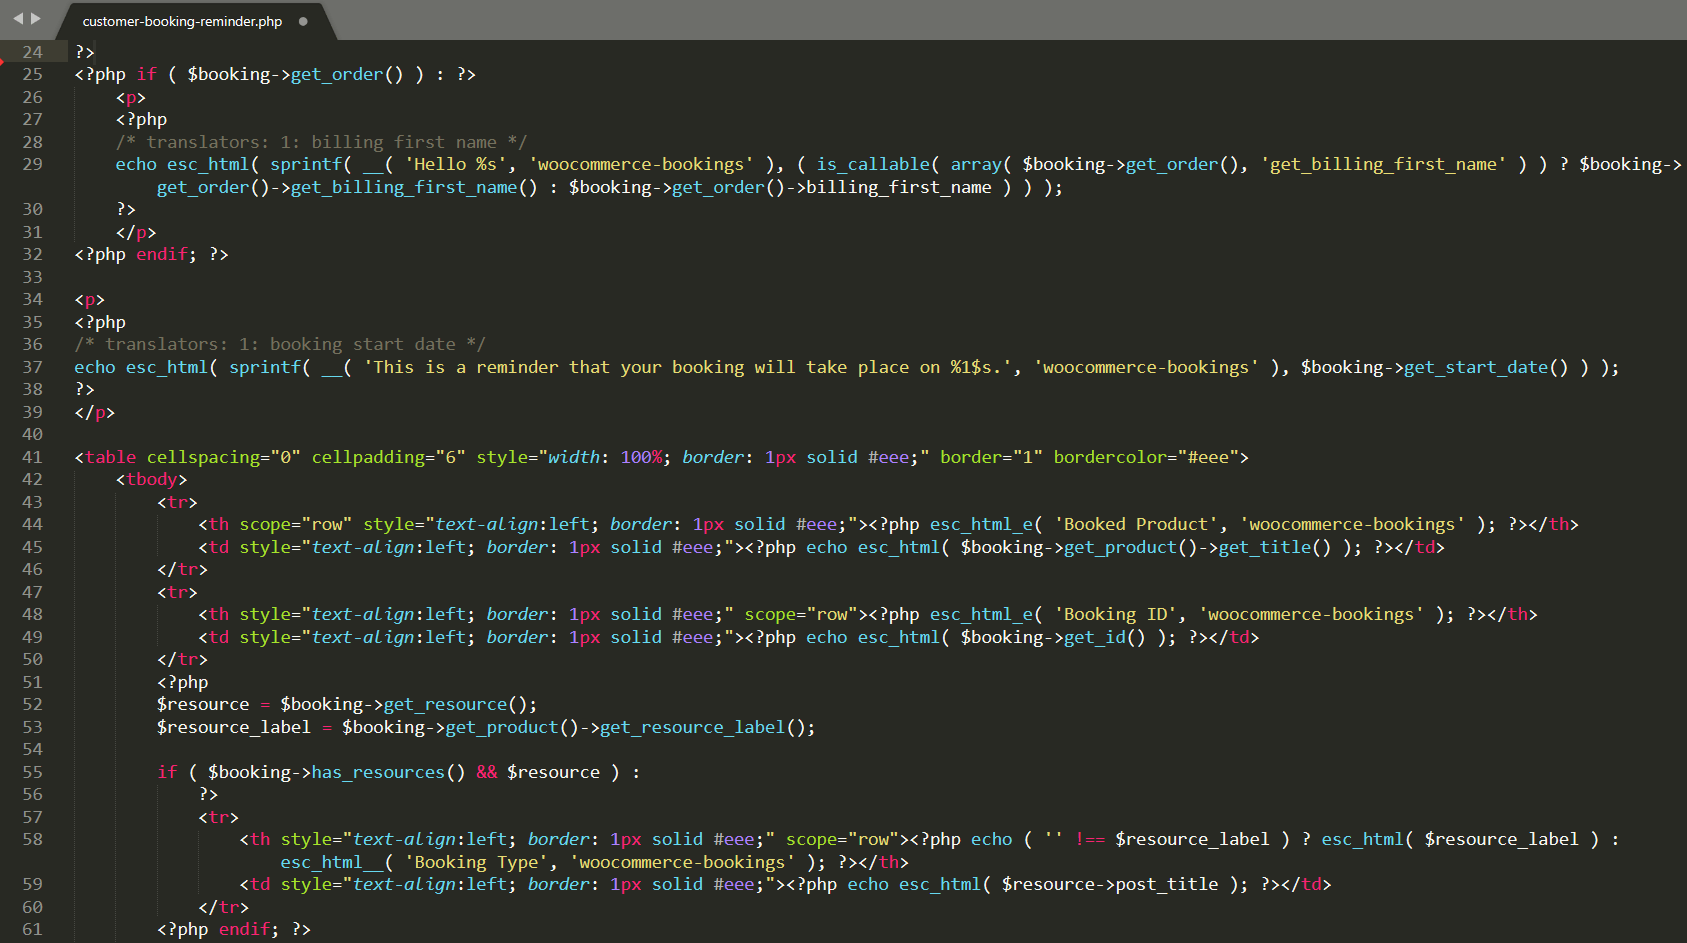
The external editor may be a better option if you need some assistance in the PHP coding.
Nevertheless, this approach requires your technical knowledge and wish to edit the PHP files!
Customize the WooCommerce completed order email with ShopMagic
ShopMagic is the perfect solution to help you with customizing WooCommerce emails. It lets you also create brand-new emails, follow-ups, and newsletters!
Benefits of using the email customizer plugin
✅ You can easily create any new email and customize it to your needs.
✅ Do you want to add some additional information to the email? No problem!
✅ Do you want to display purchased products as a list instead of a table? Sure thing!
✅ You can create new email templates to start successful email marketing in WooCommerce.
✅ You may edit, copy, and customize the emails visually, faster, and much easier!
ShopMagic is free and puts the power in your hands.
But don’t just take our word for it, over 10,000 WooCommerce stores worldwide use it daily.

You can download ShopMagic for free: ⤵️ ⤵️ ⤵️
ShopMagic
ShopMagic lets you customize WooCommerce completed order email. But that's not all! Give it a try. It's free!
Download for free or Go to WordPress.orgCustomize WooCommerce completed order email in 4 steps
In short, to customize the email contents you will need to do 2 things:
1️⃣ Disable the default WooCommerce email.
2️⃣ Add a new email with ShopMagic.
⬇️ You will find the completed instructions below ⬇️.
If you already have ShopMagic installed go to step 2.
- New Order
- Pending Order
- Processing Order
- Cancelled Order
- Completed Order (this guide)
- Failed Order
- On-Hold Order
- Refunded Order
Ok, let’s follow the 4 steps to customize the WooCommerce completed order email!
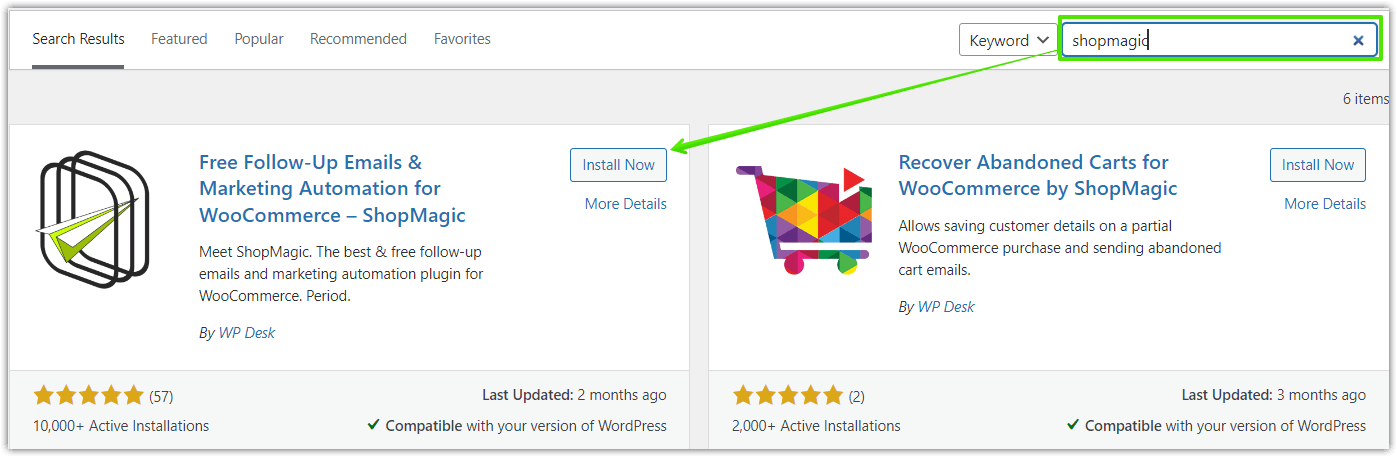
Step 1: How to install and activate ShopMagic
You can download ShopMagic for free from the WordPress repository or install it right from your WordPress plugins section by searching for “ShopMagic”:
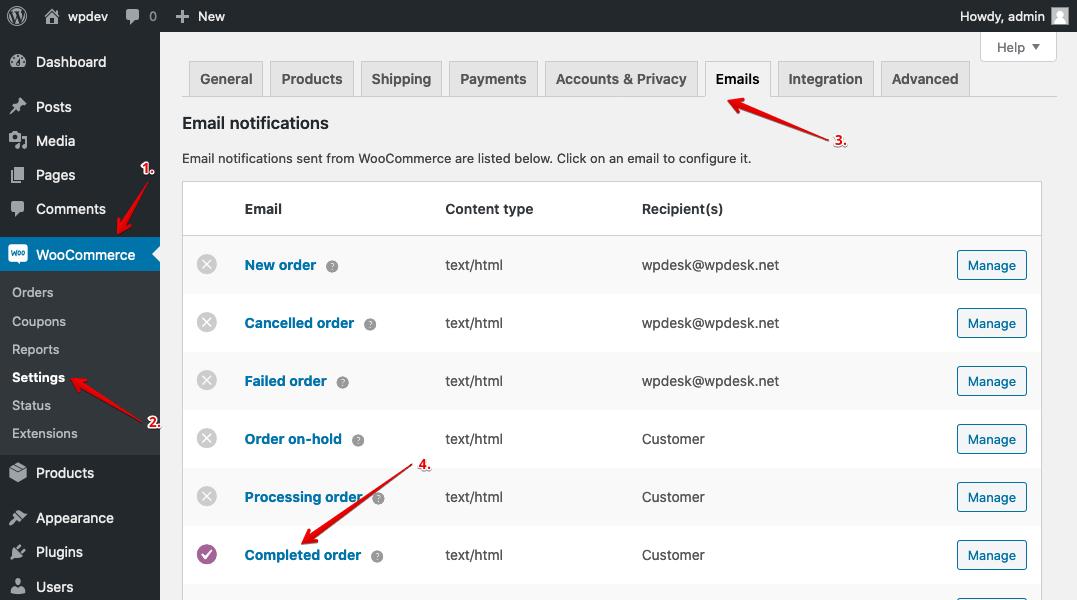
Step 2: Disable the WooCommerce completed order email
To disable the default WooCommerce email go to your menu: WooCommerce → Settings → Emails and click the Completed order link:
🚫 And then disable it:
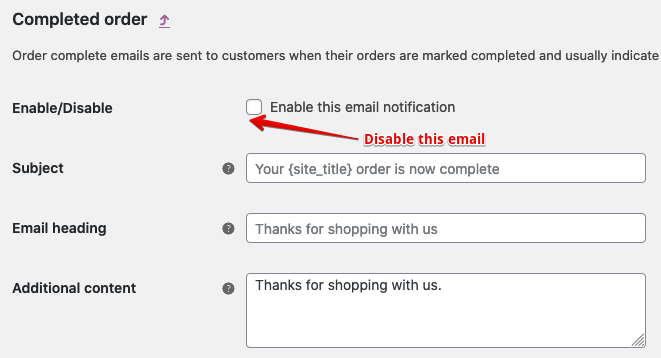
Done?😉
Great, now you made sure that your default WooCommerce completed email won’t be sent. So when you add a new ShopMagic email you will be sure to have no duplicates!
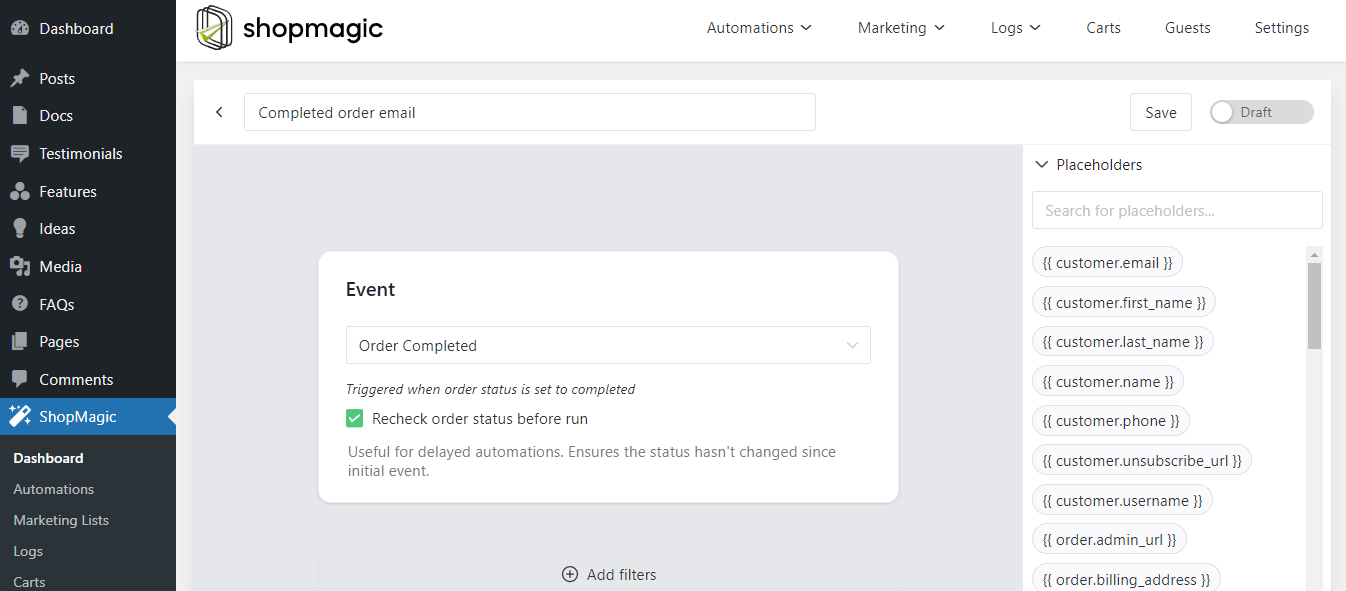
Step 3: Add new automation to customize WooCommerce completed order email
Once you have installed and activated ShopMagic ✅, let’s create your first automation. Go to: ShopMagic → Automations → Add New in your WordPress menu.
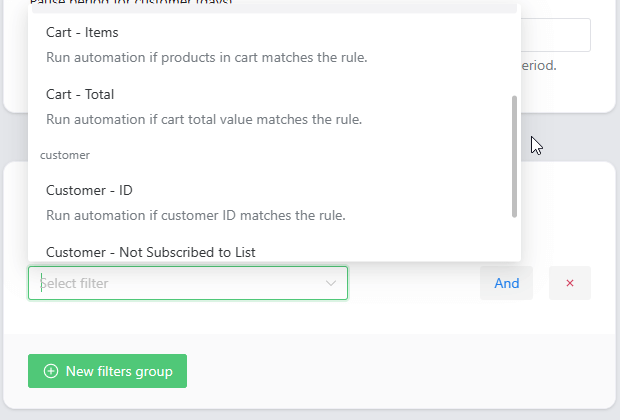
Add a name for your automation (this is for your reference only) and select the Order Completed event. This will trigger an email to be sent whenever an order is completed.
Step 4: Create the action to send the email & adjust its content
Now head to the Actions metabox where you’ll be able to configure your email.
Click the + New Action button, then select Send Email in the dropdown and you’ll be ready to start editing your email content ✍🏾.
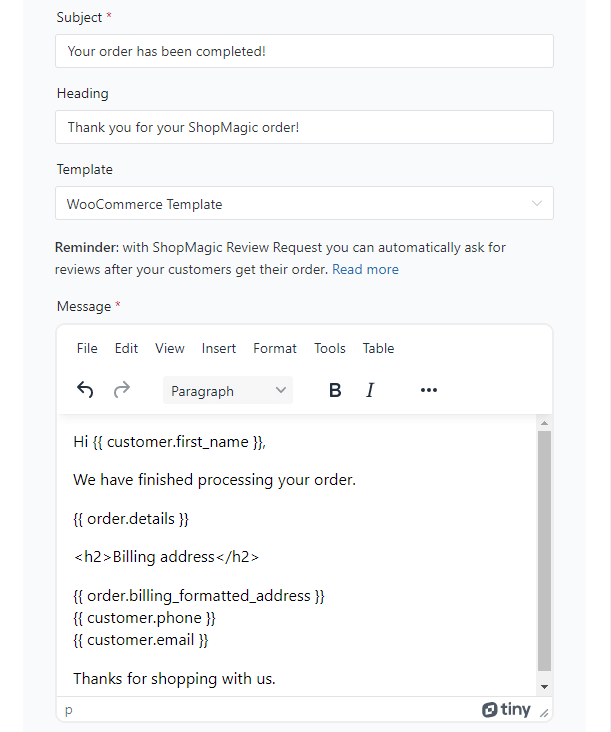
✅ Enter the email subject, for example, “Thank you for your ShopMagic order!”.
Then, enter a placeholder for customer email in the to field: {{ customer.email }}. This placeholder will be changed to the actual customer email when the email is sent.
You can start writing your message from scratch or you can use the following content which is the default WooCommerce text. If you want to use it, just copy the content below and paste it into the message field.
When the email is sent, the placeholders will be automatically changed to the actual order data:
{{ customer.first_name }}– customer’s first name.{{ order.details }}– default order table with products, payment method, and totals.{{ order.billing_formatted_address }}– billing information.{{ customer.phone }}– customer’s phone.{{ customer.email }}– customer’s email address.
Summary & more about ShopMagic
Today, you have learned how to customize the WooCommerce completed order email, which is sent after receiving payment. What’s more, you now know how to use a free plugin to create new emails and built successful email marketing in WooCommerce!
ShopMagic
ShopMagic lets you customize WooCommerce completed order email. But that's not all! Give it a try. It's free!
Download for free or Go to WordPress.orgIf you have any questions, just use the comments section below.
🪄 How about sending Thank You Emails? You can also do it with ShopMagic! Watch this video for more details:
Are you ready to customize WooCommerce emails?
Finally, I encourage you to read our blog and the below articles to see more use cases of ShopMagic.
Related to WooCommerce completed order mail:
-
Send WooCommerce Payment Reminders

Send WooCommerce Payment Reminders. Find out how to send payment reminders with ShopMagic. -
WooCommerce Emails Guide

Your ultimate WooCommerce Emails Guide. Find out all there is to know about sending WooCommerce Emails.