


WooCommerce follow up email plugin — if you need to send order reminders, review requests, or timed follow-ups on a specific date, this guide shows how to schedule and delay WooCommerce emails without touching code using ShopMagic and its Delayed Actions add-on.
Tired of sending manual reminders because WooCommerce doesn’t let you schedule or delay its native emails? Read on — you’ll learn how to create automated, scheduled follow-ups and time-based email sequences that improve conversions and customer experience.
Why use a WooCommerce follow up email plugin to schedule and delay emails?
Sending follow-up emails at the right time is one of the highest-impact, lowest-effort actions for e-commerce stores. A WooCommerce email scheduler lets you:
- Automatically remind customers about pending payments or abandoned carts after a fixed delay.
- Send review requests a specific number of days after delivery.
- Time promotional messages, upsells, and re-engagement emails for optimal open rates.
- Personalize send times using order data and placeholders like
{{ customer.email }}, order number and product names.
Default WooCommerce cannot schedule or delay its built-in transactional emails — that’s the gap a follow-up email plugin fills by providing an easy way to schedule WooCommerce emails or send WooCommerce email on a specific date.
Use cases: when a WooCommerce follow up email plugin is essential
Here are practical scenarios where scheduling or delaying emails is essential:
- Pending payment reminder: Send an email 1 hour, 12 hours, and 48 hours after an order remains unpaid.
- Abandoned cart recovery: Trigger a 1-hour follow-up, then a 24-hour reminder with a coupon.
- Review requests: Ask for reviews 7–14 days after shipping or delivery.
- Upsell / cross-sell: Send product recommendations 3–7 days after purchase.
- Customer re-engagement: Schedule reactivation campaigns for inactive customers on a specific date.
All of those are classic follow-up email patterns — delayed, timed, and measurable.
How it works (ShopMagic + Delayed Actions)
ShopMagic is a WooCommerce marketing automation plugin that lets you create customized email automations. The Delayed Actions add-on adds scheduling: delay by minutes/hours/days/weeks or send on a specific date.
ShopMagic
The best plugin to send customized emails in WordPress and WooCommerce. Build your email marketing today!
Download for free or Go to WordPress.org💡 Delayed Actions is part of ShopMagic PRO and enables you to schedule emails with precision: delay by minutes, hours, days or schedule sends on specific dates. Use it to implement every follow-up workflow described above.
Delay WooCommerce emails — practical 5-step guide
Follow these steps to create scheduled follow-ups (send later / on a specific date) in WooCommerce using ShopMagic + Delayed Actions.
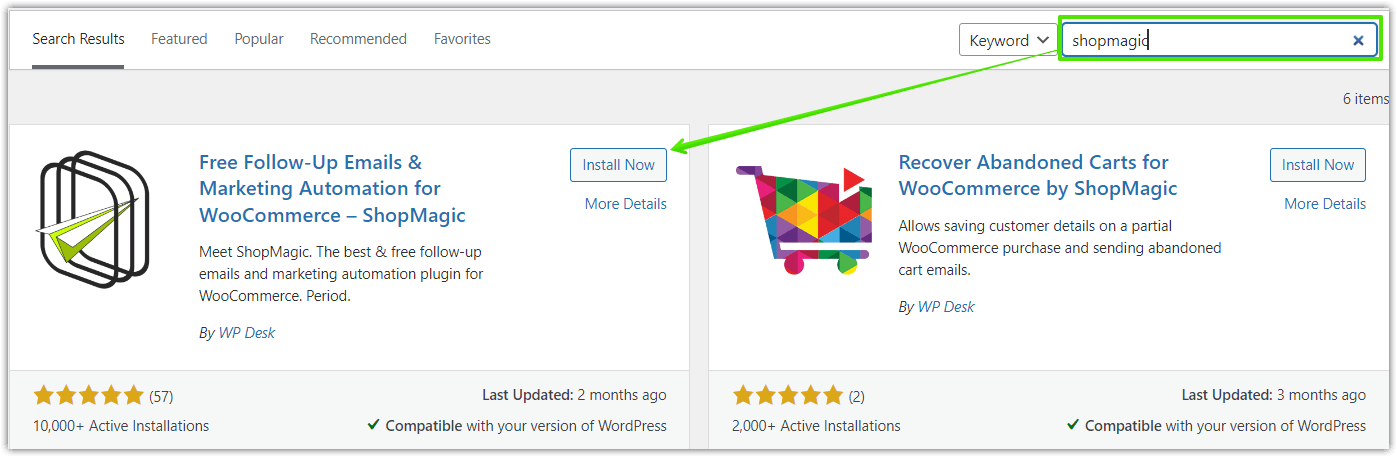
Step 1 — Install and activate ShopMagic
Download ShopMagic from WordPress.org or install from Dashboard → Plugins → Add New. Activate it and confirm it appears under ShopMagic in your admin menu.
Step 2 — Install and activate Delayed Actions add-on
If you have ShopMagic PRO, download the Delayed Actions add-on from your account and install it. This add-on provides the scheduling/sending-on-date capabilities missing in native WooCommerce.
💡 Need help installing premium add-ons? See how to install and activate premium add-ons.
Step 3 — Create a new automation (Event → Filters → Action)
Go to ShopMagic → Add New. Every automation has three components:
- Event — What triggers the automation (e.g., Order Pending, Order Completed).
- Filter — Optional conditions (e.g., product category, total amount, customer role).
- Action — What happens (e.g., Send Email), and where you set the delay / scheduled date.
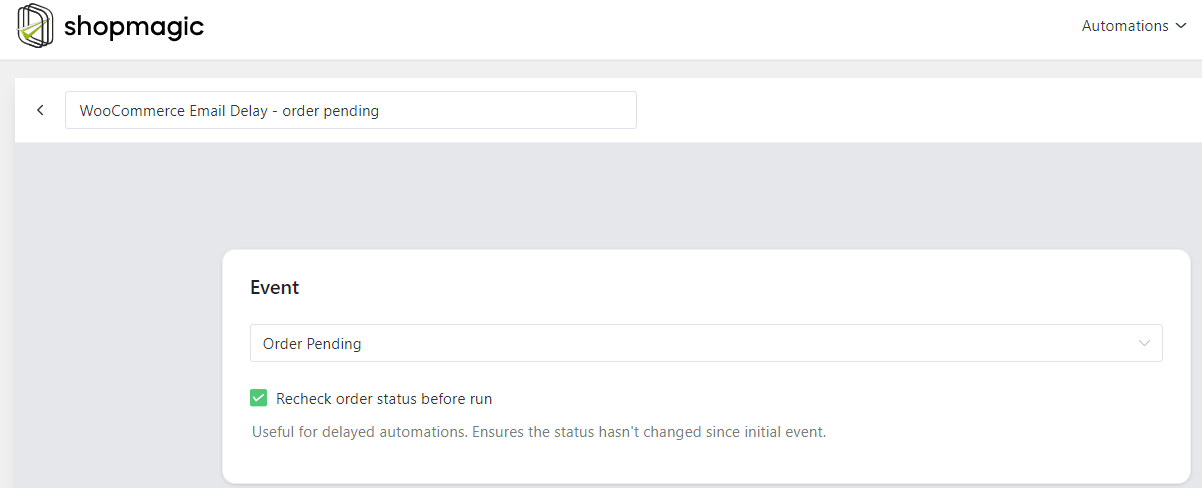
Example: choose Event → Order Pending and enable “recheck order status” so the automation validates the order state right before sending (useful for pending payment reminders).
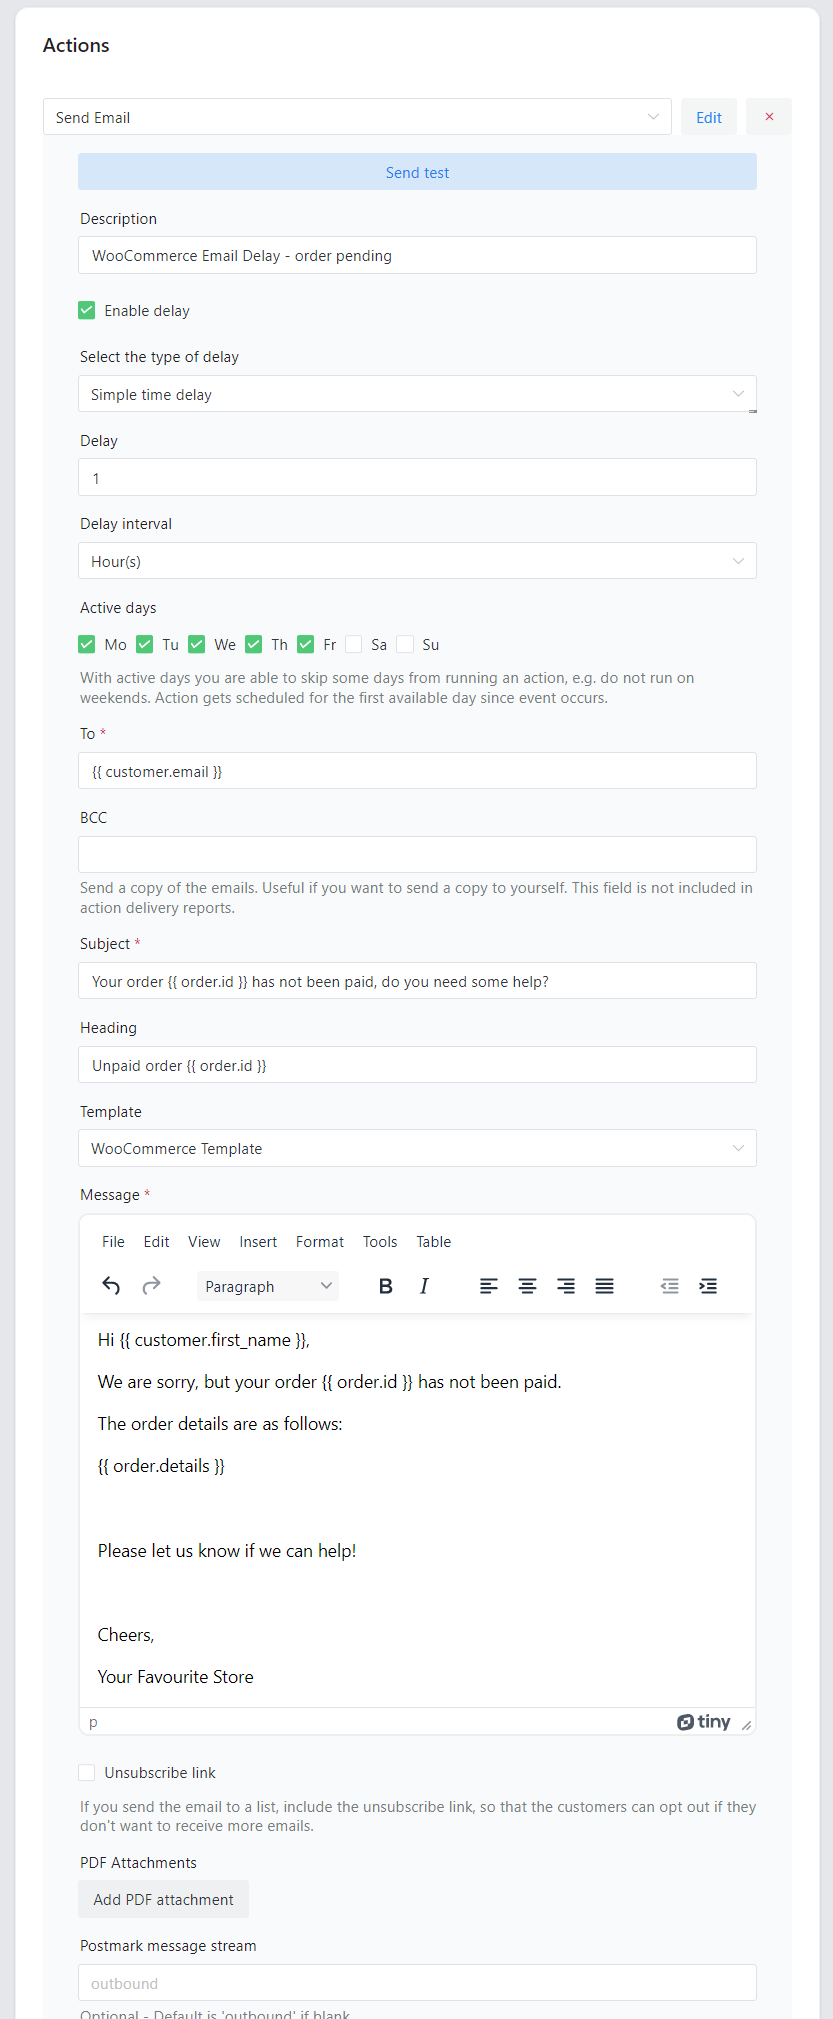
Step 4 — Configure the Send Email action and set delay or date
Add an Action → Send Email. Use these fields to create a scheduled follow-up:
- Delay / Scheduled Date: Set “delay by” (e.g., 1 hour, 12 hours, 3 days) or select a specific calendar date/time to send on. This is the core of send WooCommerce email later functionality.
- To: Use
{{ customer.email }}placeholder so email goes to the order’s customer automatically. - Subject: Use placeholders such as
{{ order.number }}to boost relevance. - Template: Choose “WooCommerce Template” to keep visual consistency, or a custom template if desired.
- Message: Fully customize the message and use dynamic placeholders for personalization.
Example: Pending payment reminder
Send the first follow-up 1 hour after order placed (to catch users who forgot to finish checkout), then a second follow-up 12–24 hours later. Both actions live inside one automation and are delayed independently.
Step 5 — Add a second (or third) follow-up action
Create additional Send Email actions in the same automation with longer delays (e.g., 12 hours, 48 hours). This sequence increases conversion probability while avoiding manual work.
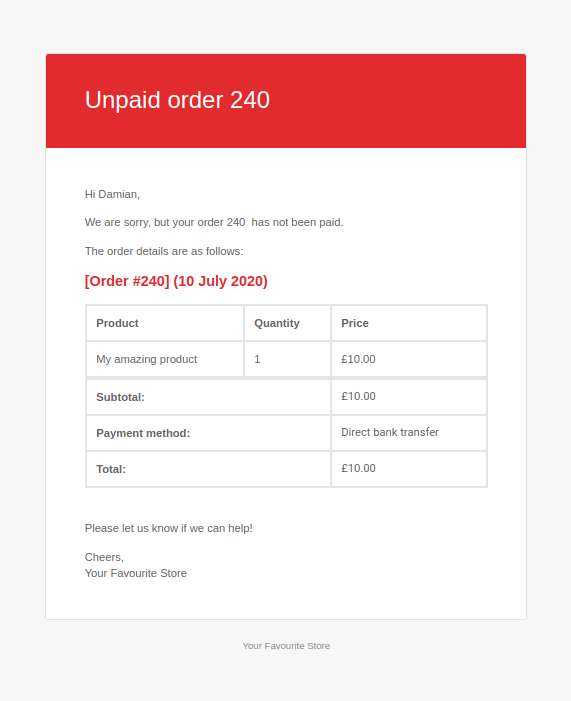
Example: Unpaid order reminder sent with ShopMagic Delayed Actions.
Best practices for using a WooCommerce follow up email plugin (timing, subject lines & frequency)
Make your scheduled emails effective — not annoying:
- Timing: For pending payment reminders, start with a 1-hour nudge, follow up at 12–24 hours and at 3 days. For review requests, wait 7–14 days post-delivery.
- Frequency: 2–3 automated follow-ups is usually enough — more can hurt deliverability and brand perception.
- Subject lines: Personalize and be specific: “Order #{{ order.number }} is still pending — complete payment”, “How was your {{ product.name }}? Please leave a review”.
- Use recheck status: Always recheck order/payment status before sending a follow-up so you don’t email customers who already paid or returned items.
- Measure: Track open, click and conversion rates for each scheduled step to optimize timing and copy.
Secondary keywords to include naturally in the content
To support SEO for this page, the article naturally includes related phrases such as WooCommerce schedule emails, WooCommerce email scheduler, send WooCommerce email later, pending payment reminder, and automated follow-up emails.
FAQ — Quick answers
Can I schedule WooCommerce native emails without a plugin?
No — native WooCommerce does not include a scheduling/delay feature for transactional emails. A WooCommerce follow up email plugin (like ShopMagic + Delayed Actions) is required to schedule/send on a specific date.
Will scheduled emails respect order status changes?
Yes — use the “recheck order status” option in ShopMagic so the automation verifies status right before sending. That prevents unnecessary reminders.
Can I send an email on a specific calendar date (not just delay by hours/days)?
es — Delayed Actions supports both relative delays (X hours/days) and absolute scheduling (send on specific date/time), which is useful for timed campaigns and product launches.
Do scheduled emails affect deliverability?
Follow deliverability best practices: use proper DKIM/SPF, avoid excessive frequency, personalize content, and monitor bounce/spam rates. Scheduling itself doesn’t hurt deliverability when used correctly.
Can I create multi-step follow-up sequences?
Absolutely — you can add multiple Send Email actions to a single automation and delay each action differently to create multi-step follow-up funnels (e.g., 1-hour nudge → 12-hour reminder → 48-hour final reminder).
Summary & more about ShopMagic
We just built a clear path from problem to solution: WooCommerce doesn’t let you schedule follow-ups natively, but a WooCommerce follow up email plugin like ShopMagic + Delayed Actions fills the gap. Use scheduled emails for pending payment reminders, abandoned cart recovery, review requests and upsells — and tailor timing to your audience for best results.
💡 ShopMagic PRO includes Delayed Actions and other add-ons you might need for full email automation in WooCommerce.
ShopMagic PRO £69
WooCommerce delay emails by minutes, hours, days or even weeks. This is your solution for WooCommerce email delay!
Add to cart or View DetailsI’d love to hear how you use scheduled follow-ups in your store — let us know your story.