


How to create custom filters in ShopMagic#
To create a custom filter in ShopMagic:
- Create a class that extends a ShopMagic filter base class.
- Register an instance through the
shopmagic/core/filtersfilter.
This guide creates an Order - Internal ID filter. It lets you compare the current order’s internal ID with a value entered in the automation editor.
The example uses the API available in ShopMagic 4.9.3 and requires WooCommerce. Store the code in a separate custom plugin so that ShopMagic updates do not overwrite it.
Choose a filter base class#
The general base class is \WPDesk\ShopMagic\Workflow\Filter\Filter.
For filters that use a comparison operator and an expected value, extend \WPDesk\ShopMagic\Workflow\Filter\FilterUsingComparisonTypes. This class builds the filter’s configuration fields from its comparison type.
You can also use a more specific base class:
\WPDesk\ShopMagic\Workflow\Filter\Builtin\OrderFilter— for filters requiring a WooCommerce order.\WPDesk\ShopMagic\Workflow\Filter\Builtin\CustomerFilter— for filters requiring a ShopMagic Customer, which can represent a registered user or guest.
These classes declare their required resources and assign the filter to the appropriate group in the automation editor.
Define the name and filtering logic#
When extending OrderFilter, implement:
get_name(): string— the name displayed in the filter selector.passed(): bool— the rule that determines whether the filter passes.get_type(): ComparisonType— the comparison type used for configuration fields and value comparison.
You can also override get_description(): string to explain the filter’s purpose.
The passed() method returns true when the filter’s condition is met and false otherwise. Its result is combined with the other filters configured in the automation.
Complete example: filter by internal order ID#
Create a folder named my-shopmagic-filters inside wp-content/plugins/. Add the following two files.
1. Create the filter class#
Save this code as class-order-internal-id-filter.php:
<?php

namespace MyShopMagicFilters;

use WPDesk\ShopMagic\Workflow\Filter\Builtin\OrderFilter;
use WPDesk\ShopMagic\Workflow\Filter\ComparisonType\ComparisonType;
use WPDesk\ShopMagic\Workflow\Filter\ComparisonType\FloatType;

final class OrderInternalIdFilter extends OrderFilter {

    public function get_name(): string {
        return 'Order - Internal ID';
    }

    public function get_description(): string {
        return 'Compare the internal WooCommerce order ID with the configured value.';
    }

    protected function get_type(): ComparisonType {
        return new FloatType();
    }

    public function passed(): bool {
        if ( ! $this->resources->has( \WC_Order::class ) ) {
            return false;
        }

        $order = $this->resources->get( \WC_Order::class );

        return $this->get_type()->passed(
            $this->fields_data->get( FloatType::VALUE_KEY ),
            $this->fields_data->get( FloatType::CONDITION_KEY ),
            $order->get_id()
        );
    }
}
The filter reads the current order from $this->resources. ShopMagic supplies this event-data container when evaluating the automation.
The selected event must provide a WC_Order object. Declaring an order requirement does not load an order automatically.
This example uses the internal order ID returned by get_id(). It does not compare a formatted order number supplied by an order-numbering plugin.
2. Register the filter#
Save this code as my-shopmagic-filters.php in the same folder:
<?php
/**
 * Plugin Name: My ShopMagic Filters
 * Description: Custom order filters for ShopMagic.
 * Version: 1.0.0
 */

namespace MyShopMagicFilters;

defined( 'ABSPATH' ) || exit;

add_filter(
    'shopmagic/core/filters',
    function ( array $filters ): array {
        require_once __DIR__ . '/class-order-internal-id-filter.php';

        $filters['my_shopmagic_order_internal_id'] =
            new OrderInternalIdFilter();

        return $filters;
    }
);
Activate My ShopMagic Filters under Plugins in WordPress. Keep ShopMagic and WooCommerce active.
The class file is loaded when ShopMagic requests custom filters, so the ShopMagic base class is available before the custom class is declared.
Keep the registration key unique and stable#
Register the filter using a descriptive string key, such as my_shopmagic_order_internal_id.
ShopMagic assigns this key as the filter’s identifier. Automations use it to reference the filter in their saved configuration.
- Use a unique prefix to avoid collisions with other integrations.
- Keep the key unchanged after automations start using the filter.
- Return the existing array with your filter added, preserving other registrations.
- Do not use an unkeyed append such as
$filters[]; use an explicit, stable string identifier.
Configure and test the filter#
- Open an automation in ShopMagic → Automations.
- Select an event that provides order data.
- Add the Order - Internal ID filter.
- Select is greater than and enter
270. - Save the automation and test it with orders whose internal IDs fall on either side of the threshold.
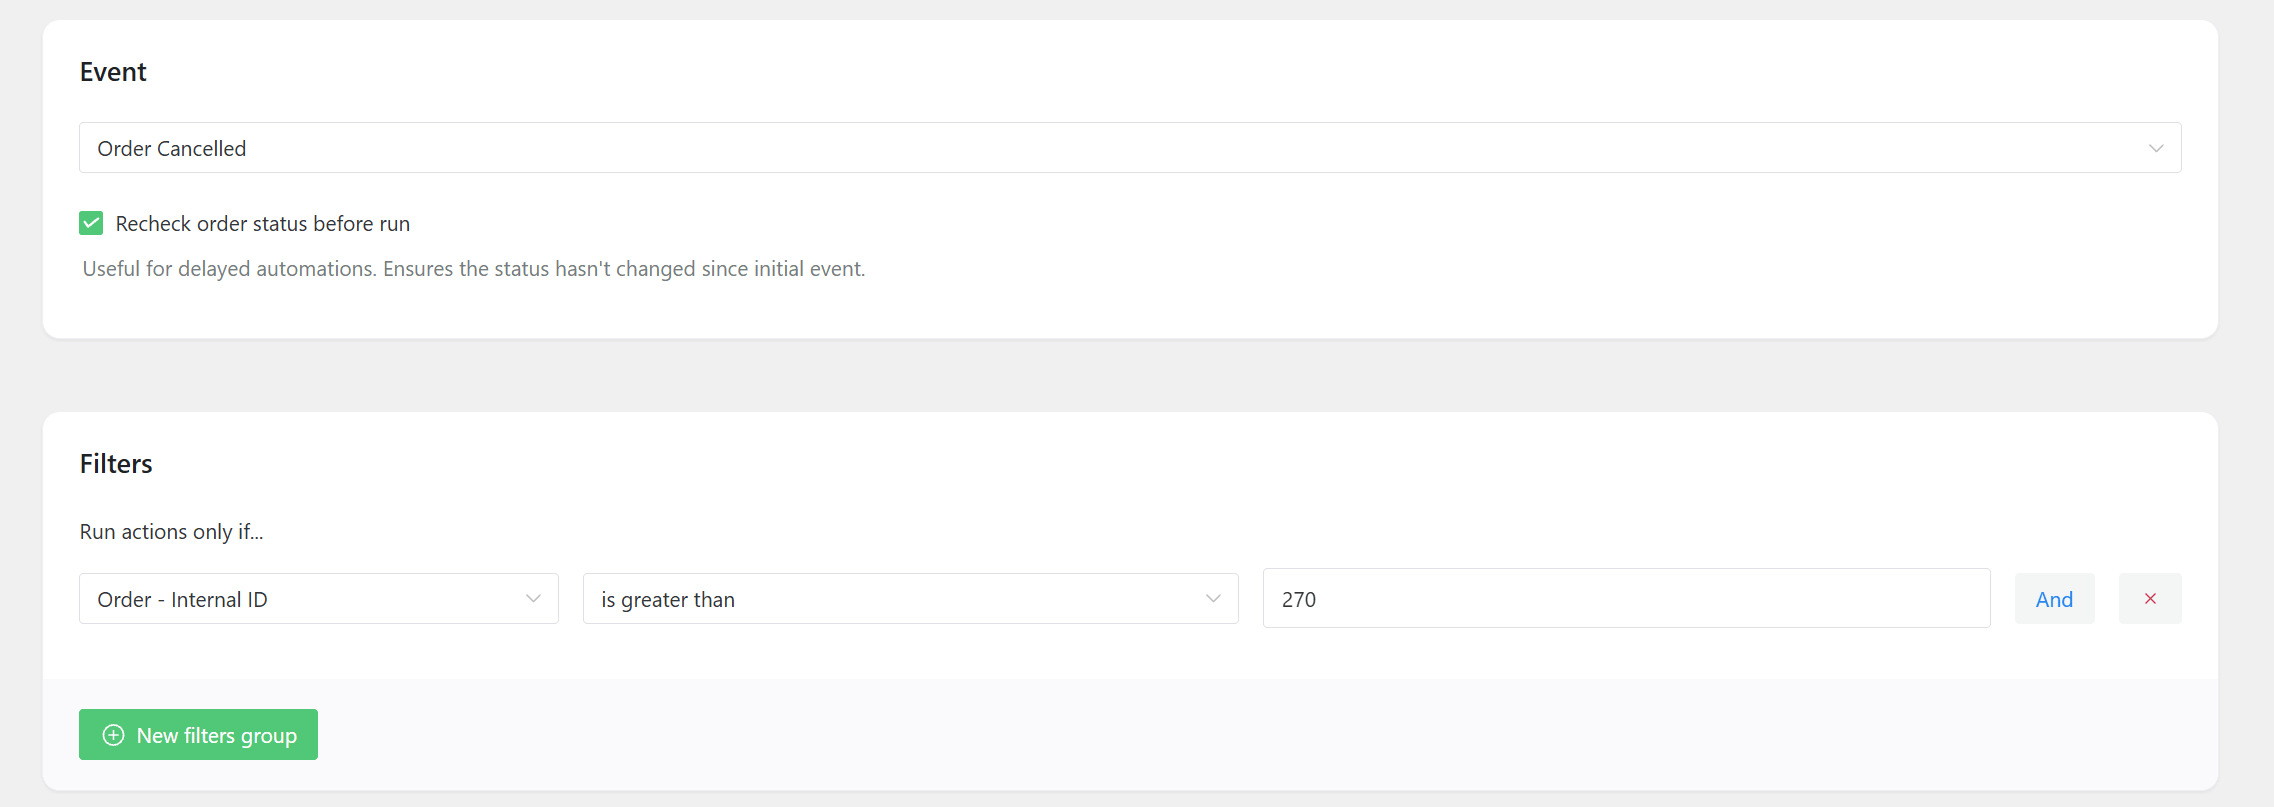
With this configuration, the filter passes for order ID 271 and fails for IDs 270 and 269. The automation’s other filters still apply.
Trigger the selected event after saving the automation. Saving a filter does not automatically process existing orders.
How comparison types work#
The comparison type provides the configuration fields and evaluates the expected value against the actual value.
Its passed() method receives three arguments in this order:
passed( $expected_value, $compare_type, $actual_value )In the example:
- Expected value — the value entered in the automation editor.
- Comparison operator — the selected condition, such as
greater_than. - Actual value — the current order’s internal ID.
FloatType provides the conditions is, is not, is greater than, and is less than.
Other built-in comparison types are available in src/Workflow/Filter/ComparisonType/, including StringType, IntegerType, DateType, and selection-based types.
To implement a custom comparison type, extend \WPDesk\ShopMagic\Workflow\Filter\ComparisonType\AbstractType. Implement passed() and get_conditions(), and override get_fields() if you need different configuration controls.
Working with customer-based filters#
If you extend CustomerFilter, use the ShopMagic Customer interface rather than assuming that every customer is a WordPress user.
Registered-user IDs are numeric strings, while guest IDs use a prefix, such as g_123. Do not pass guest IDs to a numeric comparison or remove their prefix by casting them to integers.
If your custom rule applies only to registered users, check is_guest() and return false for guests before performing a numeric user-ID comparison.
Troubleshooting#
- The filter is missing: check that the custom plugin is active and its registration callback is attached to
shopmagic/core/filters. - The filter is unavailable for an event: check that the event provides the resources required by the filter’s base class.
- The condition does not pass: check the configured value, operator, actual event data, and other filters in the automation.
- An existing automation cannot find the filter: check whether its registration key changed or the custom plugin was deactivated.
- A PHP error occurs: check class names, namespaces, file paths, and method signatures against the example.