


A customer Win-Back Email campaign in WordPress or WooCommerce means a powerful marketing strategy. The goal is to re-engage inactive customers and convince them to buy from you again. Let’s check how to create an email campaign in WordPress or WooCommerce with the ShopMagic free plugin.
Are you losing old customers? Would you like to make them buy your products again?
Today, I will show you how to use an email campaign in WordPress and WooCommerce to win them back! Let’s begin!
Table of contents
- ShopMagic marketing automation plugin
- Who is an inactive customer, and why care about him?
- What is a customer win-back WooCommerce email campaign?
- It’s time for a “Come back – We miss you” email sequence
- Summary & more about ShopMagic
ShopMagic marketing automation plugin
👉 Few words about our plugin, in case you are not familiar with it. ShopMagic is a free marketing automation and follow-up email plugin for WordPress and WooCommerce. Currently, more than 10,000 stores use it daily.
ShopMagic
Create WooCommerce email campaigns with ShopMagic. The core version is quite complete but wait what happens if you activate some of the add-ons 🚀 🚀 🚀
Download for free or Go to WordPress.org👉 With ShopMagic you are saving time, building customer loyalty, and earning more money 🤑.
You can build multiple email automation for WordPress and WooCommerce and set different conditions in each campaign:
With an easy-to-use email customizer, you may create new email templates.
To get beautiful emails in your WordPress and WooCommerce!
ShopMagic lets you do much more. Let’s see a raw list of some functionalities:
- Customer segmentation – set advanced conditions and decide who will receive your email. Customers who bought a specific product or maybe someone who purchased something last month.
- Recovering abandoned carts – stop losing profit due to the abandoned carts and convert them into sales.
- Delaying emails – delay an email for a specified number of minutes, hours, days, or even weeks.
- Advanced integrations – integrate your store with Postmark or WooCommerce Subscriptions.
- Newsletters – create and manage newsletters.
ShopMagic PRO £69
Create WooCommerce email campaigns with ShopMagic. The core version is quite complete but wait what happens if you activate some of the add-ons 🚀 🚀 🚀
Add to cart or View Details
Who is an inactive customer, and why care about him?
We can simply say that it is someone who bought something in your store but has never returned 🥷. It’s easier to visualize the term inactive customers with the stores which offer recurring goods like coffee, tea, glasses, or even socks. These kinds of goods are bought regularly, and you as the store owner will quickly realize that you have customers who stopped buying at your store.
This is when ShopMagic with WooCommerce customer win-back campaign steps in.
What is a customer win-back WooCommerce email campaign?
➡️ Basically, it is a series of emails sent to inactive customers to wake them up 💤.
⚪ When to send the first email?
It depends, however, you as the store owner, should know the answer to this question. For example, if a customer is buying something every 30 days, you should wait a little longer before you will send him a WooCommerce customer win-back email. 90 days look like a good period.
⚪ The other important question which arises is how many emails you should send.
In my opinion, one may not be enough, while four or more look too aggressive. If you are looking for advice – two or three WooCommerce customer win-back campaign emails should be fine. Speaking of the devil…
It’s time for a “Come back – We miss you” email sequence
We are only one step away from creating a successful WooCommerce customer win-back campaign.
In case you need any help, here are useful links to our docs:
1️⃣ Create automation for a WooCommerce customer email win-back campaign
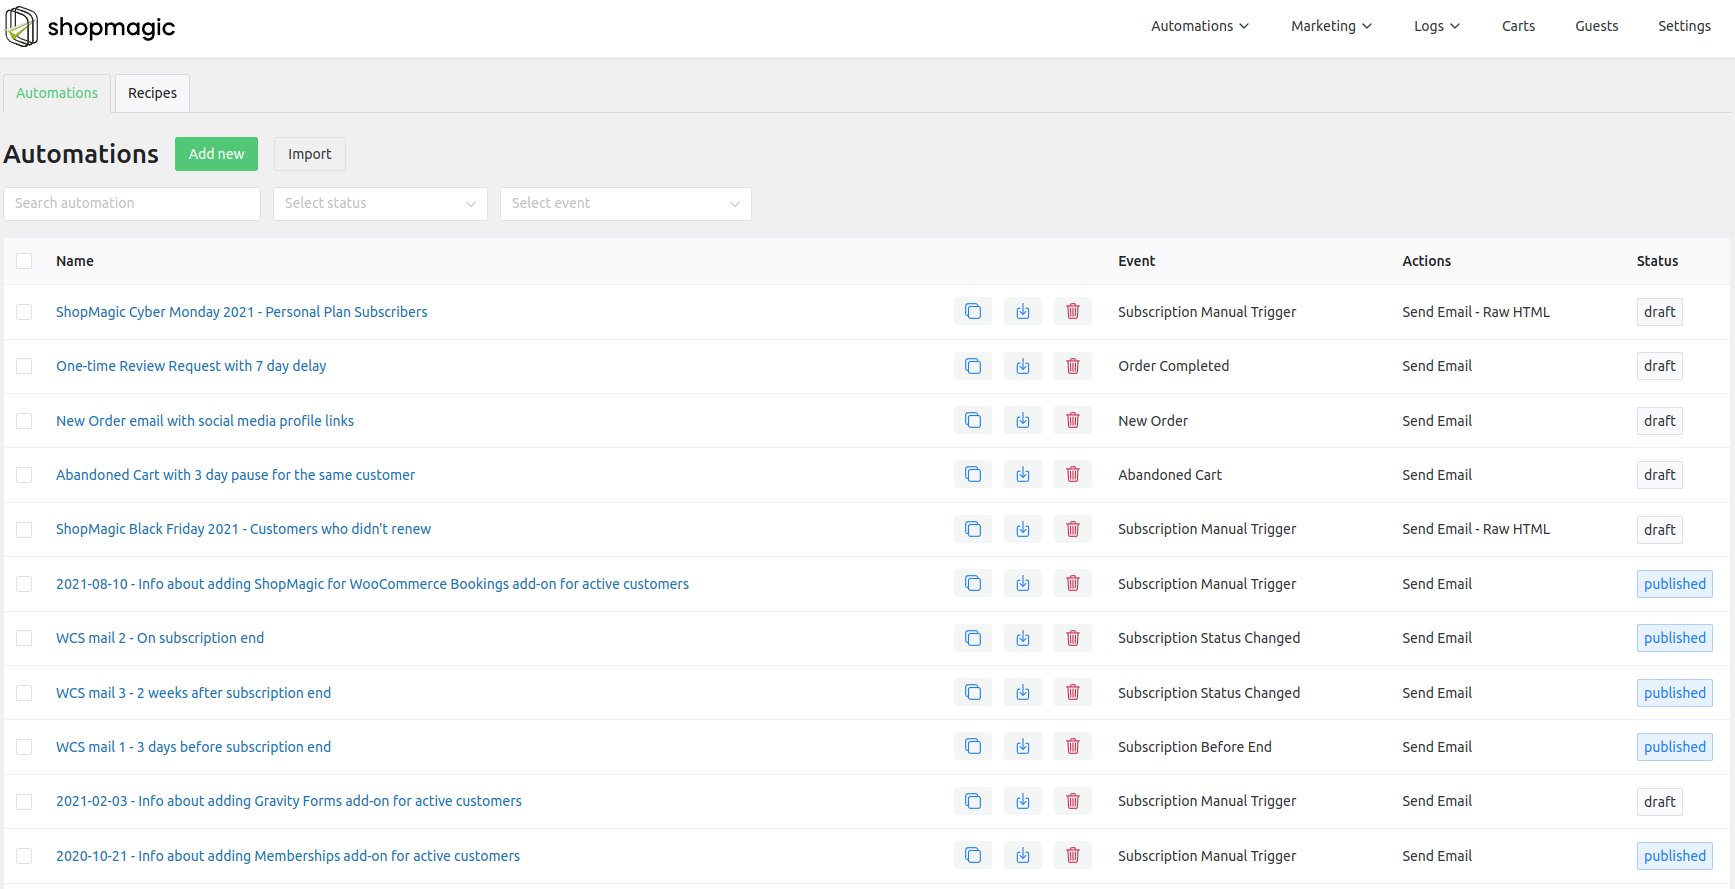
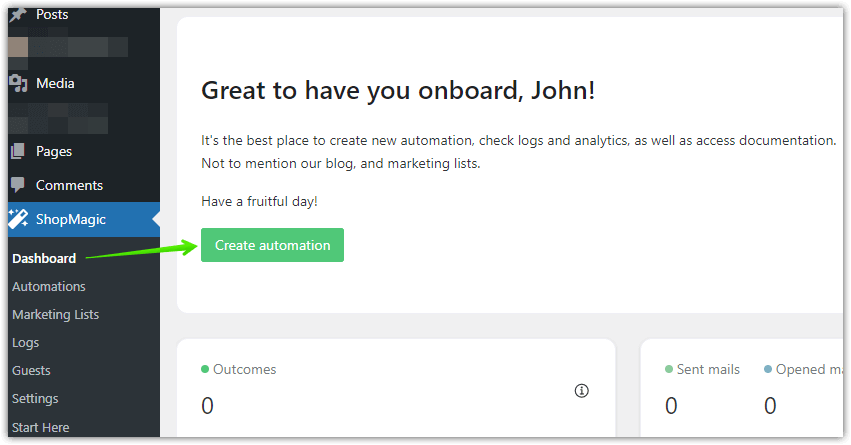
✅ Find ShopMagic in your dashboard and click on Create automation.
You will see a new window, where we will be creating new automation.
First, add the title. It’s optional and up to you how you title your automation. After that, select an Event type. Order Completed is the best choice.
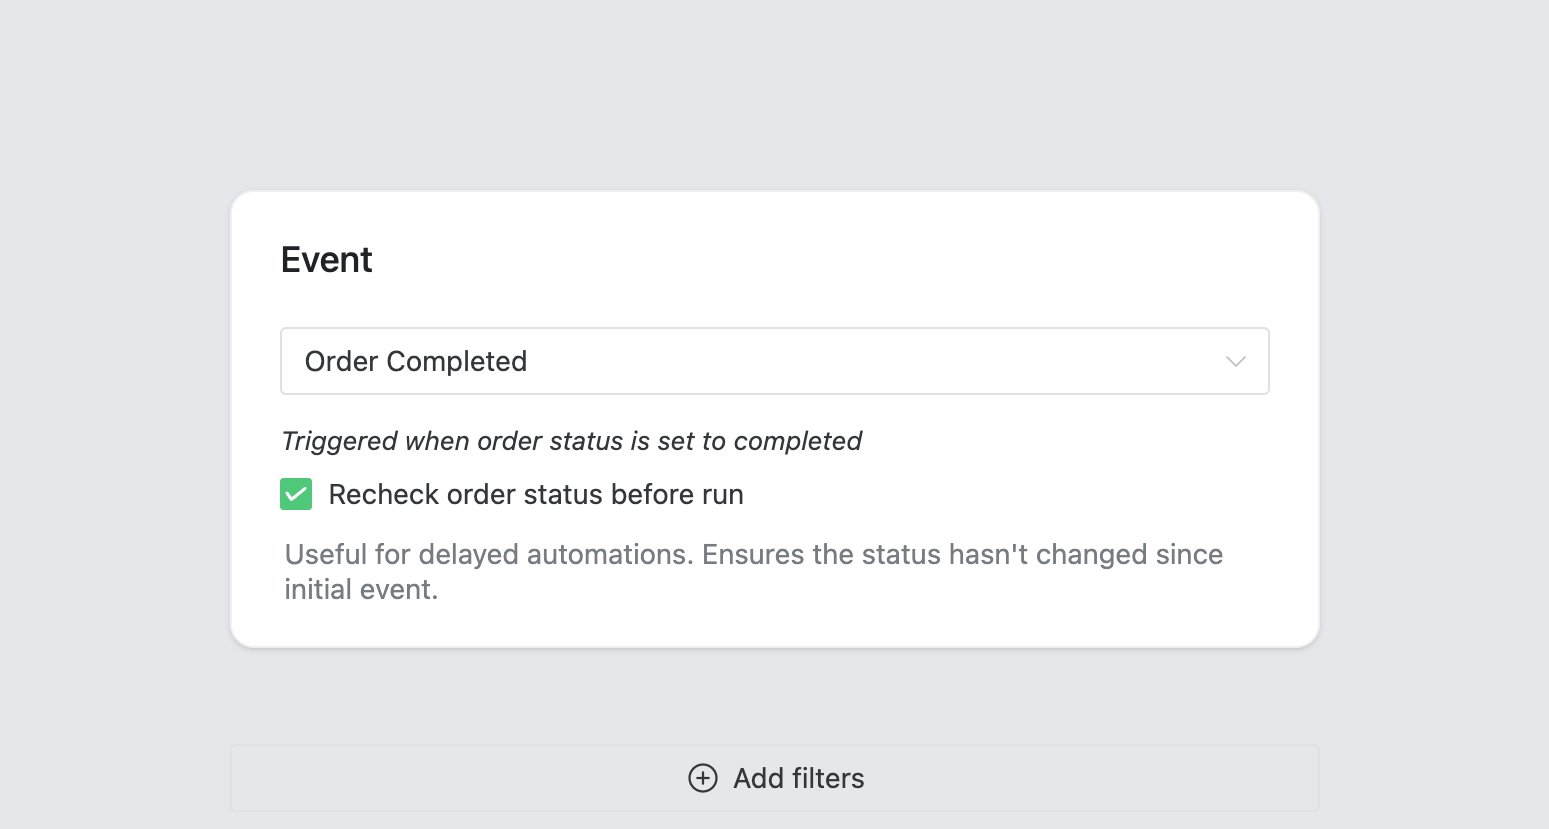
⚠️ Do not forget to use the option to recheck the order status before the run. An essential setting, especially for a WooCommerce customer win-back campaign. If the status of the order will change meanwhile (e.g. for Failed or Refunded), ShopMagic won’t fire this automation.
2️⃣ Create a Filter for your automation
It’s an optional step, but I feel that it is a good idea to add a basic filter to our automation. I can imagine that there are products that are more susceptible to this marketing strategy. Here’s an example of a filter for one specified product from my store – My amazing product! 😀
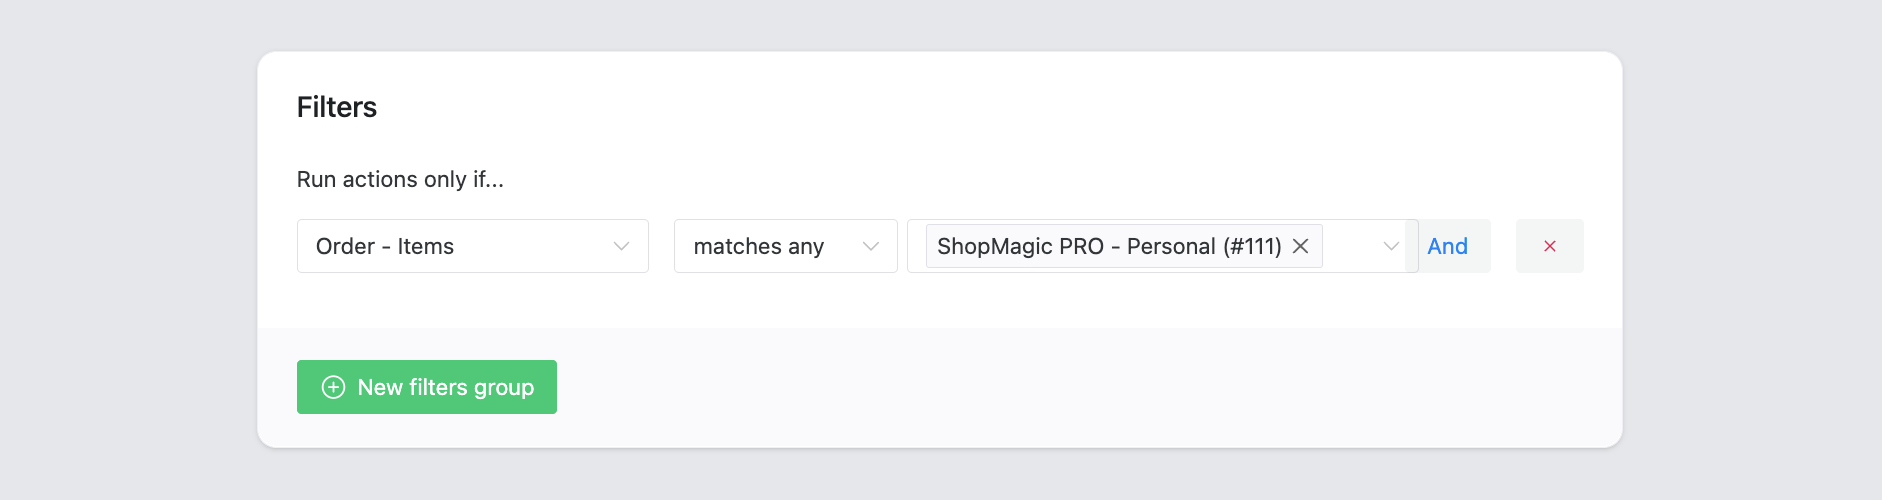
👉 Of course, if you want to create global automation, simply omit the Filter field.
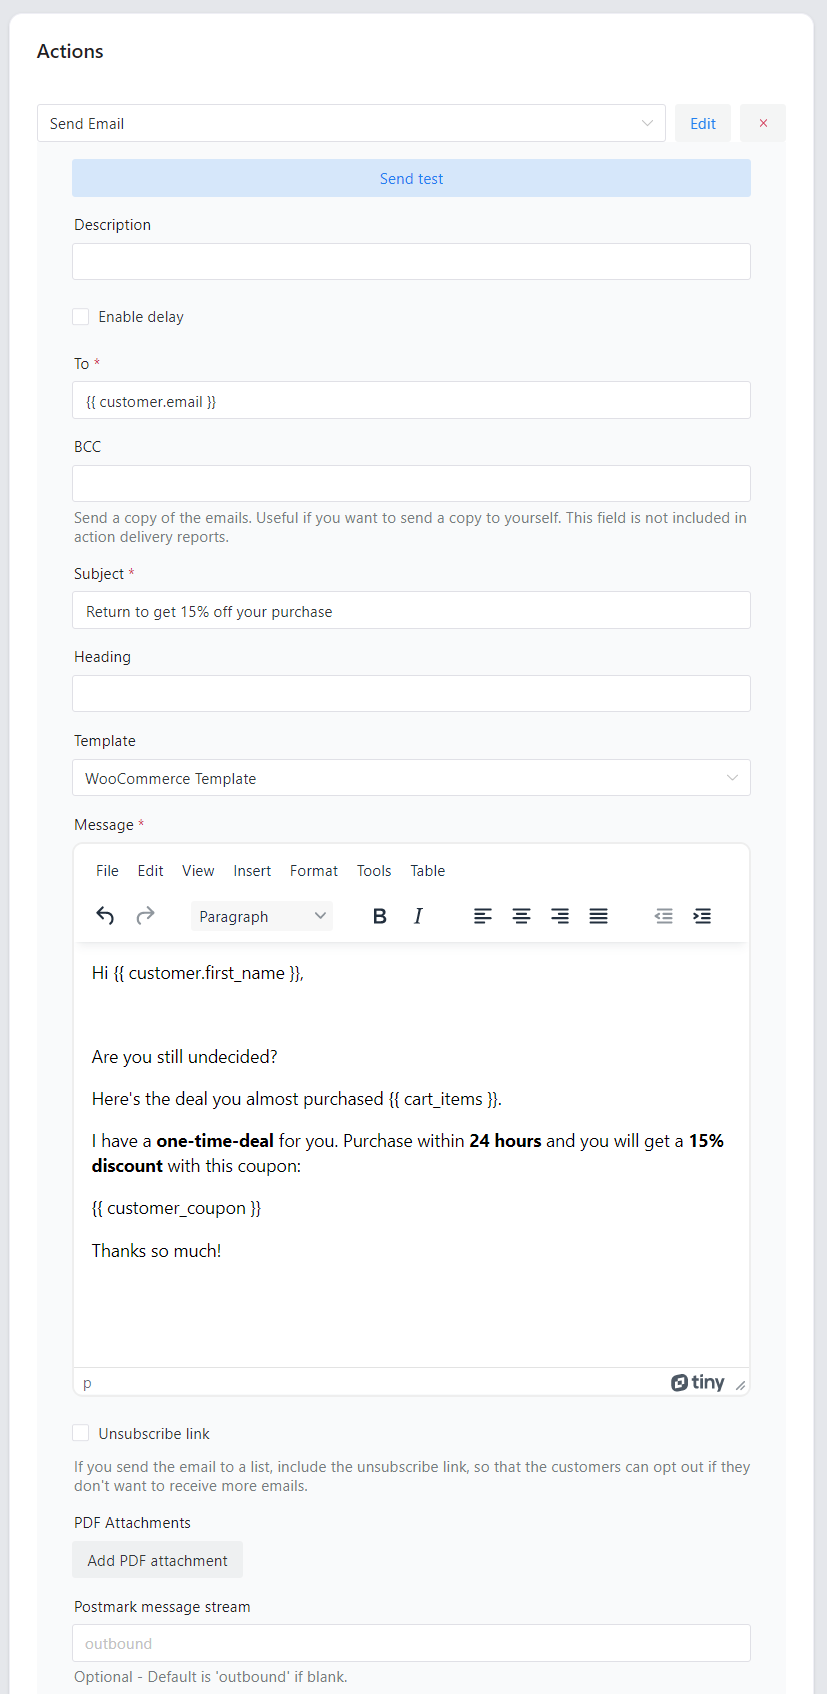
3️⃣ Create an Action
The final step of every automation. First, take a look at my screenshot. This is how your Action will look like if you follow this guide:
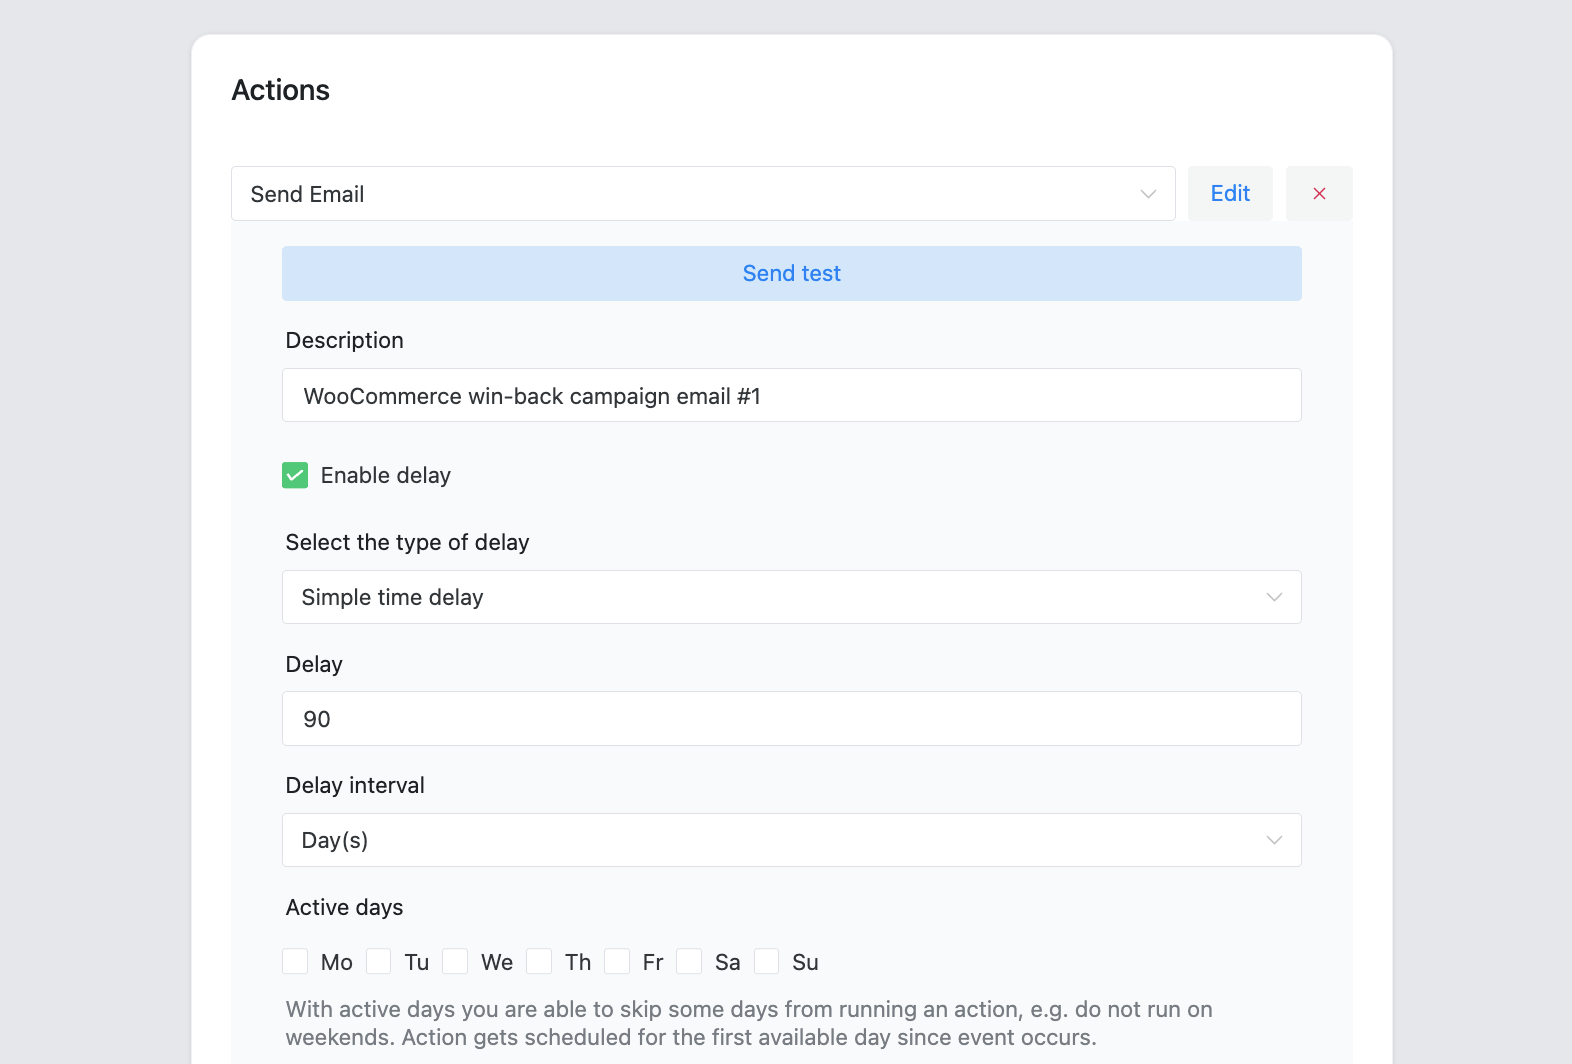

- Starting from the top, select the type of Action. Send Email is the most used, but if you have your email template, select Send Email – Raw HTML.
- The description is another field. It’s optional, but I advise you to describe your automation because it is easier to distinguish one from another. I described mine as WooCommerce customer win-back campaign email #1.
- Delay. The most important field while creating a win-back email. As you can see, I set a 90-day delay, so we can send an email after the order was completed some time ago.
- To is pre-filled with placeholder
{{ customer.email }}. ShopMagic will automatically assign the recipient’s actual email to this field. - Subject and Heading. Try to come up with catchy and creative slogans. You can use placeholders in both of these fields.
- Select WooCommerce Template if you want to style your emails similarly to standard WooCommerce notifications.
- Message. Write a few (or more – there’s no limit) words to your customers. Massage has one goal – convince customers to buy something from you. So think carefully when creating a message for the WooCommerce customer win-back campaign.
4️⃣ Create the second Action
As I wrote previously, a successful WooCommerce customer win-back campaign should have at least two emails. With ShopMagic, it is easily done by adding a second action to your automation. Fill the fields accordingly, but this time set a delay for a little longer time.
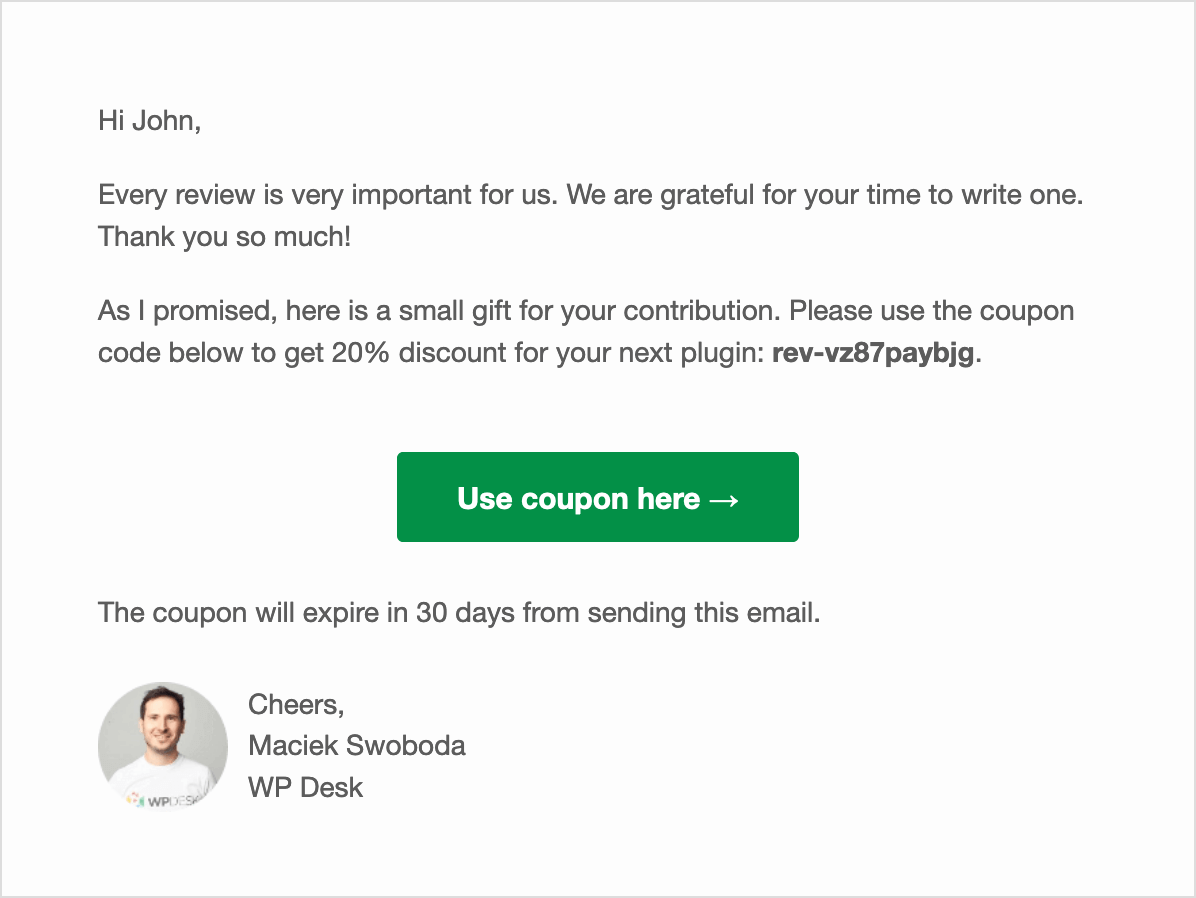
It is also a good idea to consider adding a discount coupon to your message.
5️⃣ Your WooCommerce customer win-back campaign is ready
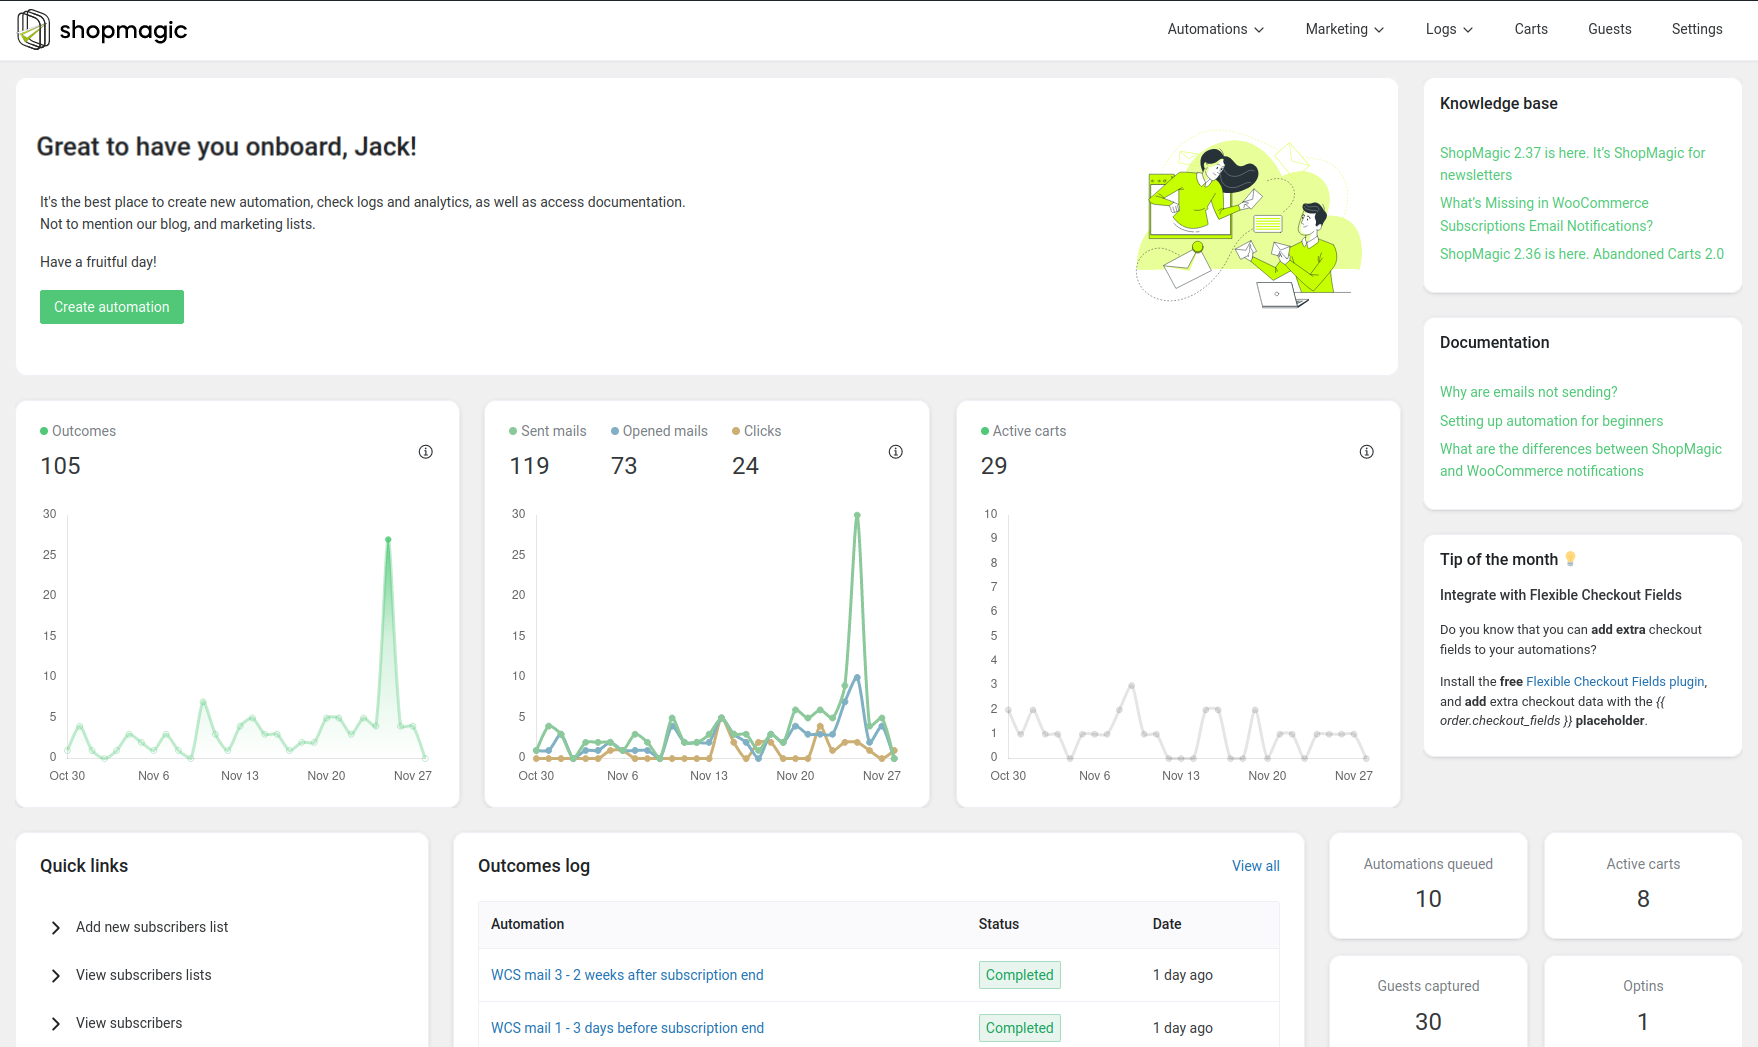
That’s all. You can publish your automation and… forget about it🎉. Your WooCommerce customer win-back campaign will trigger automatically whenever the conditions will be met. You can always check the results in the main dashboard of the plugin.
Summary & more about ShopMagic
In this article, you’ve learned how to re-engage inactive customers and convince them to buy again. You’ve also read how to create an email campaign in WordPress or WooCommerce with the ShopMagic plugin.
I encourage you to download the free version of the plugin and start right away!
ShopMagic
Create WooCommerce email campaigns with ShopMagic. The core version is quite complete but wait what happens if you activate some of the add-ons 🚀 🚀 🚀
Download for free or Go to WordPress.orgIf you have any questions let us know!
More about the WooCommerce email campaign
-
WooCommerce After Order Confirmation Email
WooCommerce email after order. Learn how to send a personalized order confirmation email in WooCommerce with a custom template. -
WooCommerce email template customizer
Create beautiful emails in WooCommerce. Learn how to use a free plugin to send custom emails in WordPress and WooCommerce.