



Requirements#
- A registered (free or paid) account on Slack.
- A Slack app added to workspace (instructions below).
Creating Slack App#
The Slack API uses OAuth 2.0 to validate all connections, so it is necessary to set up an app in order to connect the ShopMagic Slack add-on with your workspace.
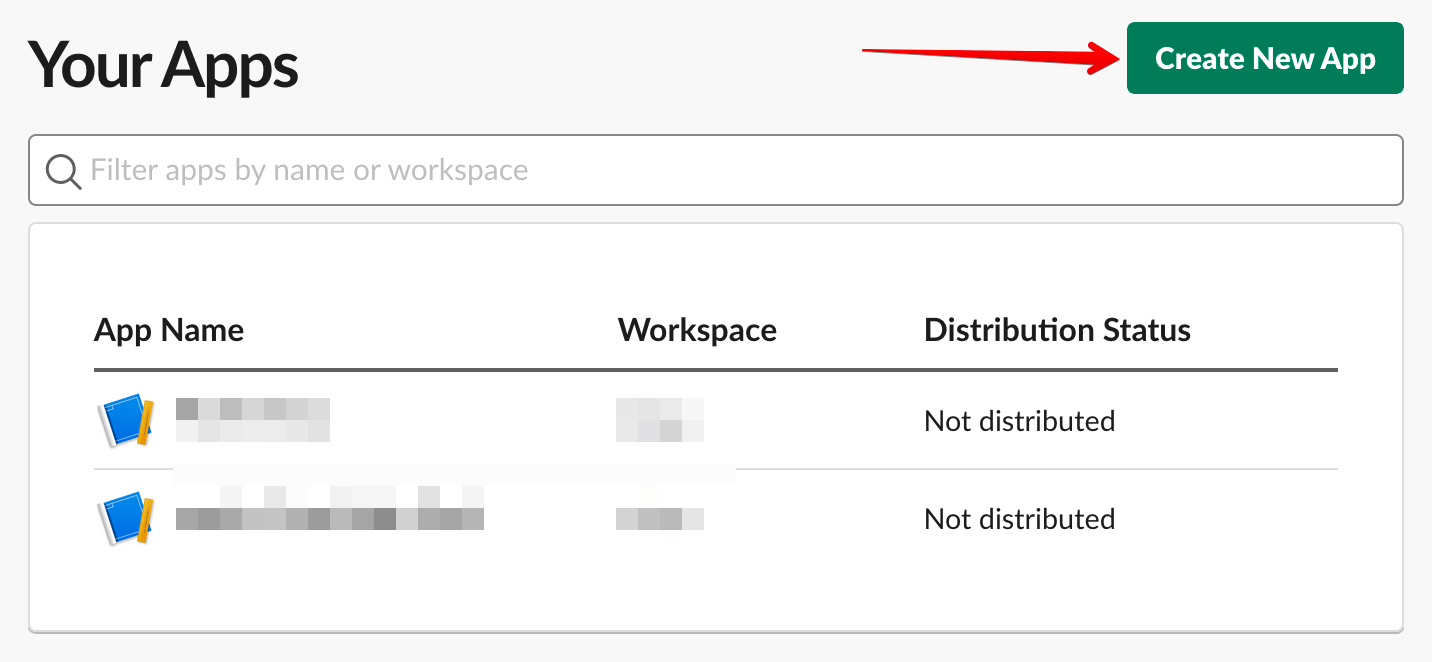
- Go to your Slack Apps admin.
- Create an app by clicking on the Create New App button:
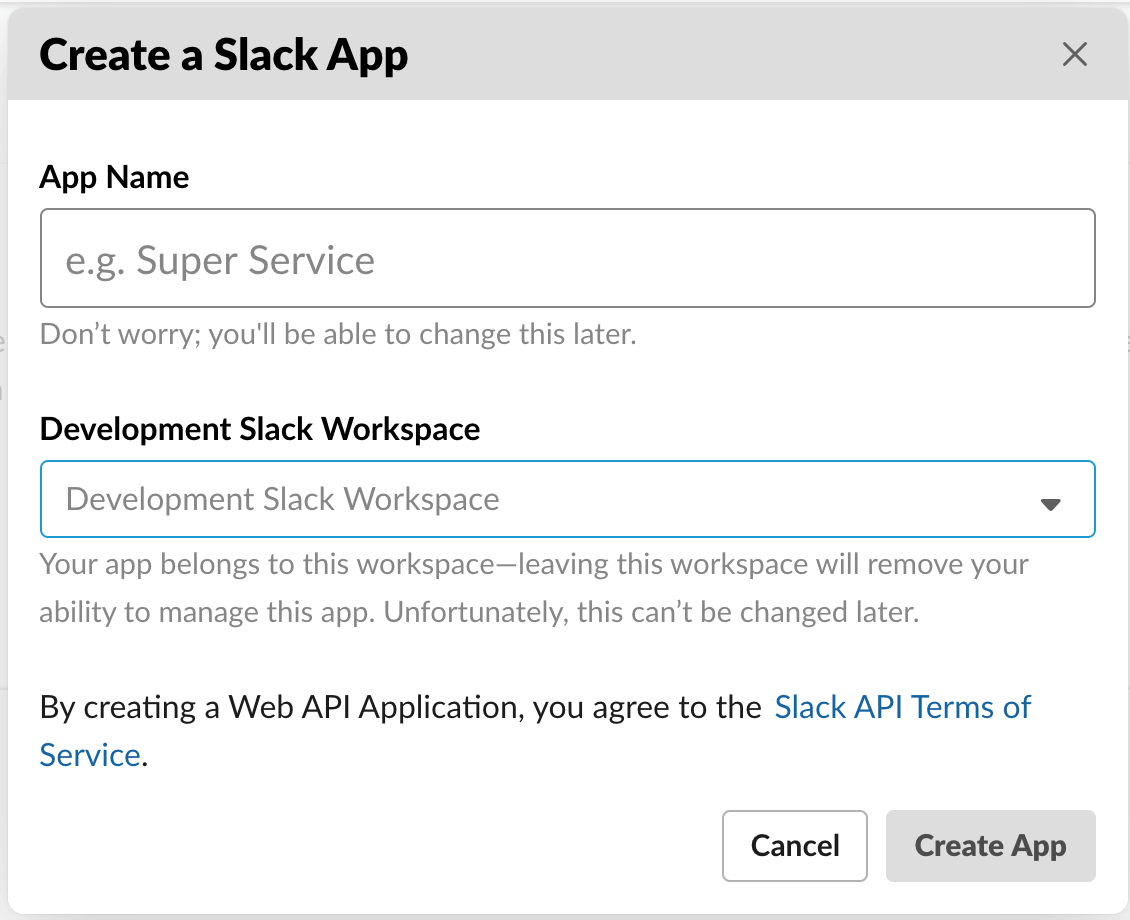
- You'll see a form with:
- App Name: set a name for your app, i.e. ShopMagic.
- Development Slack Workspace: select a workspace to which you want to add integration.
- When you are directed to next page, scroll down to see App Credentials:
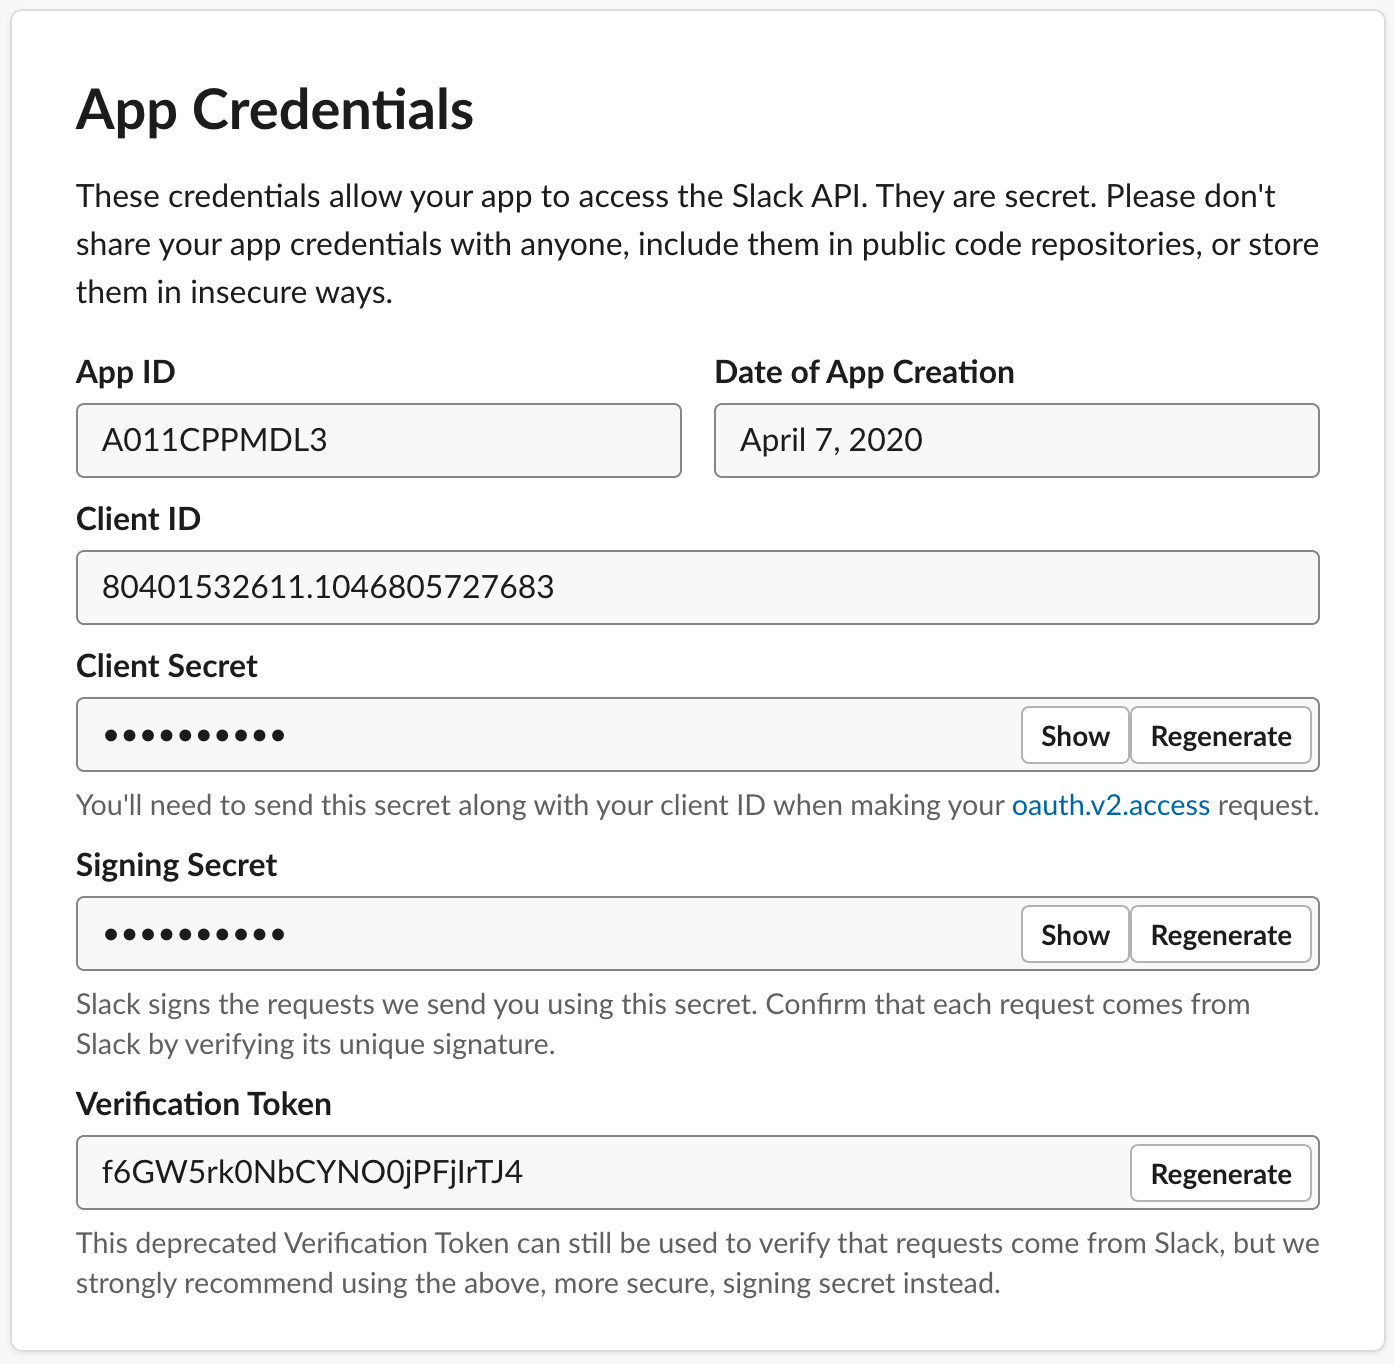
- Your app has been created. Please do not close this page, because you will also need it in the next step.
Fill in app credentials in ShopMagic settings#
- In your WordPress dashboard, go to menu: ShopMagic → Settings → Slack.
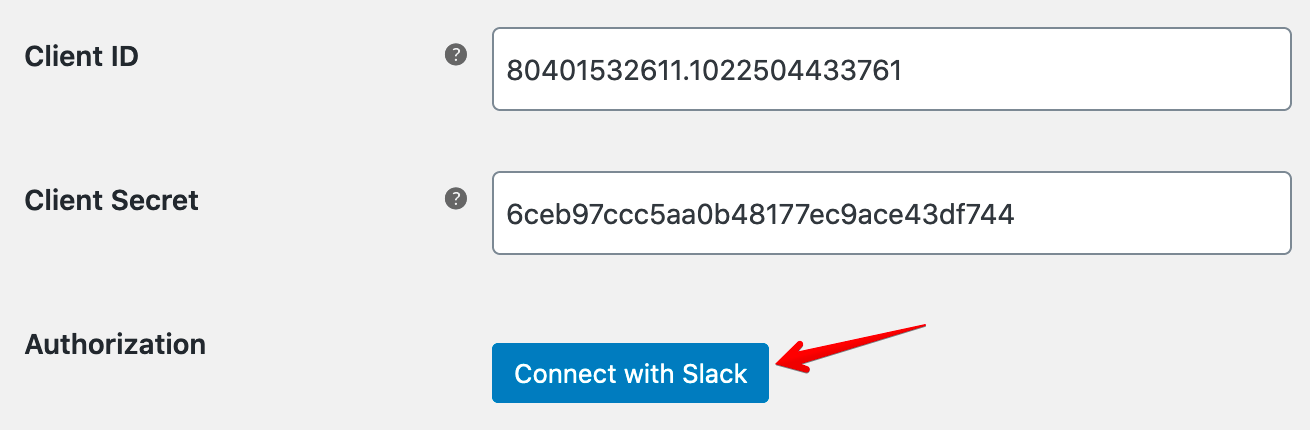
- Fill in the form to get started. Copy the Client ID and Client Secret from your Slack app that you created in the previous step and save settings:
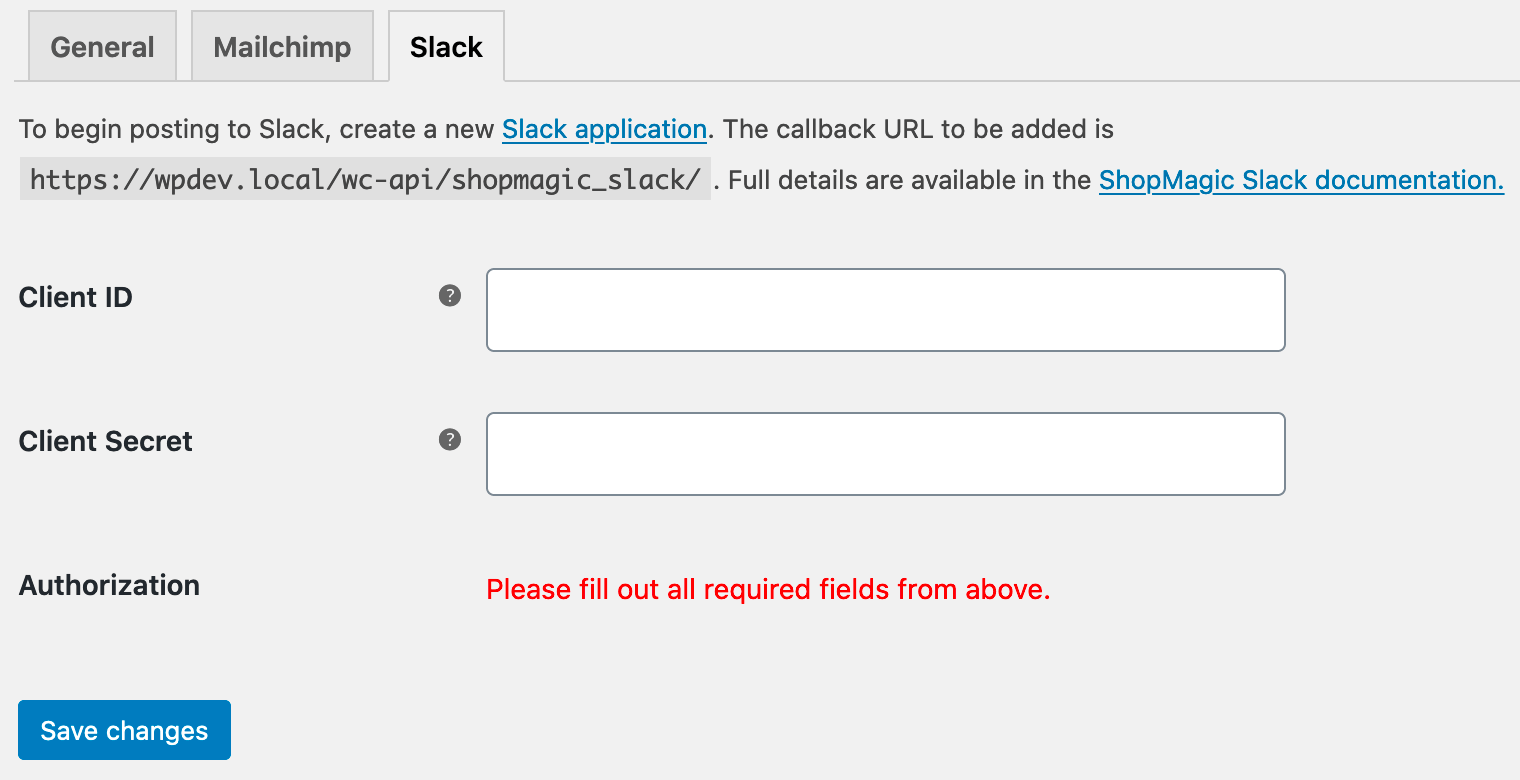
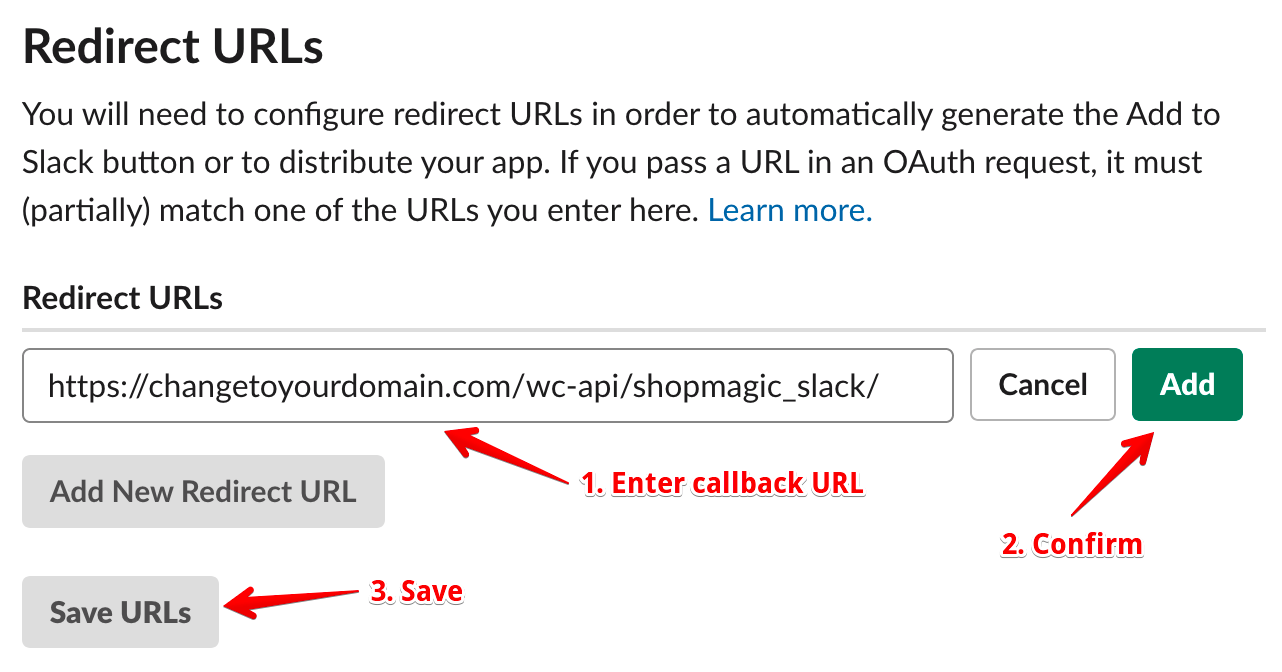
- When the Client ID and Client Secret are saved, copy the callback URL that is visible above the form. It should look like this
https://changetoyourdomain.com/wc-api/shopmagic_slack/. - Go back to your Slack app that you created before.
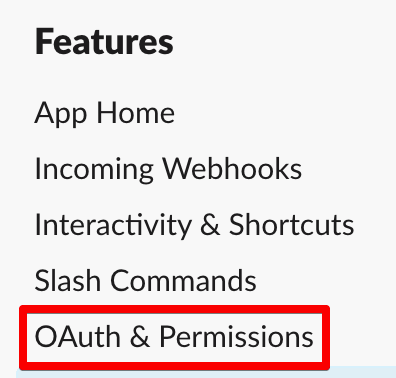
- In the sidebar click the OAuth & Permissions link:
- Enter and save your callback URL as shown below:
- Next, scroll to Scopes and in the Bot Token Scopes section add:
channels:read,groups:read, andchat:write: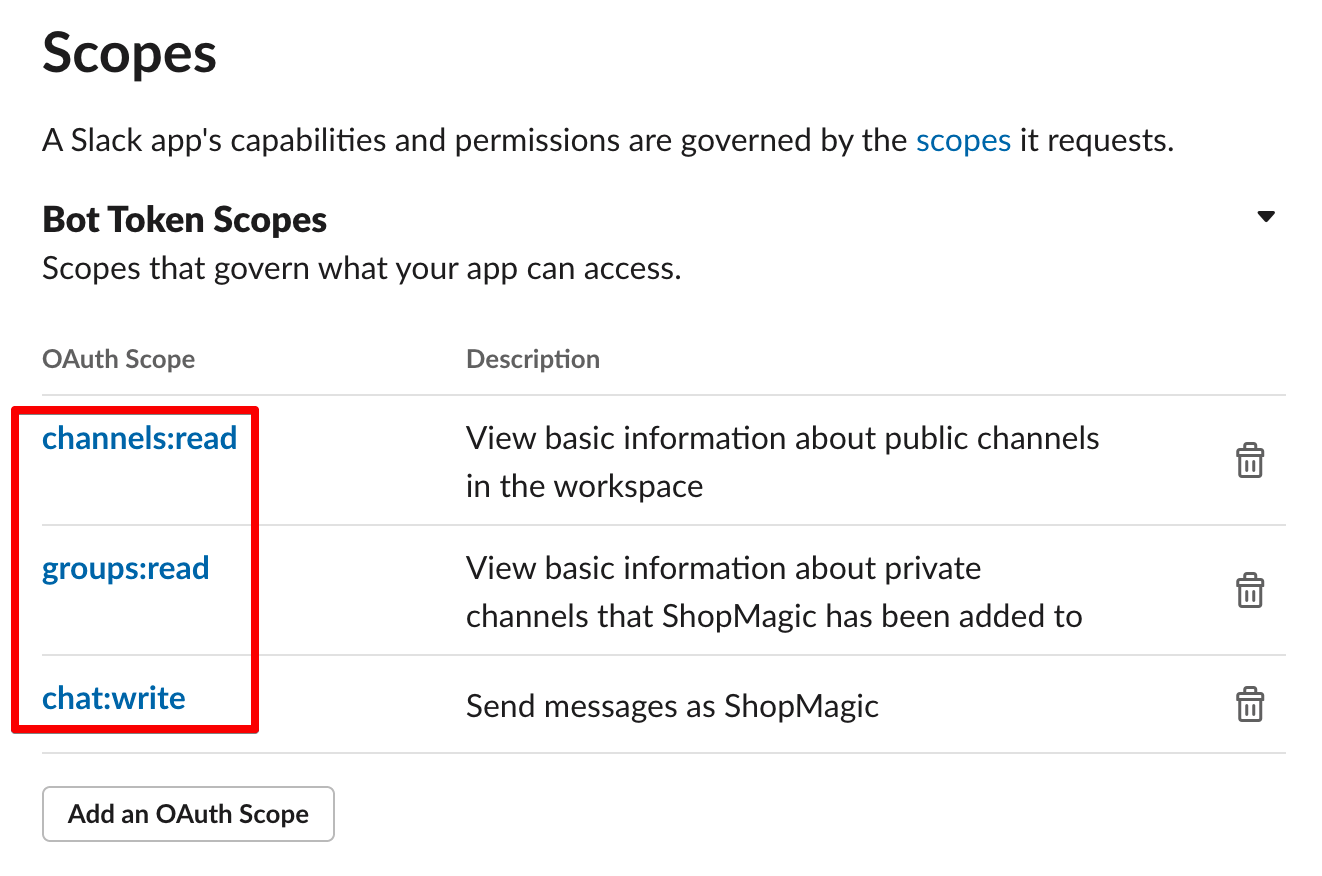
- Go back to ShopMagic Slack settings in your WordPress dashboard.
- You will be able to connect, click the Connect with Slack button:
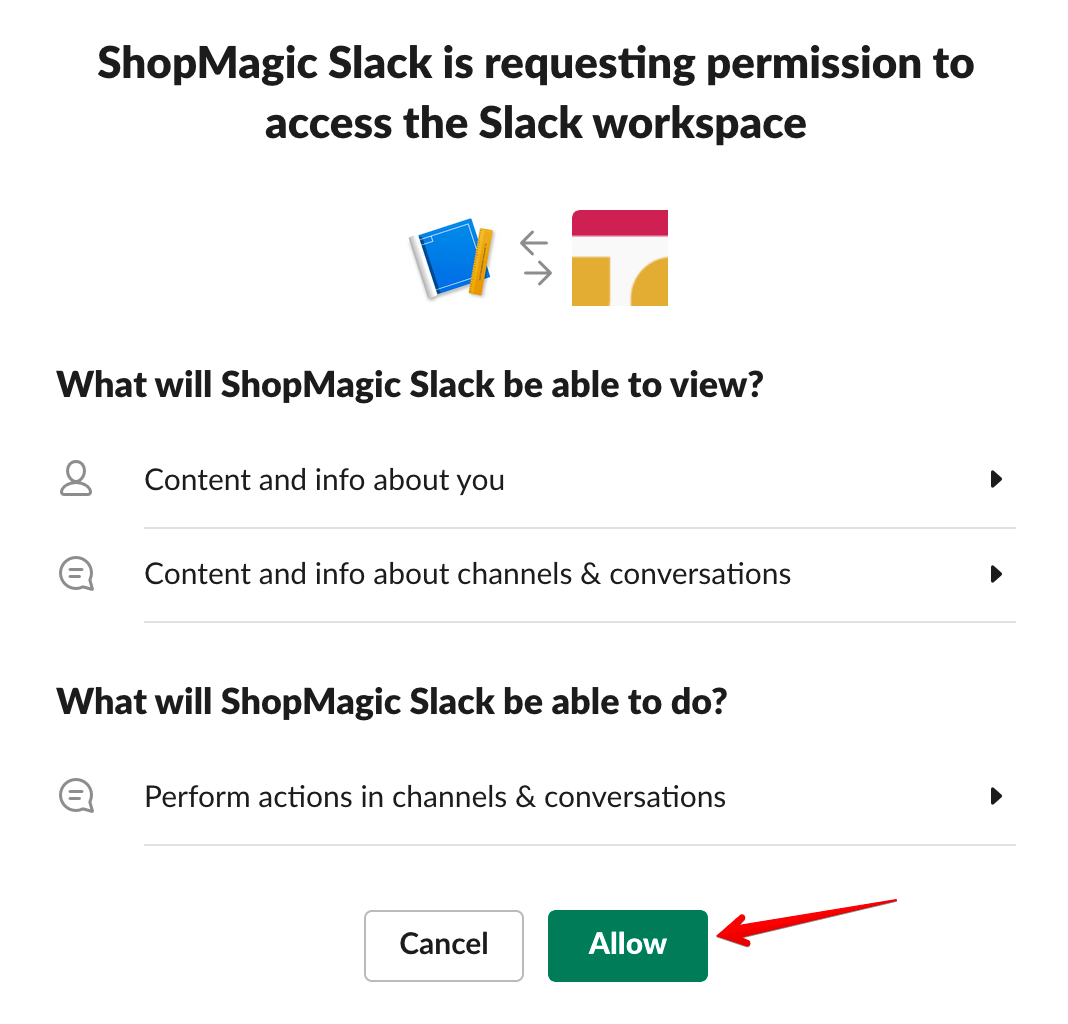
- You will be redirected to Slack. When you see permissions screen, click Allow to proceed:
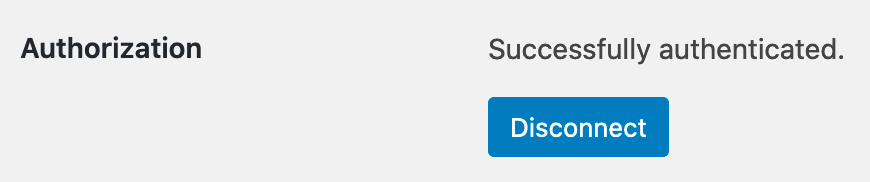
- You will be redirected back to ShopMagic Slack settings. You will notice a success message:
General Settings#
After a successful connection you will be presented with some general settings.
Defaults
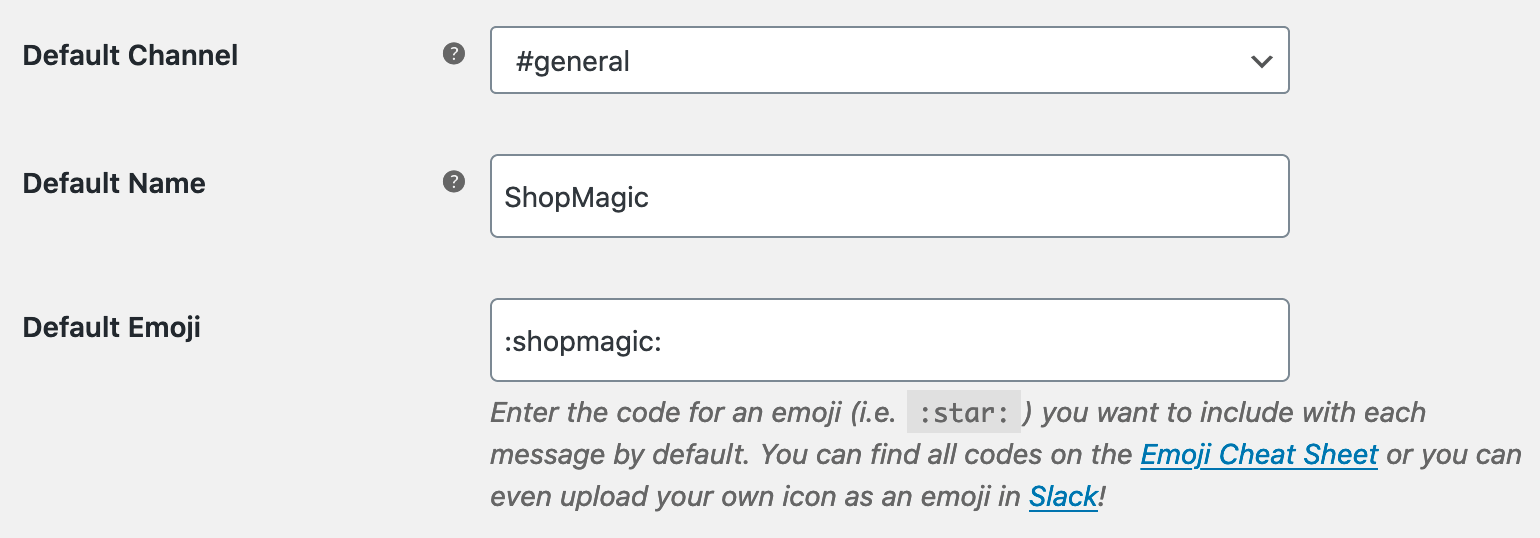
You can set up some default values. You will be able to override these when you configure your automation.
- Default Channel
- Default Name
- Default Emoji
Additional options#
- Debug: you can enable logging important information to WooCommerce logs.
- Test Notification: you can send a test notification to confirm that everything is working as expected. In order to be able to send a test notification, please select the default channel.
- Reload Channels: if you have added a new channel and it\'s not showing, this will refresh the list.
Adding a new Slack automation#
In order to add a new Slack automation, please follow the steps described here.
When you scroll to the Actions meta box, you will be able to add Post to Slack action:
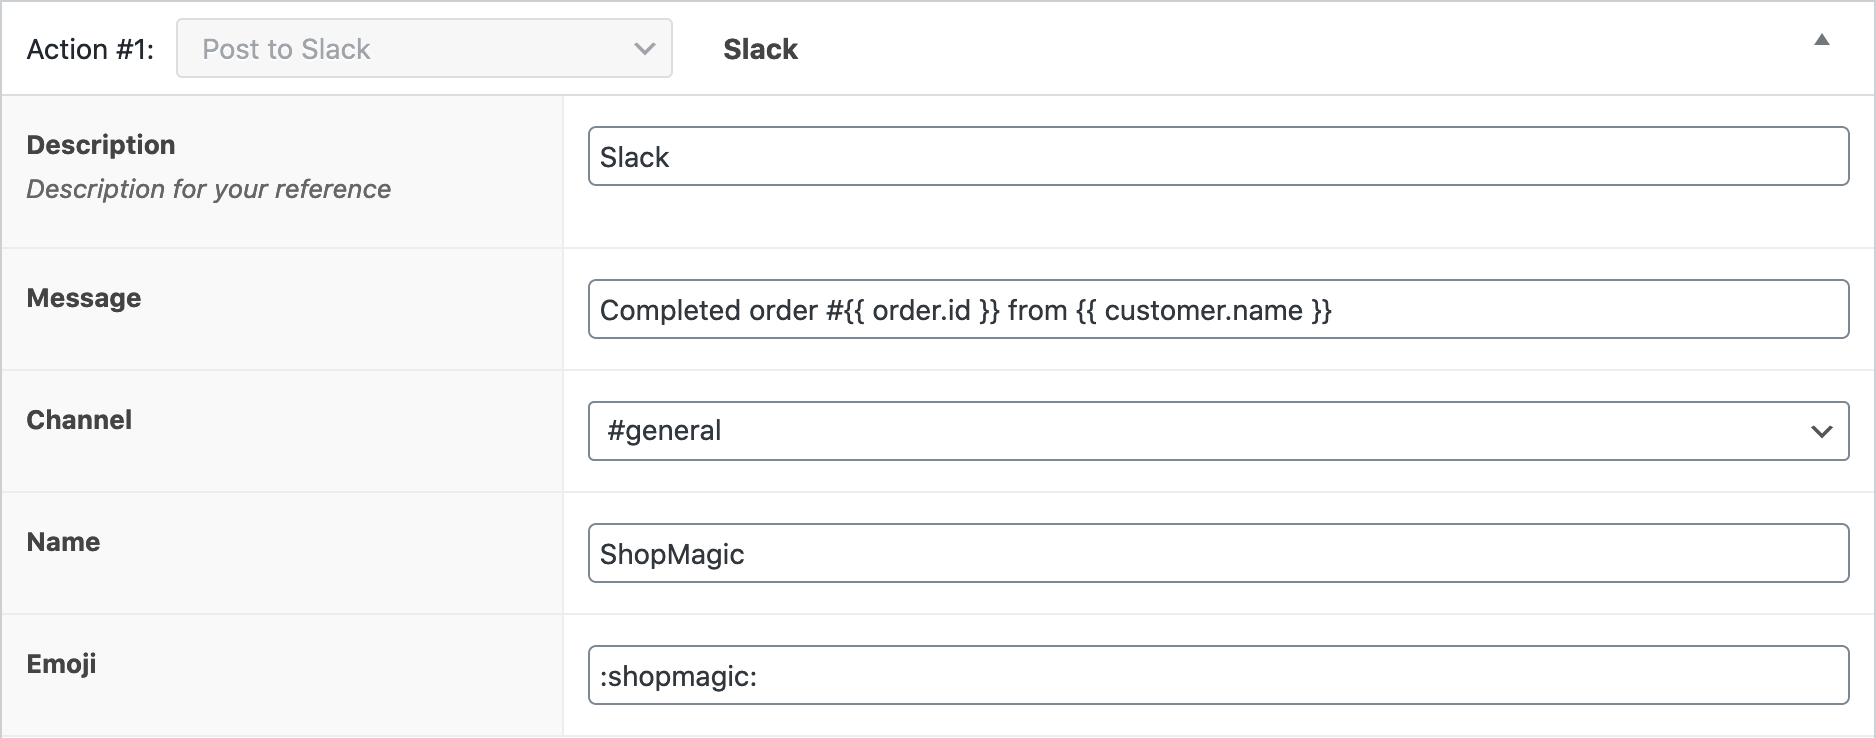
- Message: create a message that will be sent to Slack. You can use placeholders here.
- Channel: select a channel to post to.
- Name: enter a name that will appear next to the message.
- Emoji: enter an emoji for the message.
If you do not fill channel, name, or emoji fields, defaults from general settings will be used.
When the selected event occurs a message will be sent to your Slack:

You may also read more on how to send notifications from Slack with ShopMagic.