


In this tutorial, we will create automated pending payment email notifications for WooCommerce triggered by orders with a pending status. More importantly, we will set up a pending payment reminder with a free plugin that lets you send transactional emails on every possible WooCommerce order status with a FREE plugin.
Let’s remind ourselves how the WooCommerce order statuses work.
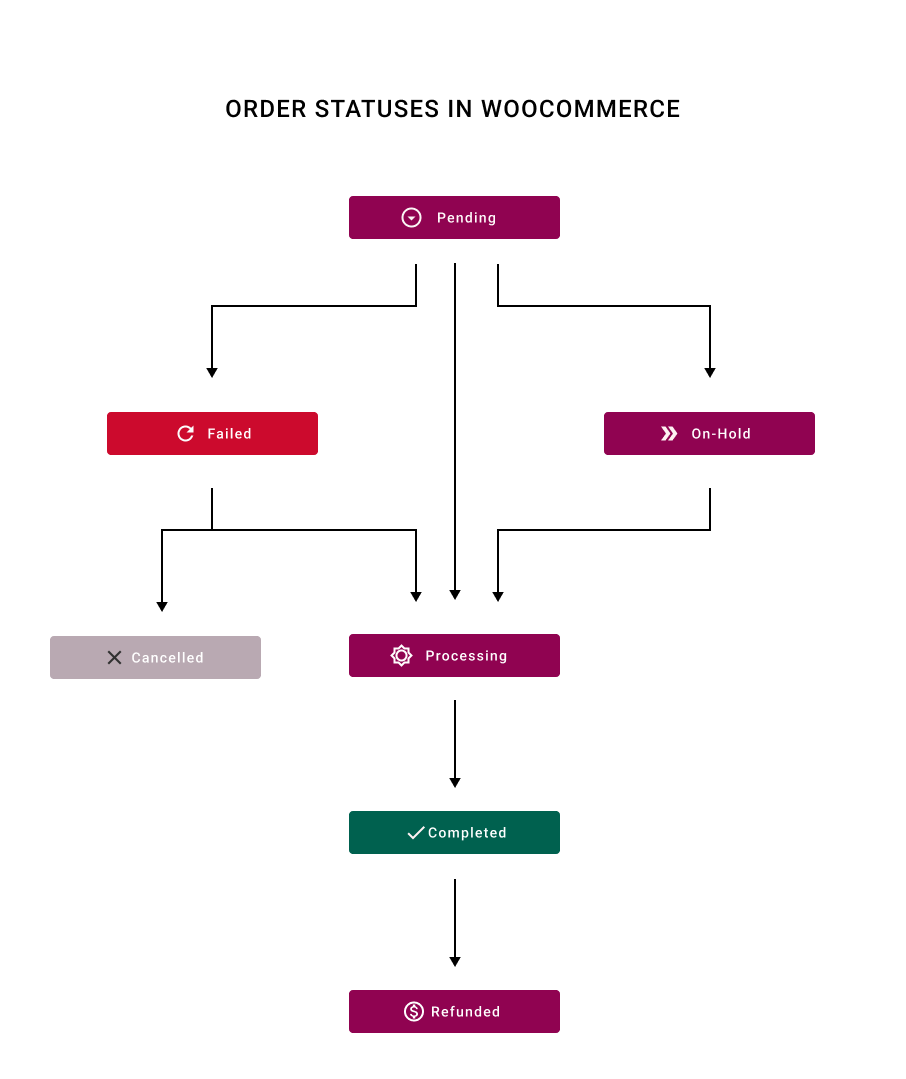
You may also read more about WooCommerce order statuses and automating order completion.
By default, WooCommerce doesn’t give you the option to send pending payment email notifications!
Learn how to use a FREE plugin to create, send, and customize beautiful emails in WooCommerce.
WooCommerce pending payment email notification example
ShopMagic – a free email customizer for WordPress and WooCommerce
ShopMagic
Having problems with WooCommerce pending payment? Send out WooCommerce pending payment email notifications with ease. Download ShopMagic and say bye to WooCommerce pending payment orders.
Download for free or Go to WordPress.orgTable of contents
- Does WooCommerce pending payment occur often?
- WooCommerce pending payment email notifications
- 3 steps to set up a WooCommerce pending payment email notification for free!
- Summary & more about ShopMagic
Does WooCommerce pending payment occur often?
If you are running an e-commerce business built with WooCommerce, there’s a good chance that one or more orders in your store had Order Pending status.
Order pending may occur in many situations in WooCommerce for your customers’ orders. Generally, it happens when the customer placed an order but didn’t pay for it.
See more WooCommerce tips →
WooCommerce pending payment time limit settings
However, from ShopMagic’s perspective, the reason does not matter. If the specified order status will be given, the automation will run.
WooCommerce pending payment email notifications
You may ask yourself why is it so important to write an article about it. WooCommerce emails support pending orders. Well, I will disappoint you.
Wait a sec, no WooCommerce pending payment email notification?
That’s right. It’s the way how it was designed. No pending payment reminders are available out of the box. We will not discuss the meaningfulness behind this decision because most likely it won’t change anything. However, we will discuss the possible solutions for creating actual pending payment notifications as WooCommerce automated emails.
How to send WooCommerce pending payment emails?
There are a few ways of solving this and creating WooCommerce pending payment emails to notify customers when their orders are pending:
- You can find a paid plugin
- If you are familiar with the code, you can use a custom action hook
- You can install ShopMagic for free and resolve it in 5 minutes 🙂
🪄 See what ShopMagic looks like from the inside:
ShopMagic
Having problems with WooCommerce pending payment? Send out WooCommerce pending payment email notifications with ease. Download ShopMagic and say bye to WooCommerce pending payment orders.
Download for free or Go to WordPress.orgNumber 3 is my choice. What to do now?
“Wise decision you have made young padawan” 😜. More seriously – I’ll use ShopMagic to resolve this issue because not only it’s a free email notification plugin. You also do not need to put a single line of code!
Send WooCommerce pending order payment notification emails with ShopMagic
ShopMagic may be a turning point for your store. Let’s not forget that ShopMagic is a powerful marketing automation plugin. Every WooCommerce business can benefit from sending pending order reminders to new customers. How, you might ask?
First, it will trigger automatically and increase the conversion rate in your store. ✅
Then, customers’ loyalty will rise, and they will return to your store more often. ✅
Ultimately, you will be earning more money. ✅
ShopMagic
Having problems with WooCommerce pending payment? Send out WooCommerce pending payment email notifications with ease. Download ShopMagic and say bye to WooCommerce pending payment orders.
Download for free or Go to WordPress.org3 steps to set up a WooCommerce pending payment email notification
Did you already look for possible solutions and got overwhelmed with technical advice? Or you simply don’t like the idea of spending hours poking around in code?
The whole process is really simple. To send automated pending payment reminders follow these 3 steps:
- Download and install an email customizer plugin like ShopMagic
- Create new automation (details below)
- Customize your email reminder with a placeholder and an easy-to-use editor
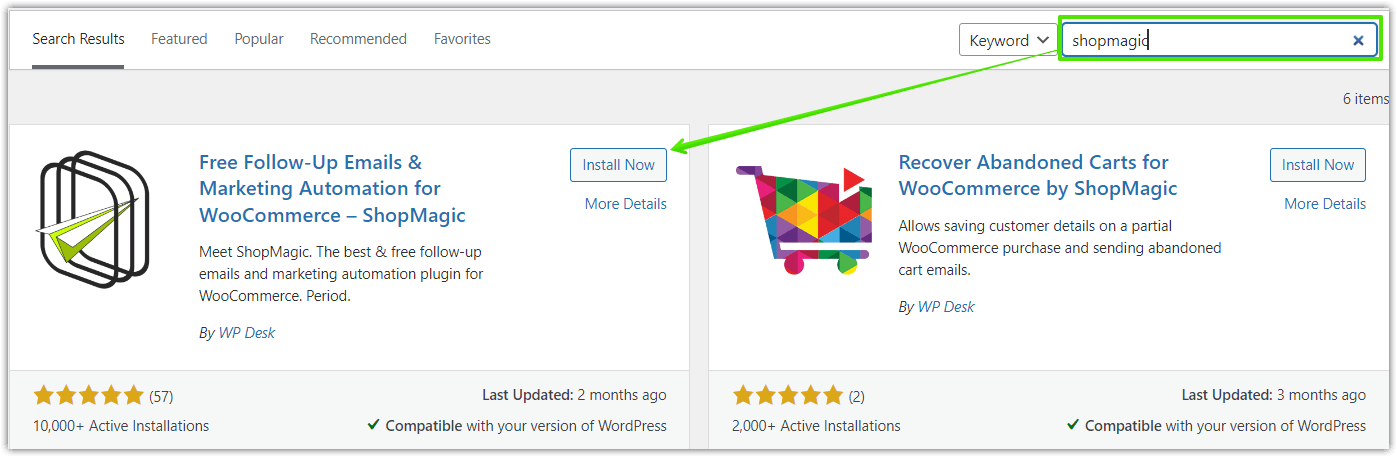
Step 1: Install and activate the ShopMagic free plugin
Before we will move to the creation of email notifications for pending payments, you need to download, install and activate ShopMagic. If you are in your WordPress dashboard, simply click on Plugins → Add New and find ShopMagic in the plugins’ repository. You can also download the zip file directly from the WordPress.org repository.
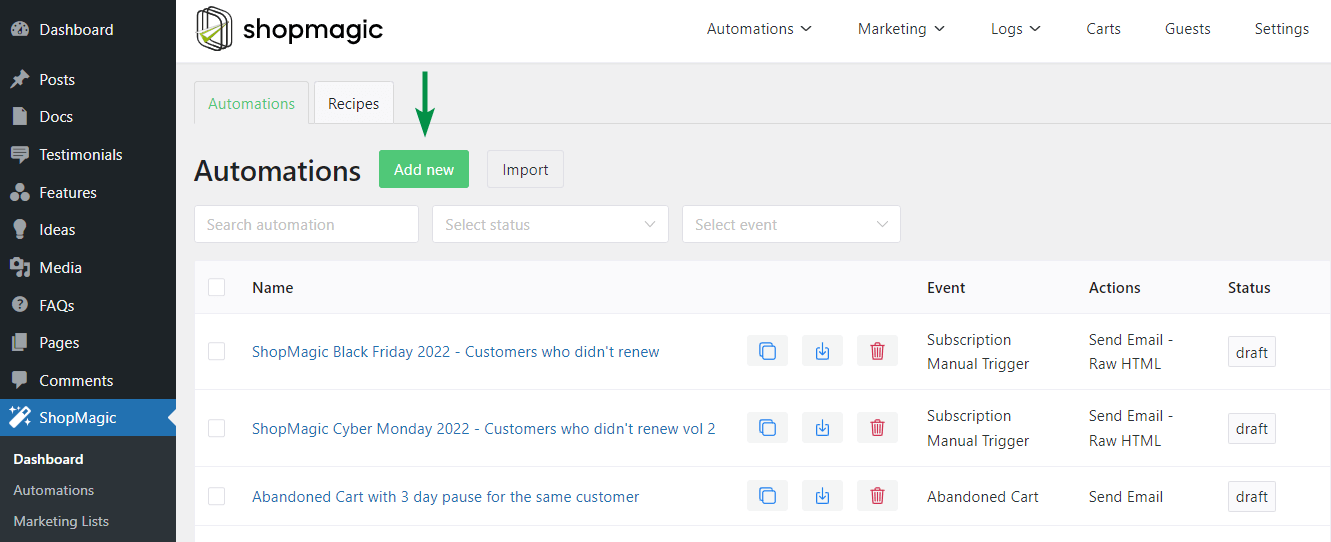
Step 2: Create your first WooCommerce pending order email
Find ShopMagic in your dashboard and click Add New. You will see a new window, where we will create our new automation emails that will be triggered for pending orders in your WooCommerce store.
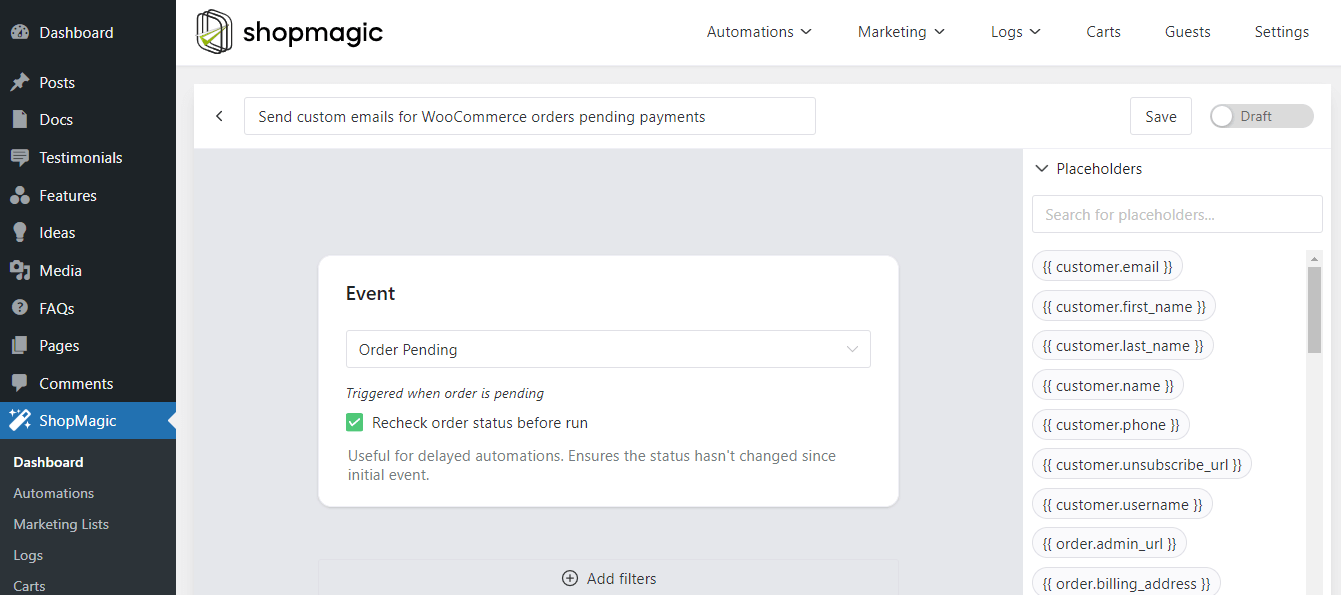
Starting from the top of the screen, you will see the Add title field and Event metabox where you can select a specified event. The title is just a title, so you can write whatever you want here, in my example it is “WooCommerce pending emails automation” because I like when the title is connected to the content of the automation.
As an event, which is quite obvious, I selected Order Pending. In most cases, it’s a good idea to select the rechecking order status checkbox. It will prevent sending an email if the order status changes in the meantime. In this example, we are not assigning Filter. It will cause the whole automation will be global. So it will be triggered for all of the orders with Order Pending status.
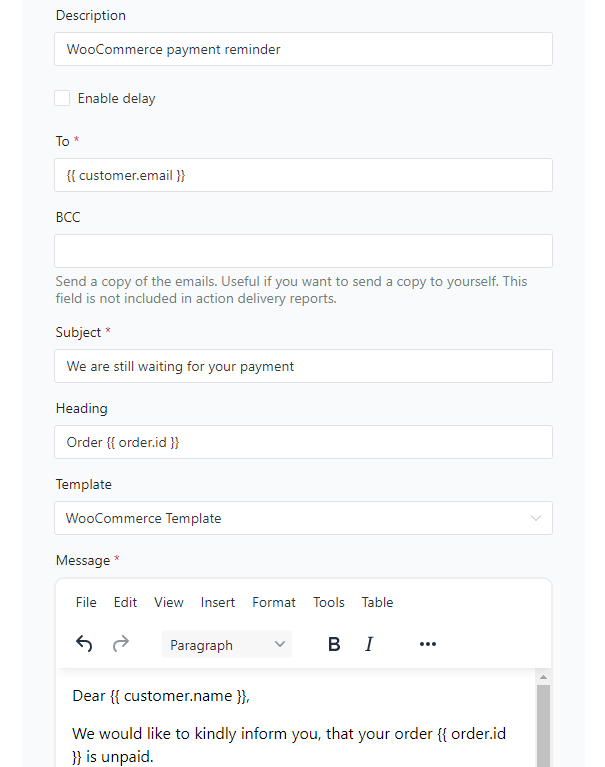
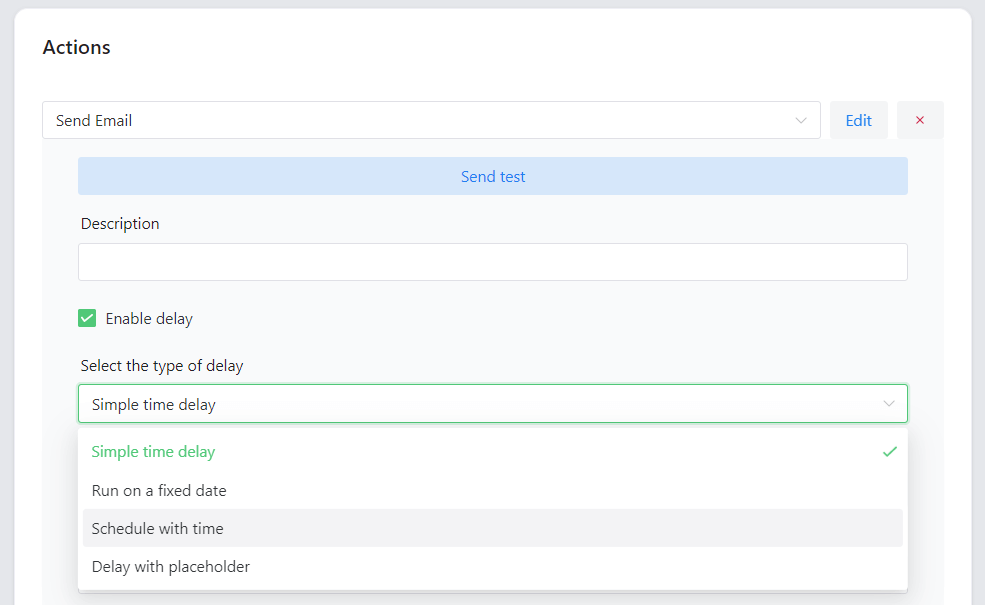
👉🏽 Take a look at my screen, in which you can see the setting for the action (you can use placeholders too):
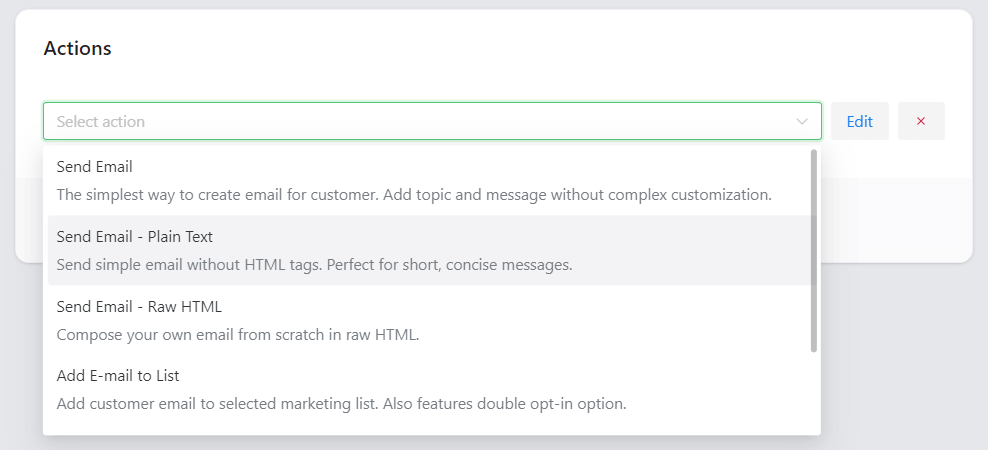
Step 3: Customize the WooCommerce pending payment email notification
✅ First, choose the type of action (Send Email/Plain Text/Raw HTML/Delete or Add to list/MailChimp and Slack integrations).
✅ Afterwards, there’s a Description where you can name your action. Similar to the title it’s up to you what you will write here. You can also send a test email to anyone you like.
🔥 Now let’s get down to specifics, lastly message creation, and all that goes with it:
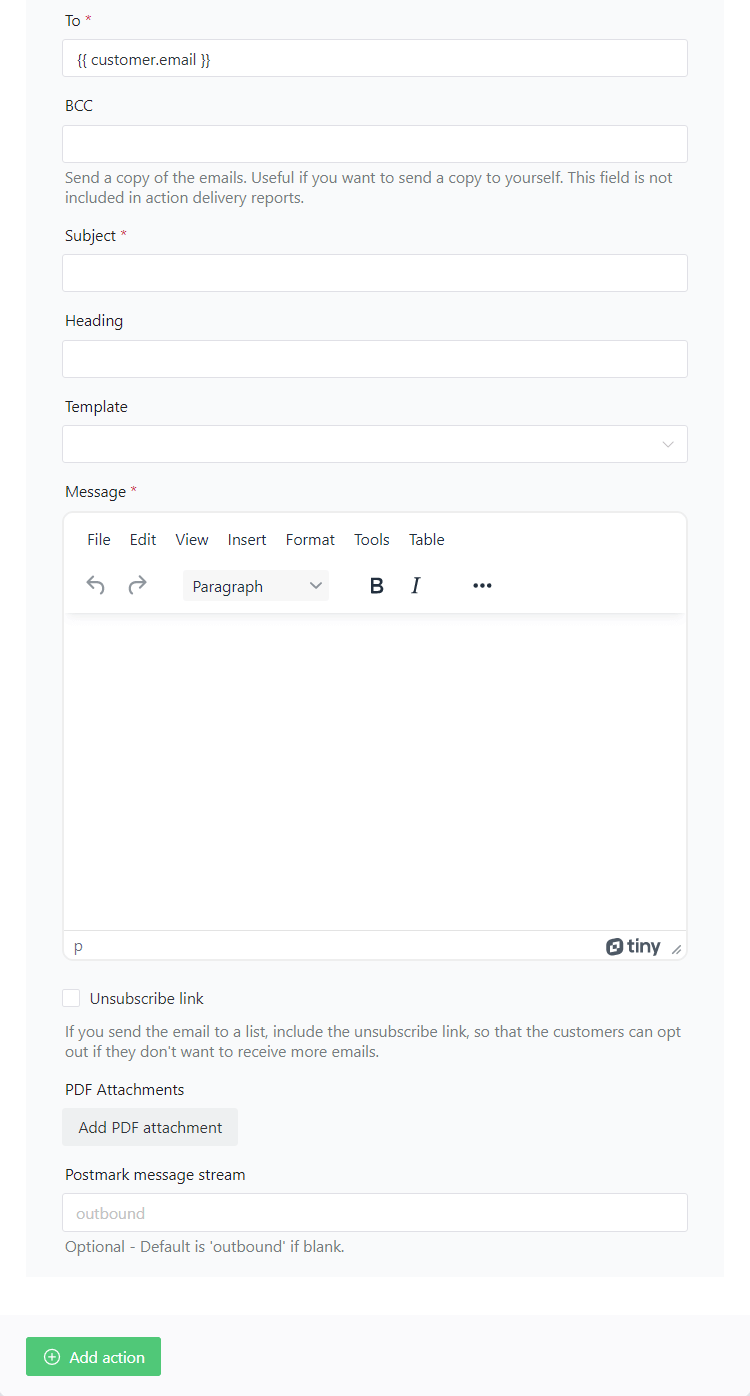
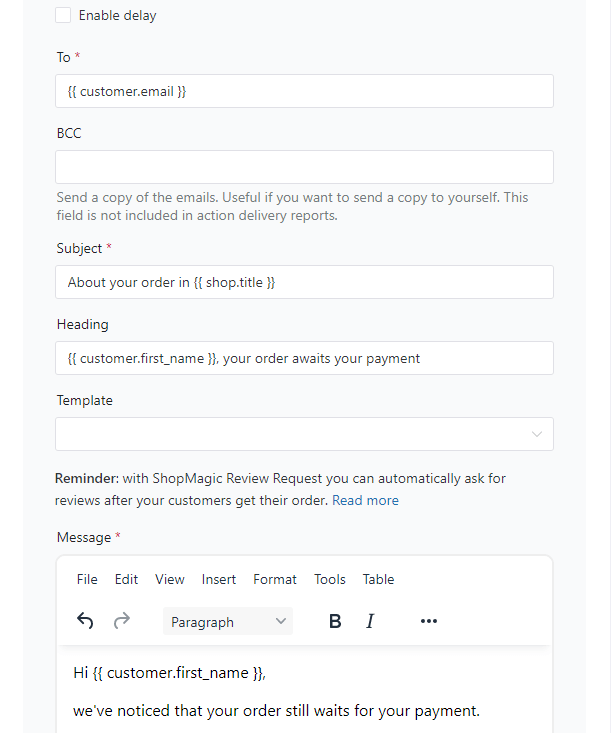
✅ To is for the recipient. It’s prefilled with the placeholder { customer.email } as has been noted, you can delete it and write a different email here.
✅ Subject and Heading can be customized and perform the same role as in the standard emails, all things considered.
✅ Template. Choose from WooCommerce Template or none.
✅ Message field. Here you can write your message for the WooCommerce pending emails. The message field (same as Subject and Heading) supports placeholders. You can find a full list of available placeholders on the right side of the screen.
✅ At the bottom of the page, there’s an option to add an unsubscribe link to the automation.
Done. Your WooCommerce pending payment email notification is ready 🪄
This time I won’t be showing you the result. If you followed this guide then you have to simply do one thing – use the Send test feature and see yourself 😜.
You may also read more on how to fix and improve WooCommerce email notifications.
Summary & more about ShopMagic
Today, you’ve learned how to use a free plugin to create custom WooCommerce order status email notifications. You’ve seen how to create, customize, and send a pending payment notification email in WooCommerce.
Finally, you now know the best email marketing solution for WordPress & WooCommerce of WP Desk – a company behind Flexible Checkout Fields and Flexible Invoices!
ShopMagic
Having problems with WooCommerce pending payment? Send out WooCommerce pending payment email notifications with ease. Download ShopMagic and say bye to WooCommerce pending payment orders.
Download for free or Go to WordPress.orgTo summarize, I hope that this tutorial will help you when your store encounters orders with pending status. As always, if you have further questions, contact us.
Finally, I encourage you to read the ShopMagic blog and the below articles.
Related to WooCommerce pending payment order notification email
-
WooCommerce Manual Email

Send Manual Emails in WooCommerce with ShopMagic. Find out how to send WooCommerce Manual Emails using Shopmagic. -
WooCommerce On Hold Order Email

Send Order On Hold Emails with ShopMagic. In this article we give you tips on how to send WooCommerce Order On Hold Emails with Shopmagic.