

ShopMagic has marketing Lists with opt-ins and opt-outs functionalities for quite some time. In this plugin update, we improved this feature and added a few more options to let you use ShopMagic for sending newsletters. Let’s take a look at what you’ll find in today’s release.
Lists 2.0
With lists, you can manage your marketing opt-ins or opt-outs and make sure that you actually have the customer’s consent to send marketing emails.
This function did not change. However, we improved it a bit.
Lists and opt-ins were divided into two tabs in ShopMagic’s menu. From now on, you’ll find opt-ins within the Lists tab, along with subscribers and import/export options.
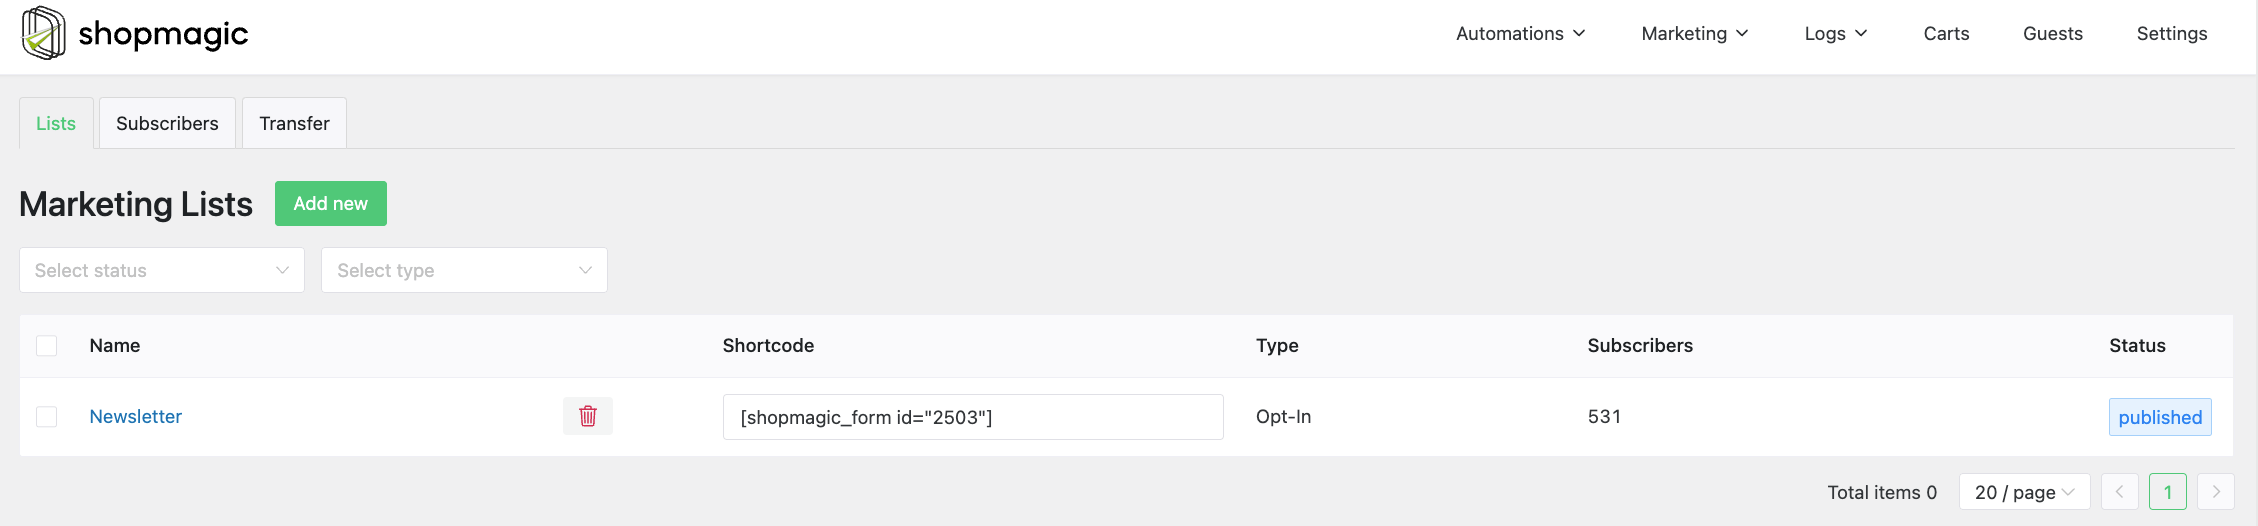
Marketing lists and Subscribers
The first tab is called Marketing Lists. Here you can view all of your lists, their type, whether they are opt-in and opt-out, how many subscribers they have and copy a shortcode of a form, which I’ll explain shortly.
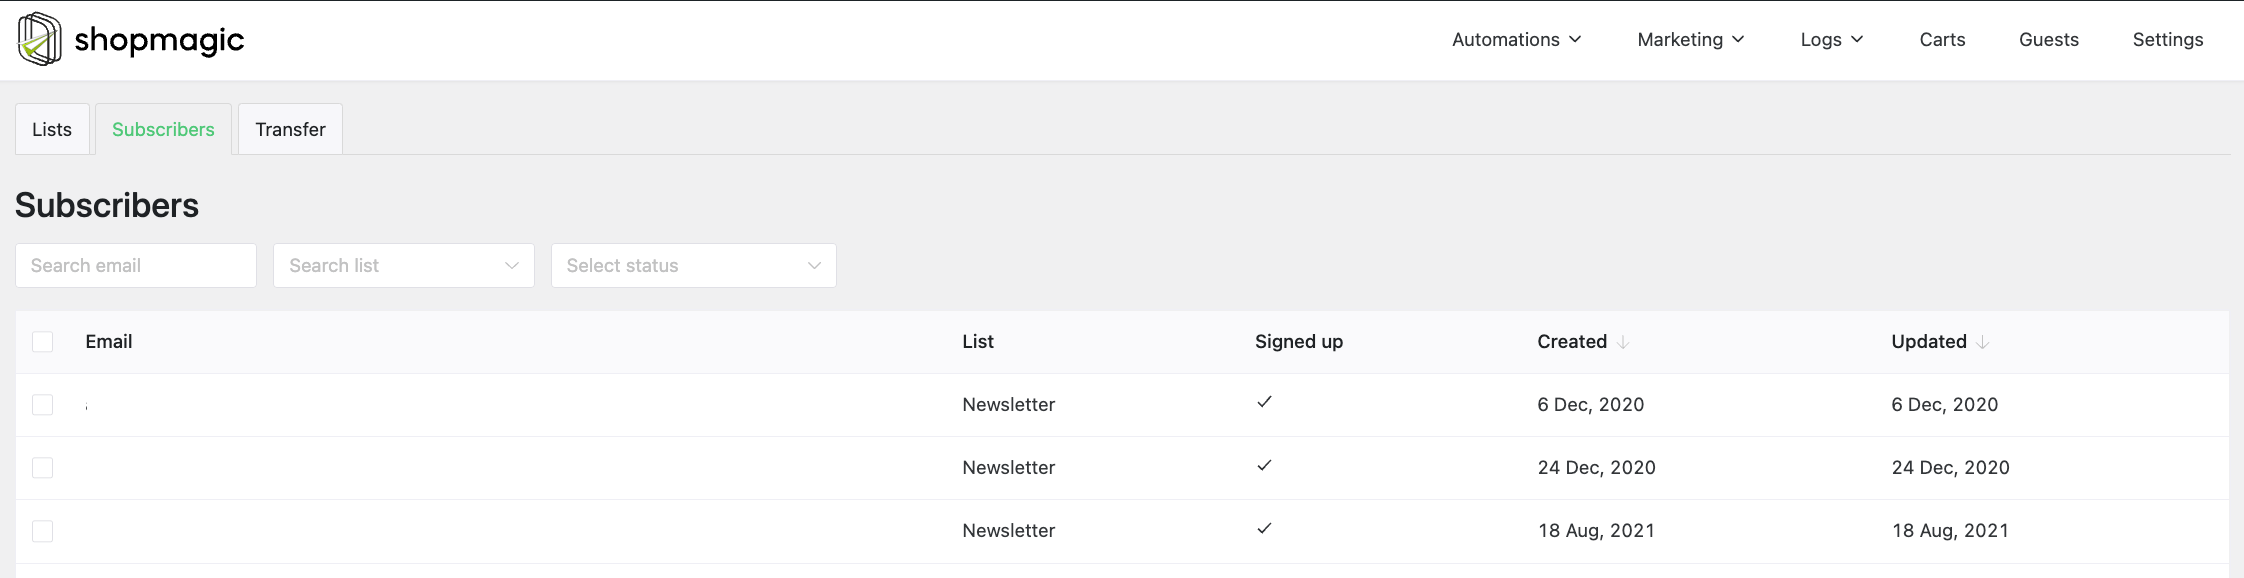
The second tab, which is Subscribers lets you check all the subscribers, sort them, check their lists and, what is a highly welcome upgrade – delete a customer from it:
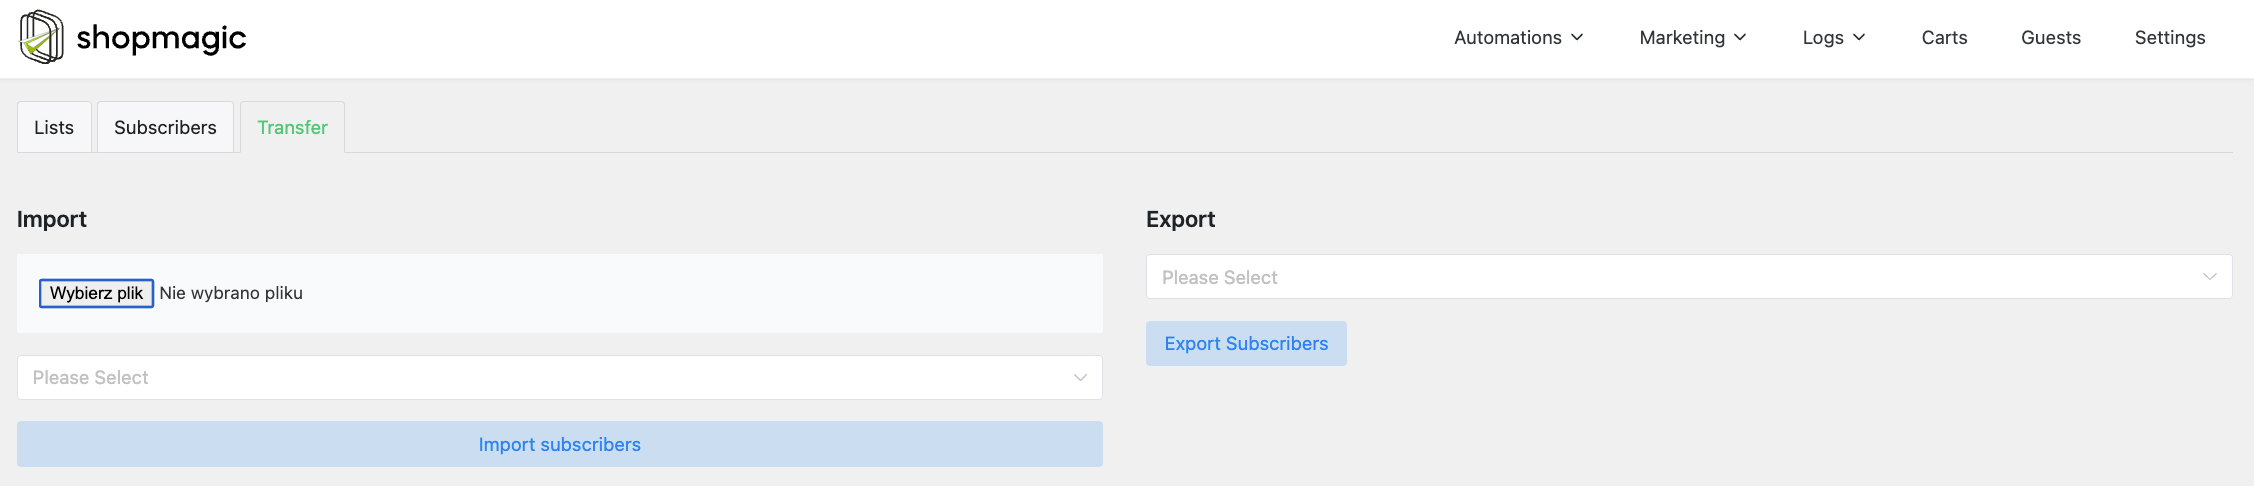
Import and export
The third tab is for importing and exporting marketing lists. Here you can import a list of customers from an external software or reversely export it to a file. Both these functions work on a CSV file types:
ShopMagic’s Forms
I’ve already mentioned that you can create a sign-up form directly in our plugin. To achieve it, simply click on edit list, and you’ll see a metabox which you can use to customize your form. As it is a simple form, it can have a name, labels, and you can choose to switch it into a double opt-in form.
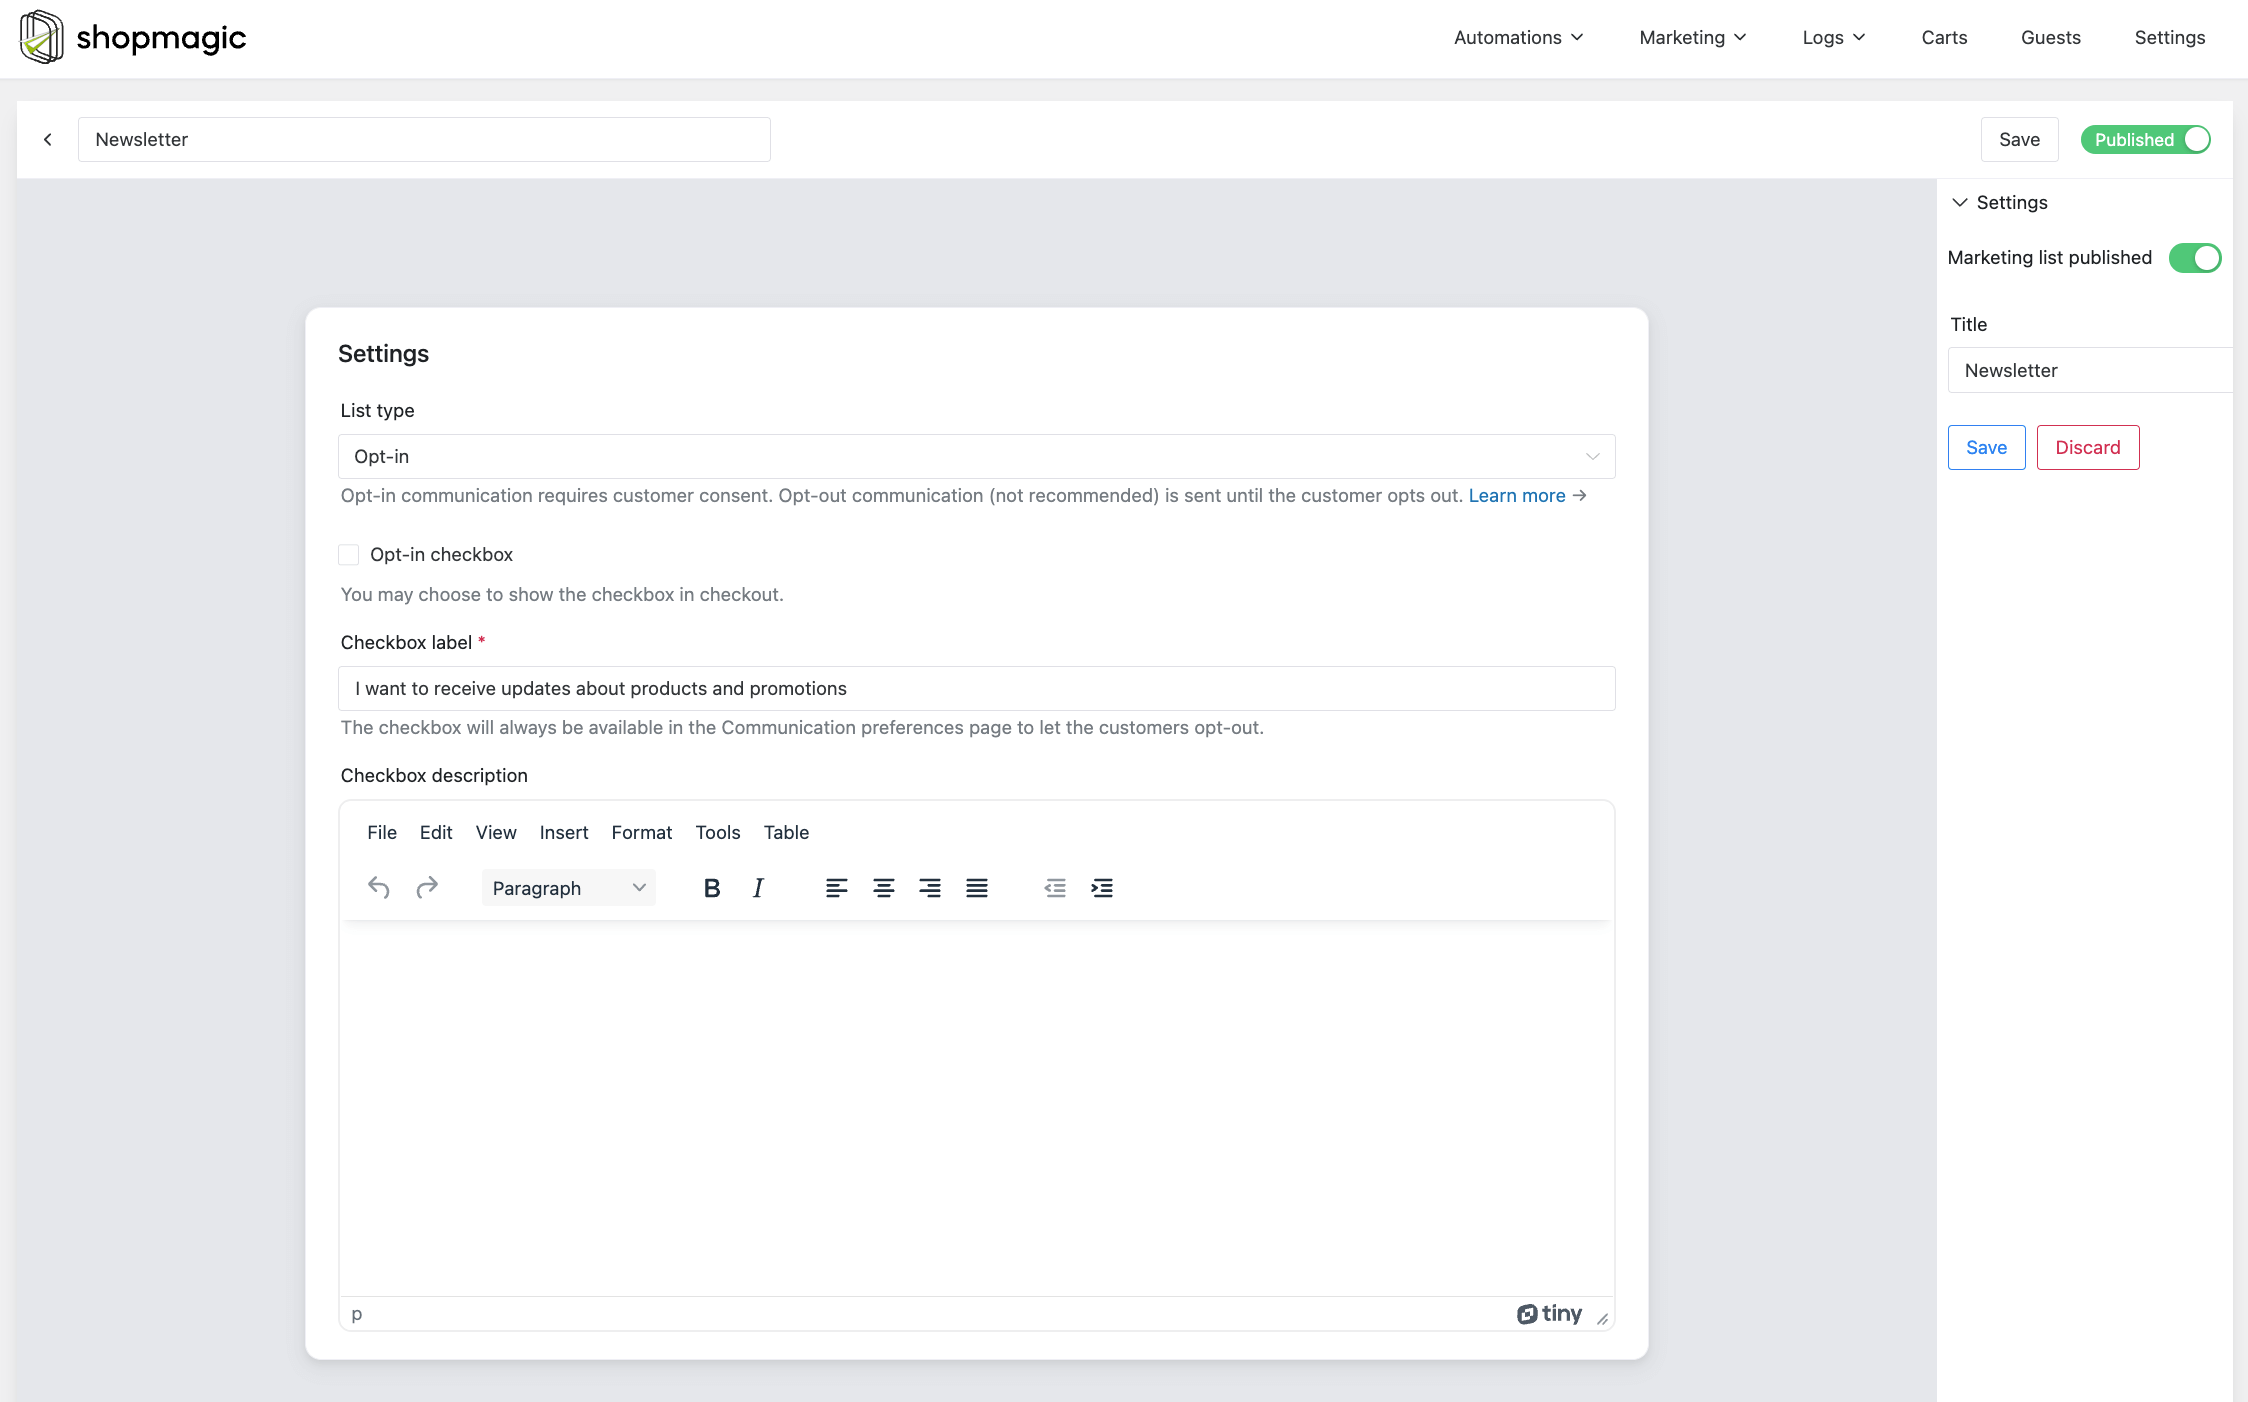
Double opt-in form
Similar to a form, but requires a customer confirmation before adding one to the list. It generates a unique link, which is sent to a customer’s email address. The customer has to click on it to confirm subscription.
Of course, you can still use Contact Form 7 or Gravity Forms plugins and their forms as a sign-up form for your customers.
How to subscribe and unsubscribe?
To sum up a little. There are three ways to add a customer to a list:
- Customer can sign up through a form.
- In the checkout, if you selected such an option in a specified list.
- Customers can also be added to the lists with an automation, and Add E-mail to List action type
Regarding unsubscribing, there are four ways of how it can be done:
- Through the placeholder,
{{ customer.unsubscribe_url }}which can be added to the message field in automation. - Through the optional link in the footer.
- Admin can manually delete a customer from the list.
- With an automation and Delete E-mail action.
New filter – customer not subscribed to the list
The Aforementioned changes somehow forced adding a new filter Customer not subscribed to the list. It works similarly to the Customer subscribed to the list, but you know, the other way. So, if you use it, your email will be sent to all customers who are not subscribed to the selected list.
That’s all for now
Stay tuned for more, as this spring will bring countless new additions to our plugin.